Online Chat
Office Hours: 24/7
Start Chat

Standalone Use
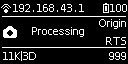
1.Shooting Mode Screen
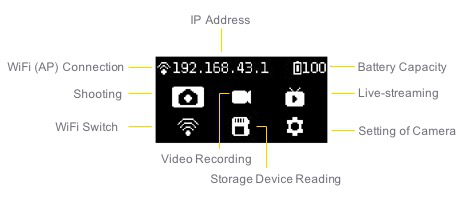
2.Operation Instructions
(1) Select the shooting mode from the camera menu, press the POWER key to confirm entering such mode. After the camera completes the preparation, the Ready state will be displayed.
(2) When the shooting mode is in Ready state, press UP and DOWN keys to switch over the sizes for shooting.
(3) When the shooting mode is in Ready state, press POWER key and you can take a photo as per the current size.
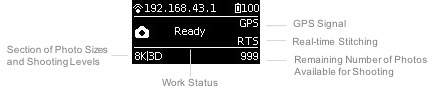
If the real-time stitching level is needed after the photo is taken, the camera will enter the processing state. After processing is done, the photo will be saved, and then, the camera will be switched to shooting READY state.
A 5s countdown is needed in each shooting. During the countdown, the work indicating lamp will flash continuously, accompanied by a sound prompt. Be sure to keep away from the camera within the 5s, to avoid affecting the shooting effect. There will be a sound prompt after the shooting is done successfully.
3.Specification and level for shooting
| Shooting Specification | Description |
|---|---|
| 11K|OF | Shoot and store 11K panoramic original photos and real-time optical flow stitching photos. |
| 11K|3D|OF | Shoot and store 11K 3D panoramic original photos and real-time optical flow stitching photos. |
| 11K | Shoot and store panoramic original photos without real-time optical flow stitching. 11K panoramic or 11K 3D panoramic photos can be made in post-production. |
| AEB3 | When shooting AEB3 (Automatic Exposure Bracketing) photos, there will be 3 groups of photos with different exposures. With this function, photos with relatively high latitude can be made in post-production. You can choose to shoot 3, 5, 7, 9 photos in camera settings. |
| Burst | One key shoot and store 10 groups of original photos. 10 8K panoramic / 3D panoramic photos can be synthesized through post-production, and one 12K super-resolution panoramic photo can also be made through post-production. |
| Timelapse | Interval length (minimum 2s) can be set and images at consecutive intervals are taken. The maximum of 11K 3D panoramic video can be synthesized in post-production. |
| Customize | Camera customized options allow users to quickly select parameters saved last time when using the controlling app. Details of usage are shown in 7.2. |
Note:
① Photos shot in all modes can be stored in the format of Raw+jpg.
② Photos shot in Normal mode are stored in SD card (0). In Timelapse, AEB (Auto Exposure Bracket) or Burst mode, when photos are stored in raw+jpg format, the jpg files from each lens are stored in the SD card (0) while the dng files in the SD card (1-8) due to the limit of write speed.
③ In Timelapse mode, when the photo is stored in jpg format, the minimum interval length can be set to 2s. When the photo is stored in raw+jpg formats, the minimum interval length is 4s due to the limit of write speed.
④ For 11K 3D and 11K photo, the resolution of their original files captured by every single lens is 5280 x 3956. These files can be stitched into 3D or 11K 2D photos in post-production. The real-time stitching feature in the camera will not affect the original files from each lens.
Use the app for shooting
1. Shoot photos with the app (take the interface of iOS app as an example)
The camera provides access to the following functions: photo, video, live-streaming, storage and device setting
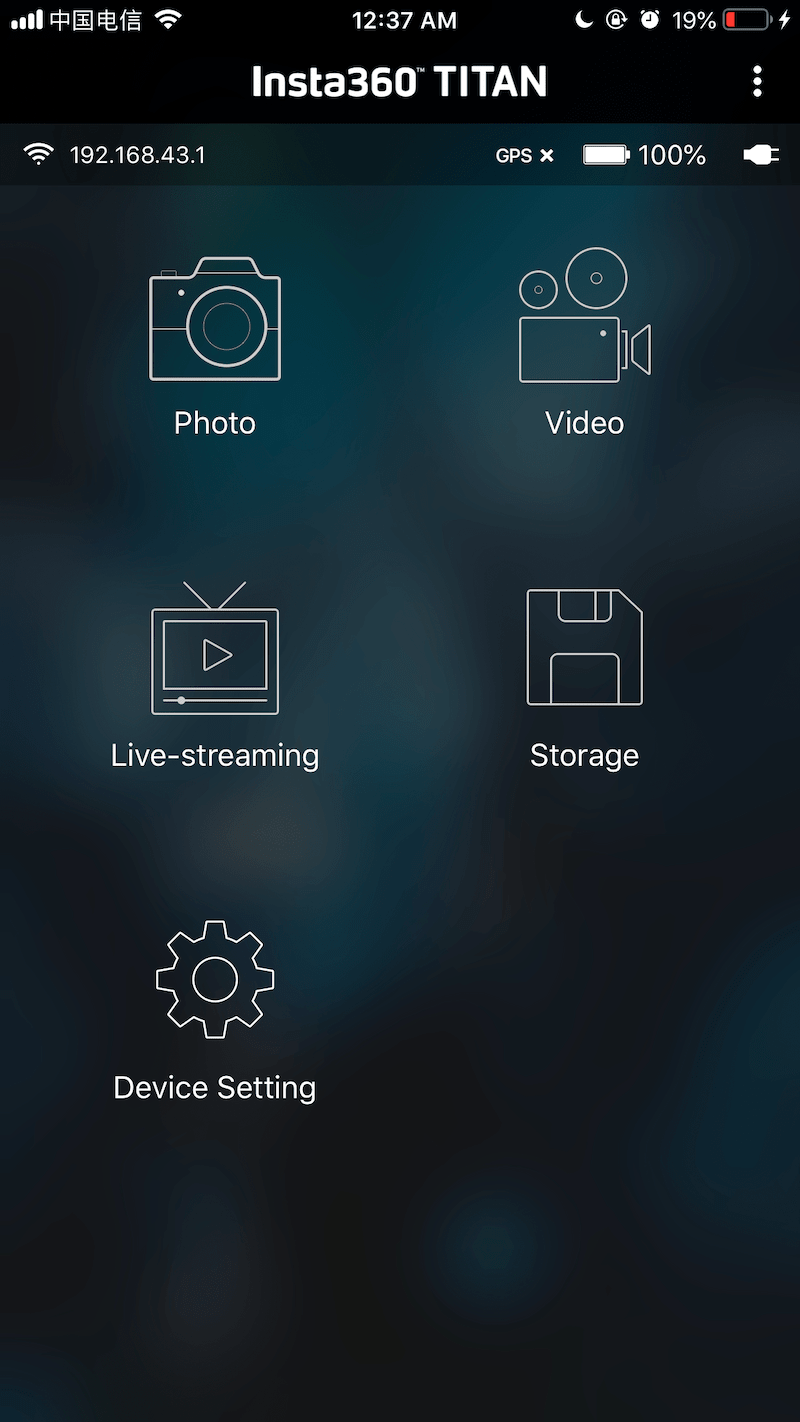
Click to enter shooting mode, the app will automatically load preview stream and get ready to shoot after completion. The interface of the photo shooting mode is shown below. There are several buttons at the bottom of the preview screen. The buttons from left to right are:
① Gyroscope for stabilization: with the function on, photos stored through the camera’s real-time stitching function can be automatically corrected according to gyroscope data. Note that this feature cannot take effect when recording 3D real-time stitching content or 3D live-streaming.
② VR preview button: tap the button to switch to preview under VR glasses mode.
③ Full screen: tap the button to watch the preview stream in full screen.
④ Brightness histogram: with the button on, a brightness histogram of the preview stream will be shown on the top left of the preview screen. When shooting under sunlight, it’s hard to just check the exposure with your eyes on the preview screen. Brightness histogram can help you to get the proper exposure.
⑤ Audio button: tap the button to turn on or off the sound in the preview stream. Note that this function only takes effect in the preview screen and doesn’t affect the sound recording settings in the camera.
⑥ Close preview button: press it to close the preview screen. It can save electricity when the preview screen is closed. You can tap anywhere in the preview screen to turn on the preview function again.
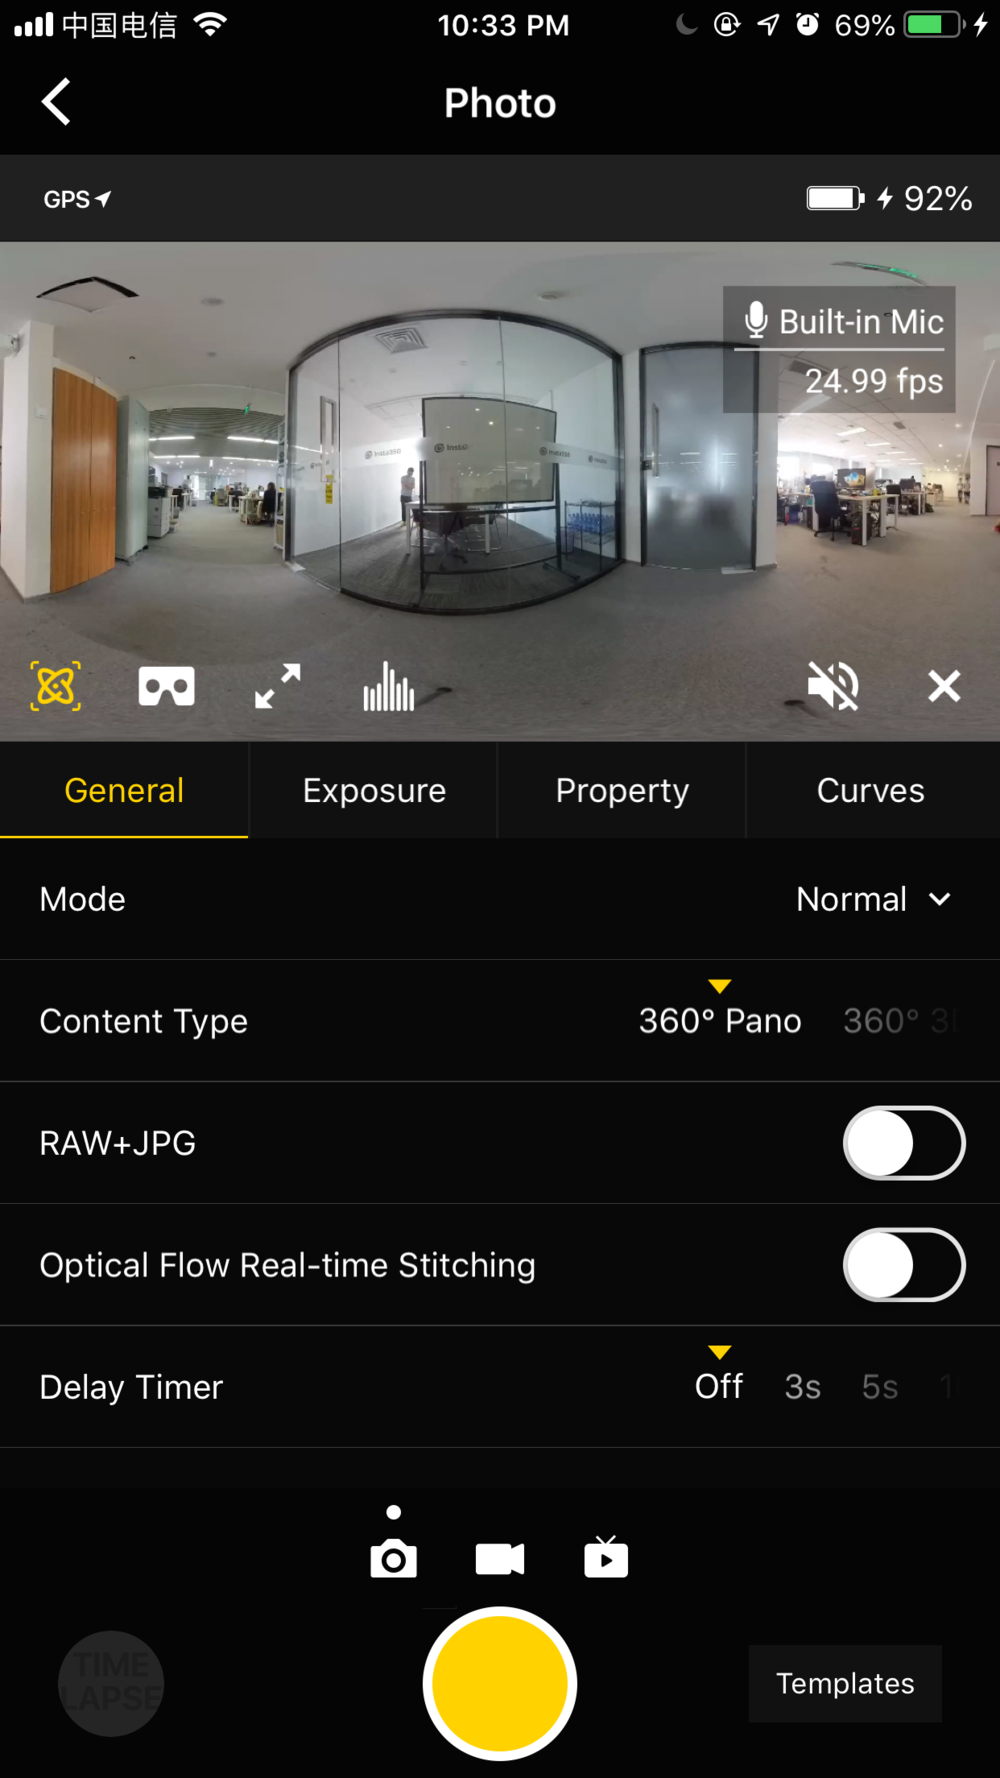
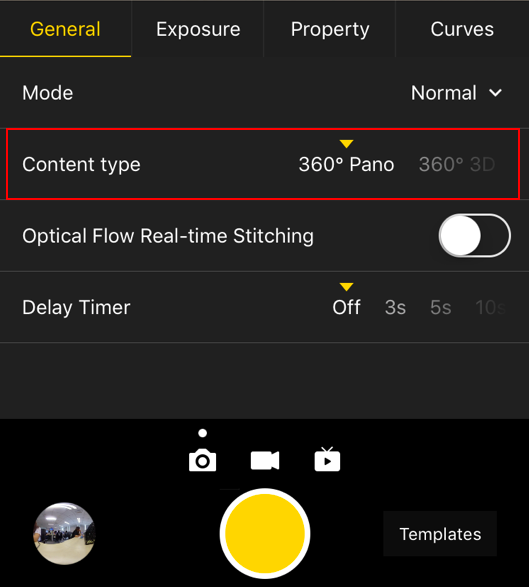
General (Basic settings for photo):
| General | Level | Notice |
|---|---|---|
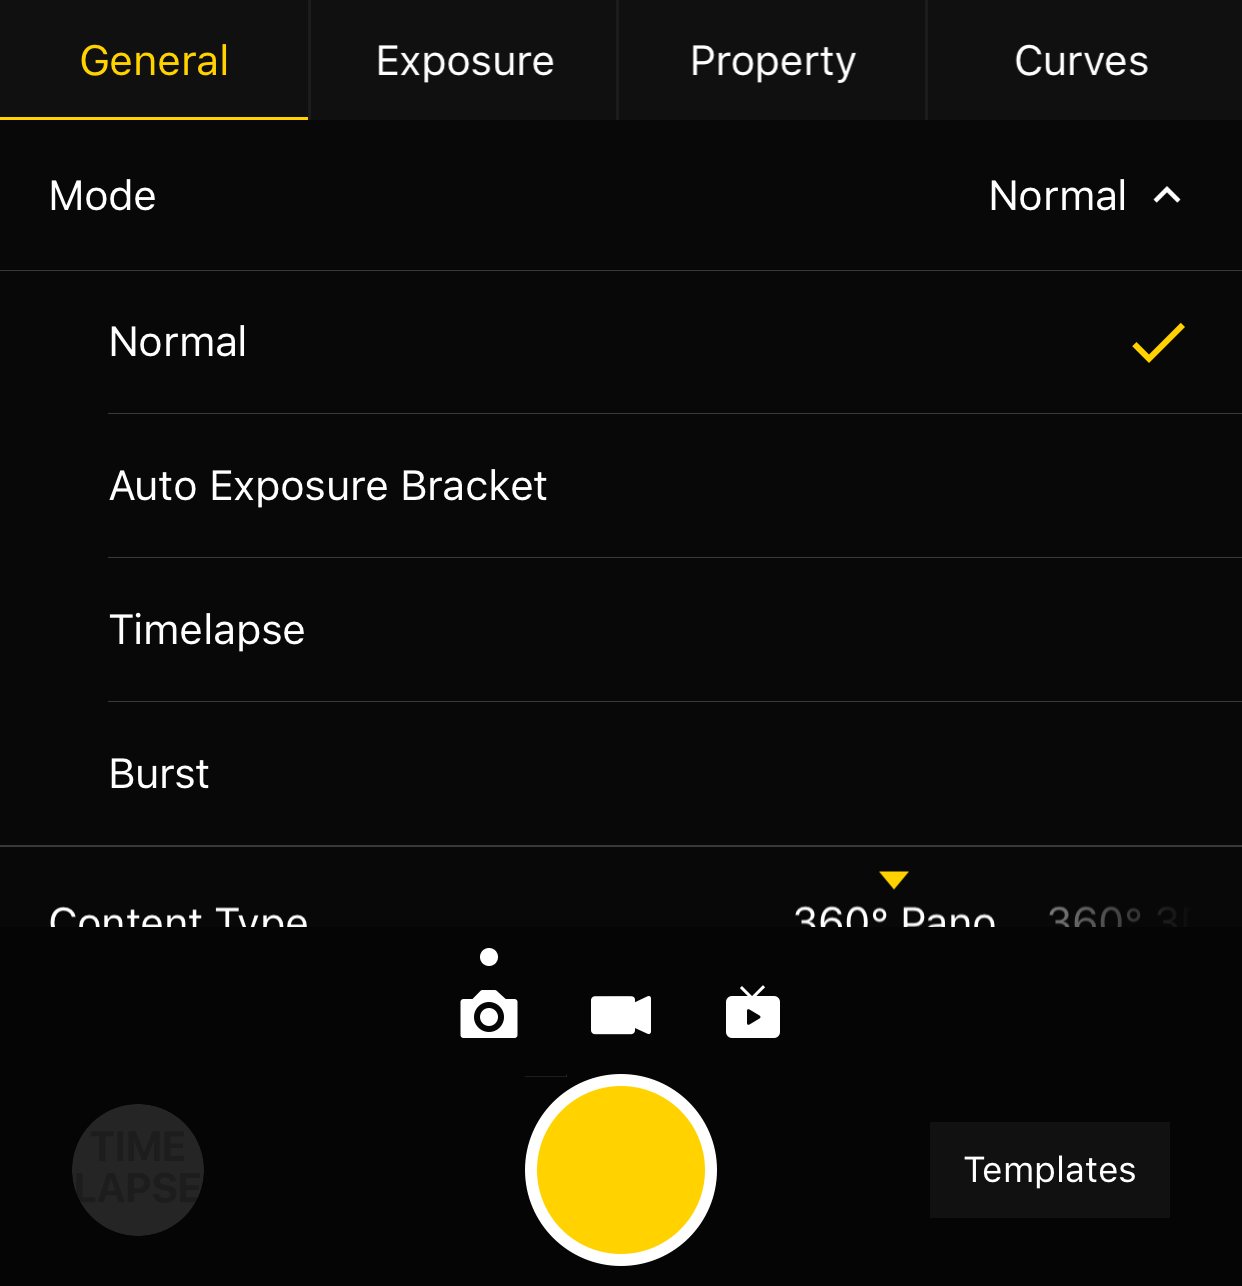
| Mode | Normal Burst Timelapse Auto Exposure Bracket |
1. All photo modes can store images from 8 lenses. Each photo has a resolution of 5280 x 3956. RAW photo format is DNG. Panoramic / 3D images with maximum resolution of 11K can be synthesized in Insta360 Stitcher. 2. The interval length of Timelapse photography must be set above 2s, while interval time should be 2s longer than Shutter time. For example, when the interval is set to 3s, Shutter can be set to 1s at a minimum. 3. Auto Exposure Bracket can select 3, 5, 7, 9 photos with different exposures, eventually synthesizing HDR photos by using software such as Insta360 Stitcher or Photoshop. |
| Content Type | 360° Pano 360° 3D |
This setting only affects photos that are stitched in real time to be 3D or 2D. Insta360 Stitcher can be used to synthesize the original photos from 8 lenses to be panoramic or 3D photos. |
| Raw | On / Off | 1. When this mode is on, photos will be stored in both formats of Raw+JPG simultaneously. 2. DNG files can be toned via Photoshop etc. |
| Optical Flow | On: use Optical Flow Stitching. Off: use Template Stitching |
1. Under Normal mode, real-time optical flow takes time to stitch a 360 ° Pano or 360 ° 3D photo and save the original images from 8 lenses simultaneously. The whole real-time stitching process takes a certain time (camera state is Processing) to complete. After stitching, the camera will be ready for the next shoot. 2. Optical flow real-time stitching only takes effect for JPG. If Raw + JPG photos are taken simultaneously, only JPG photo will be stitched into a panoramic photo in real time. |
| Delay Timer | None, 3S, 5S, 10S, 20S, 30S, 40S, 50S, 60S | Cameras will shoot after the countdown is over. |
| Reset |
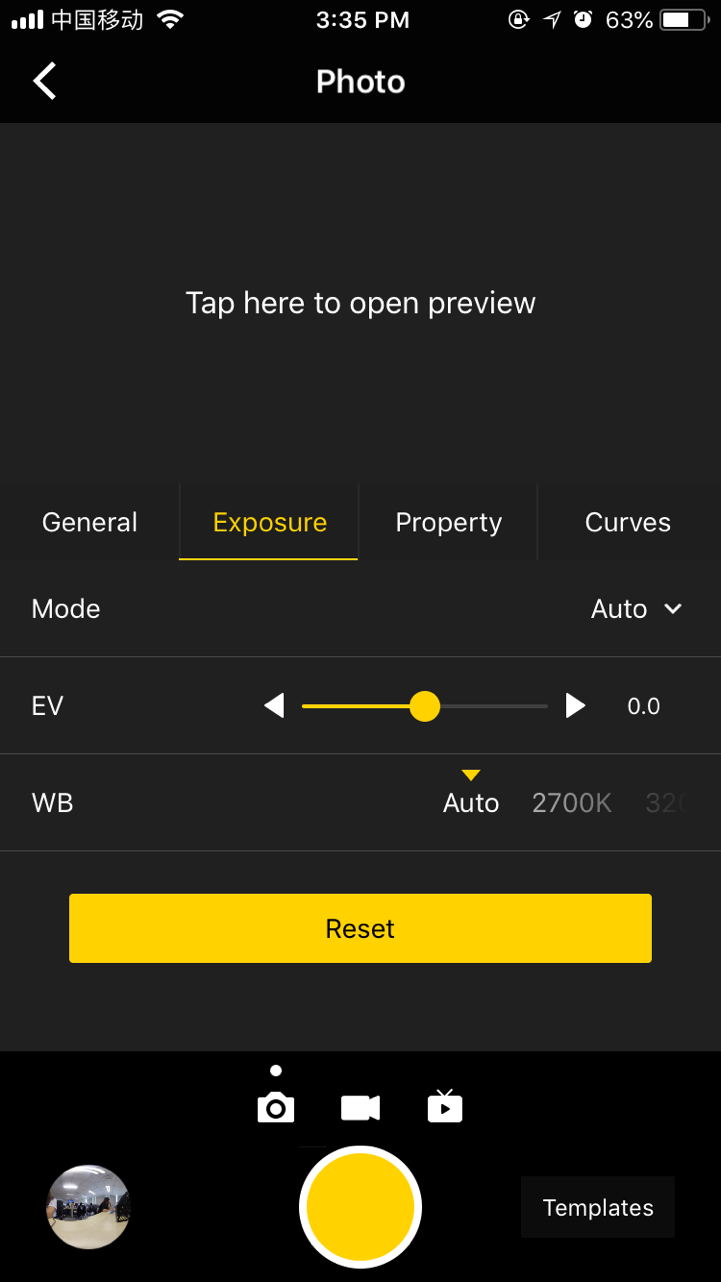
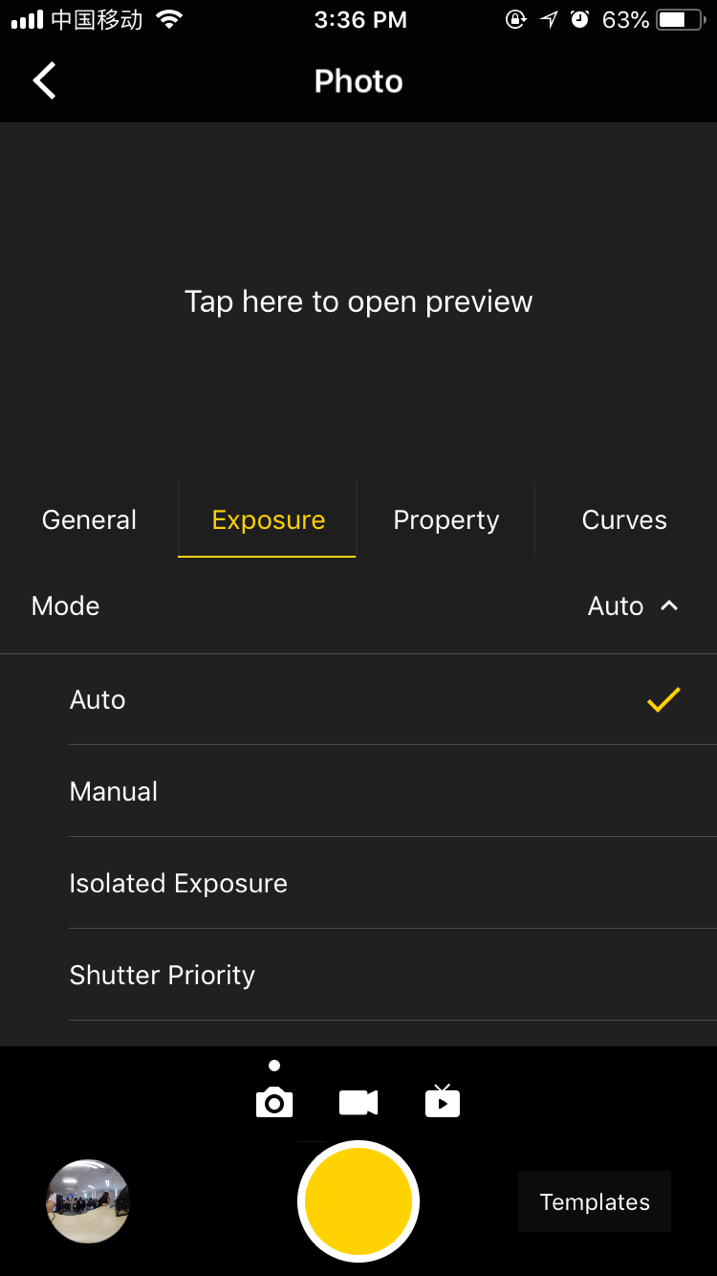
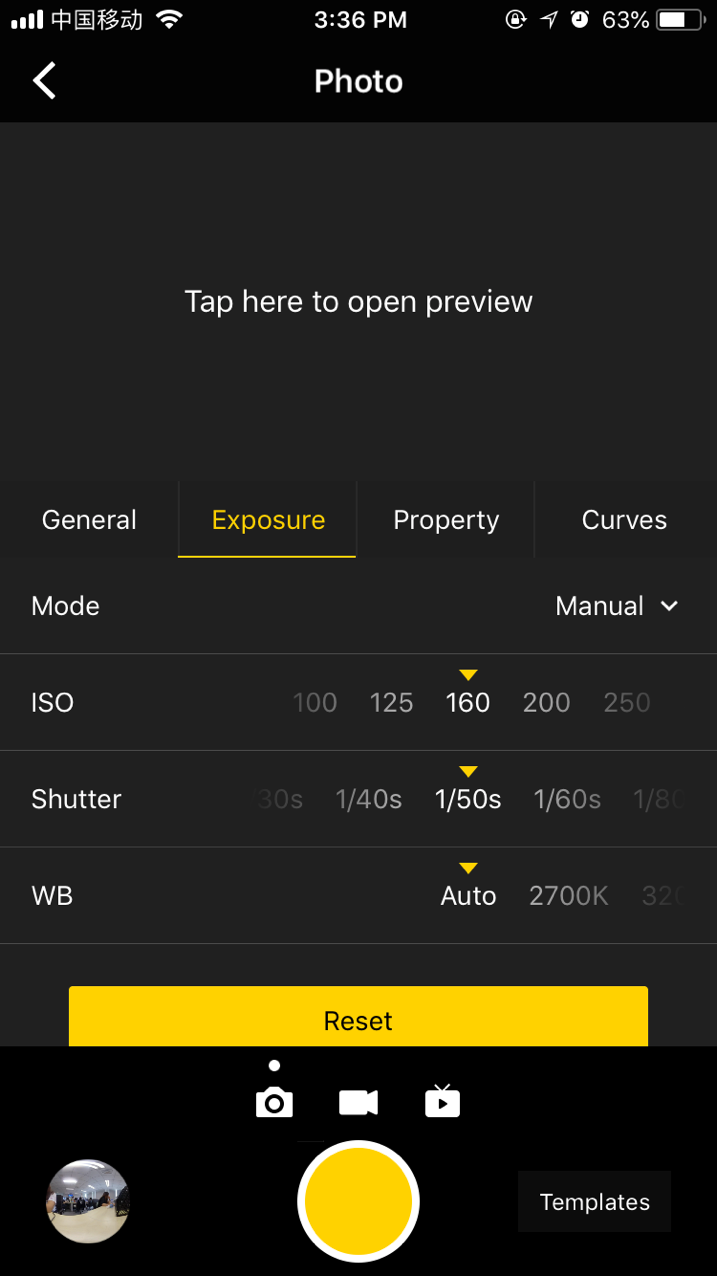
Exposure:
| Exposure | Level | Notice |
|---|---|---|
| Auto | It can adjust EV, white balance | In the Normal shooting mode, the range of EV is-5 ~ 5. |
| Manual | ISO range: 100 ~ 6400 Shutter speed range: 1/2s ~ 1/8000s for ordinary Shutter, 1s ~ 55s for Long Shutter WB levels: Auto(auto white balance), 2700K, 3200K, 4000K, 5000K, 6500K, 7500K |
|
| Isolated Exposure | Eight lenses will expose independently and automatically. EV and white balance can be adjusted. | Isolated exposure is suitable for shooting scenes with sharp light and shade contrast, such as shooting in a room with bright sunlight streaming through a window. |
| Shutter Priority | Shutter parameters can be set manually; other parameters are automatically matched by camera | |
| ISO Priority | ISO can be set manually; other parameters are automatically matched by camera | |
| Reset |
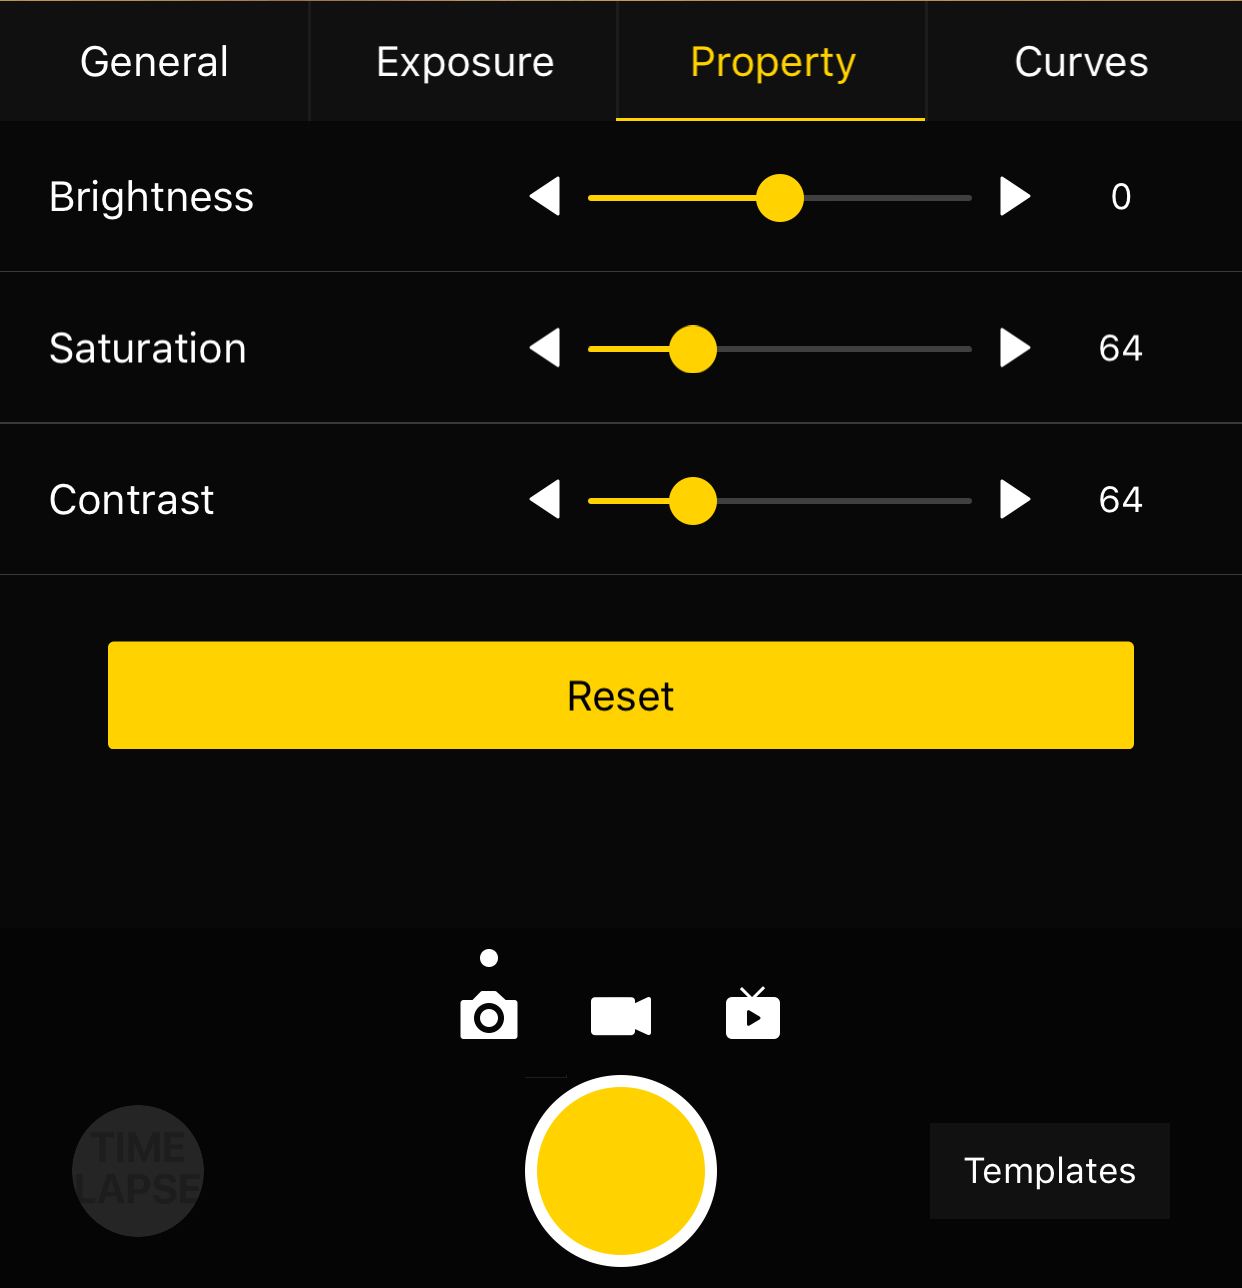
Property
| Property | ||
|---|---|---|
| Brightness | -255 ~ 255 | Note: it's not suggested to modify the property settings. |
| Saturation | 0 ~ 255 | |
| Contrast | 0 ~ 255 | |
| Reset |
After shooting the desired contents using the mobile app, you can go to the camera storage album through the shortcut entry in the lower left corner, to access the file folders containing the contents shot just now and from history. Except for photos in the Auto Exposure Bracket (HDR), Burst or Timelapse mode, all the materials may be previewed, which is helpful for the user to locate a subject quickly. Users can view individual material file via client terminal and download photos to mobile phones.
However, most of the material files are large in volume, and a camera’s performance of downloading and playing is relatively weak, so it is recommended that users should use a computer to view and manage the shot materials.
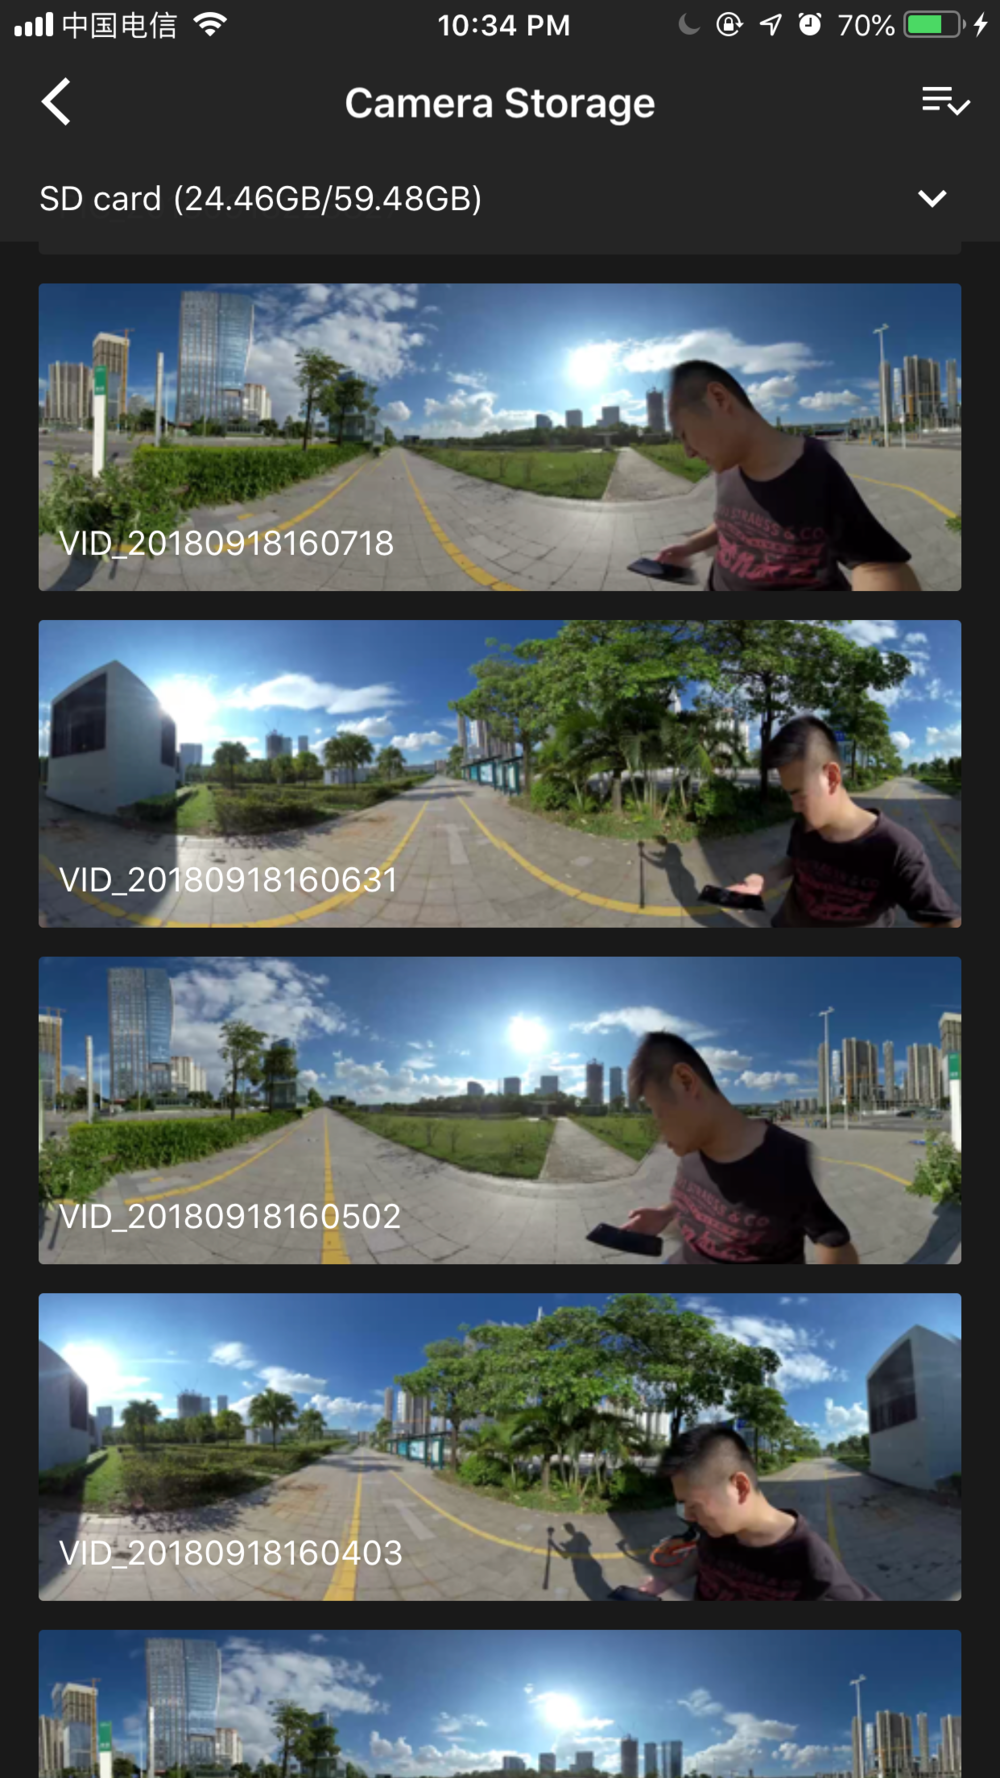
With the storage management function, you can view the capacity of the storage device currently configured to the camera.
2. Precautions for shooting
In mobile AP connection, it may cause unstable connection due to crowd density, and shelter, etc.
Titan is not waterproof so it cannot be photographed underwater nor does it recommend photographing in rainy weather.
Optical flow stitching algorithm is designed to detect each pixel between frames. And if no similar point is found in adjacent images, ripples will be generated at moving objects or lens seams. For example, in front of wallpaper of fine vertical stripes, twigs, reflective glass or stainless steel railings. Therefore, we should try to avoid these situations and place the camera in the scene with details that are rich but non-repetitive.
Safe distance: the safe distance of optical flow stitching is 80cm. The safety distance between template stitching is 2m and safe distance should be considered in camera’s position.
.svg)

