Online Chat
Office Hours: 24/7
Start Chat

| Menu | Gesture | Diagram |
|---|---|---|
| Open the Shortcut menu | Swipe down | 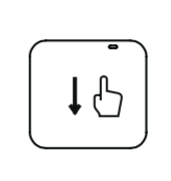 |
| Access Media Gallery | Swipe right | 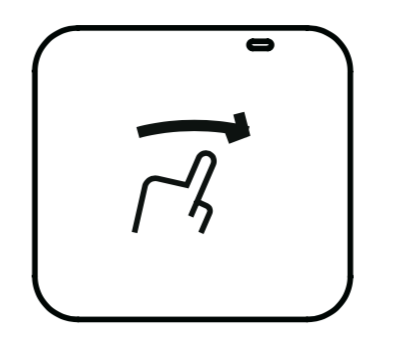 |
| Adjust camera settings | Swipe left | 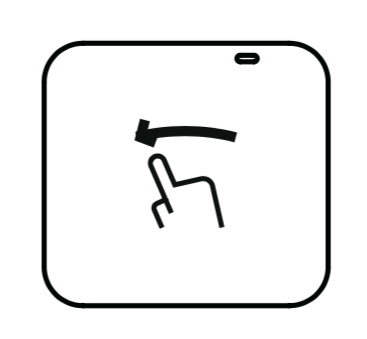 |
| Select capture mode | Tap the icon at the bottom left corner | 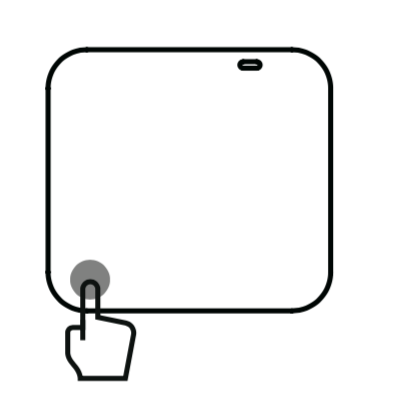 |
| Set resolution settings | Tap the icon at the bottom right corner | 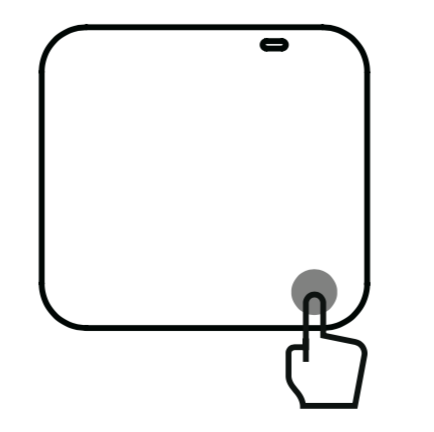 |
1. Open the Shortcut menu: Swipe down
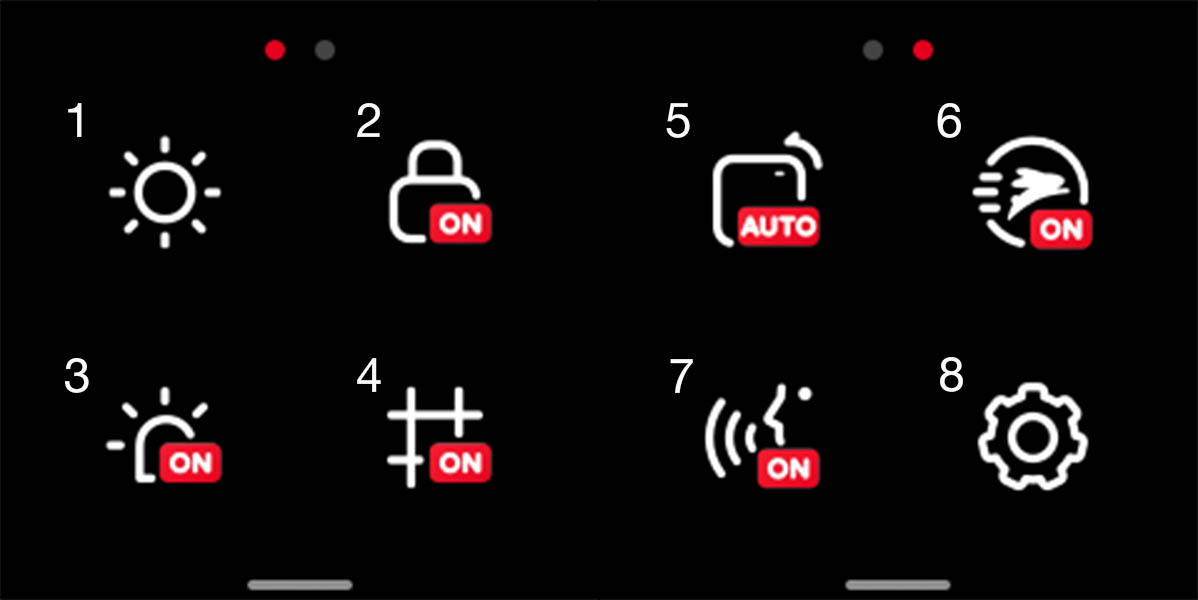
① Adjust screen brightness
② Touch screen ON / OFF
③ LED ON/OFF
④ Grid ON / OFF (Not availbale in Dual-360 Mod)
⑤ Rotate Screen ON / OFF
⑥ QuickCapture ON / OFF (You can press shutter release to power on ONE R and start recording when turn on QuickCapture)
⑦ Voice control
⑧ Settings
2. Access Media Gallery: Swipe right
The most recently captured content is shown by default. Tap the album icon in the upper left corner to enter the album and browse all.
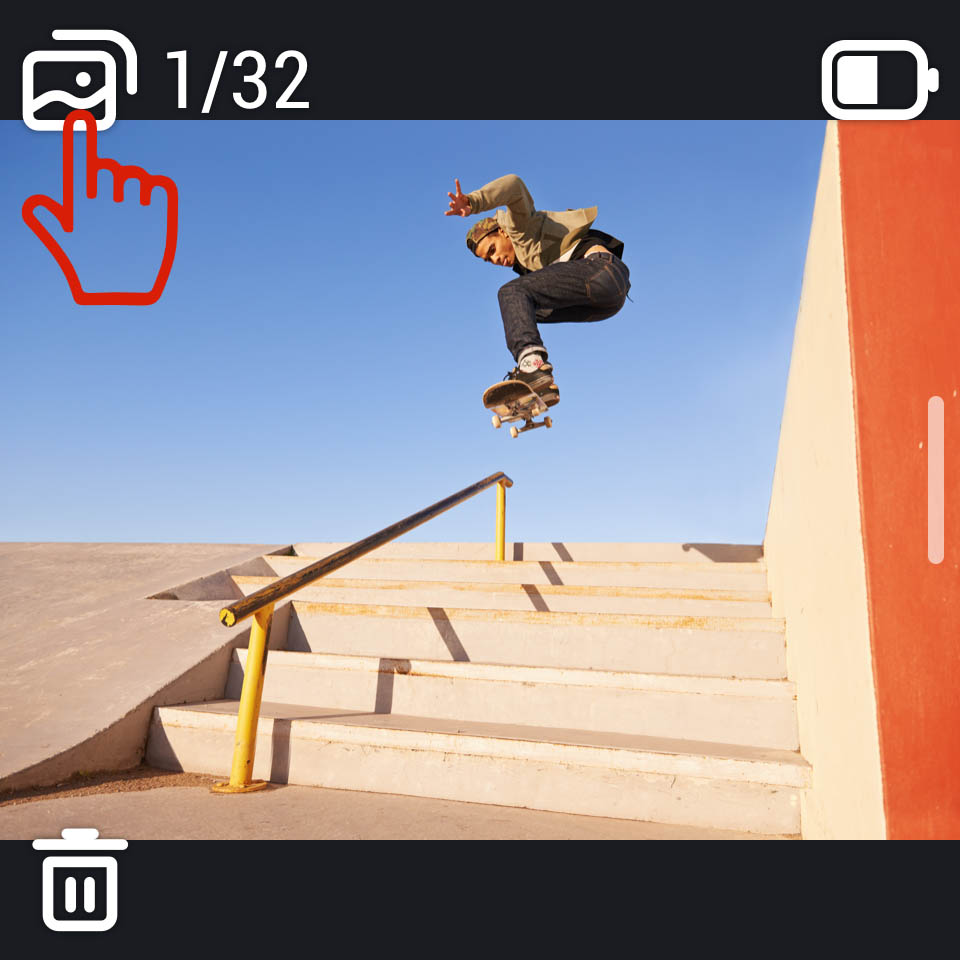
Note: ONE R does not support HDR photo, Burst photo, interval photo, Night photo and Timelapse video. Please check after connecting to the app.
3. Adjust camera settings (WB, EV etc.): Swipe left
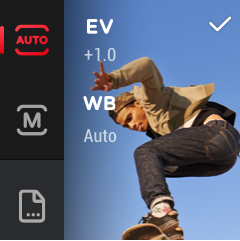
*Click here for a detailed tutorial on setting parameters.
4. Select capture mode: tap the icon at the bottom left corner
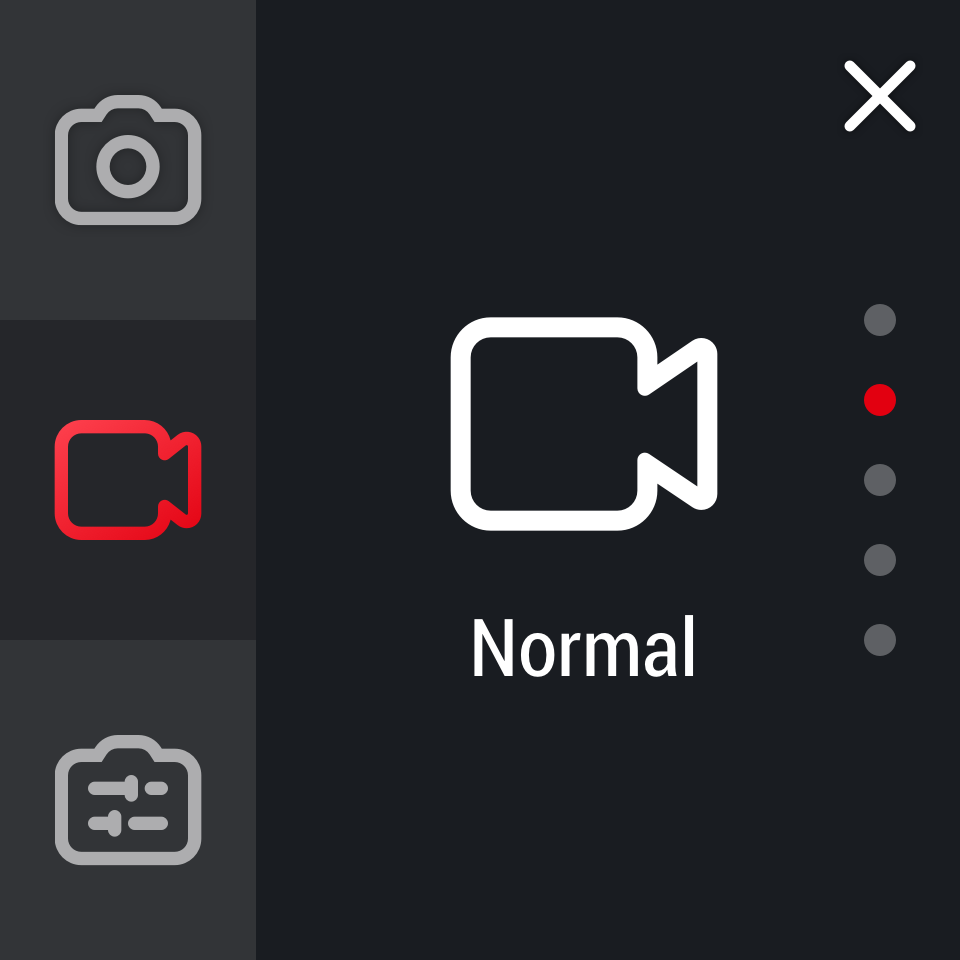
1) Photo:Standard photo, HDR photo, Interval Photo, Burst photo, Night photo.
2) Video:The video modes of different lenses are different. The detailed information is as follows:
| ONE R 4K Wide Angle | ONE R Dual-Lens 360 | ONE R 1-Inch Wide Angle |
|---|---|---|
| Standard | Standard | Standard |
| HDR | HDR | |
| Timelapse | Timelapse | Timelapse |
| Timeshift | Bullet Time | Timeshift |
3) Preset: Preset modes
*Click here for a detailed tutorial on shooting mode settings.
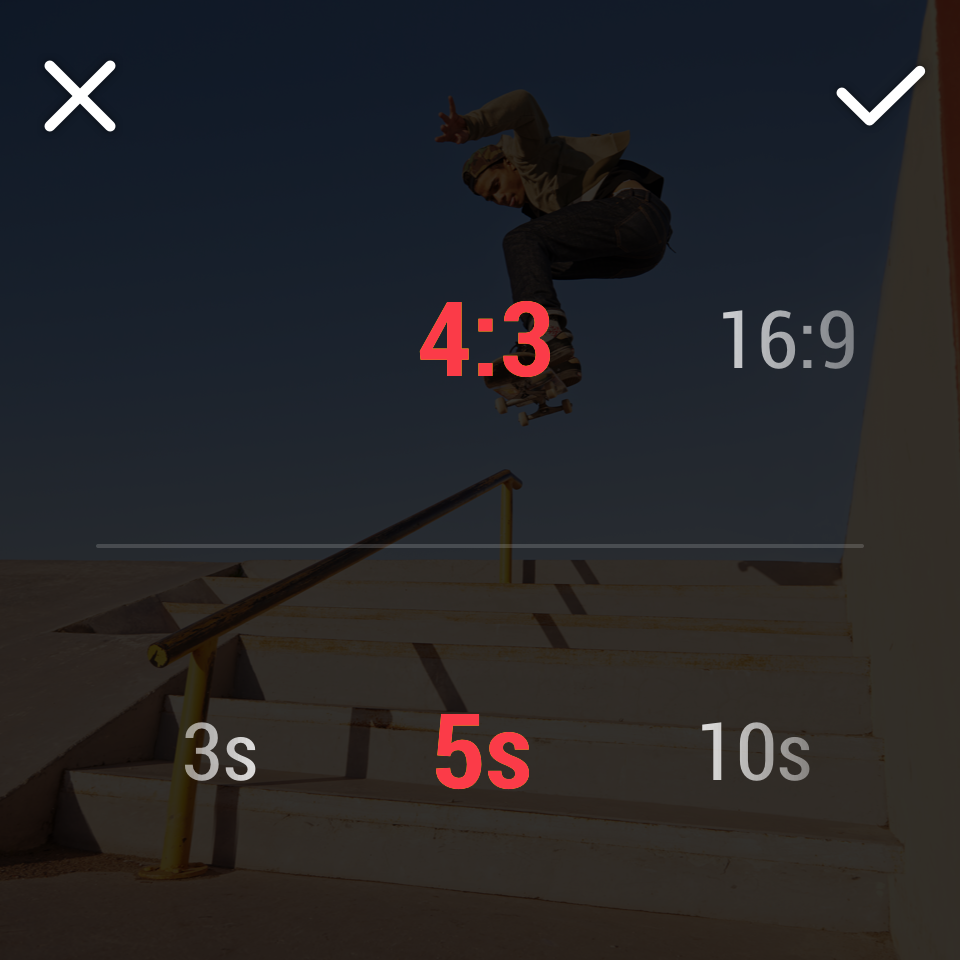
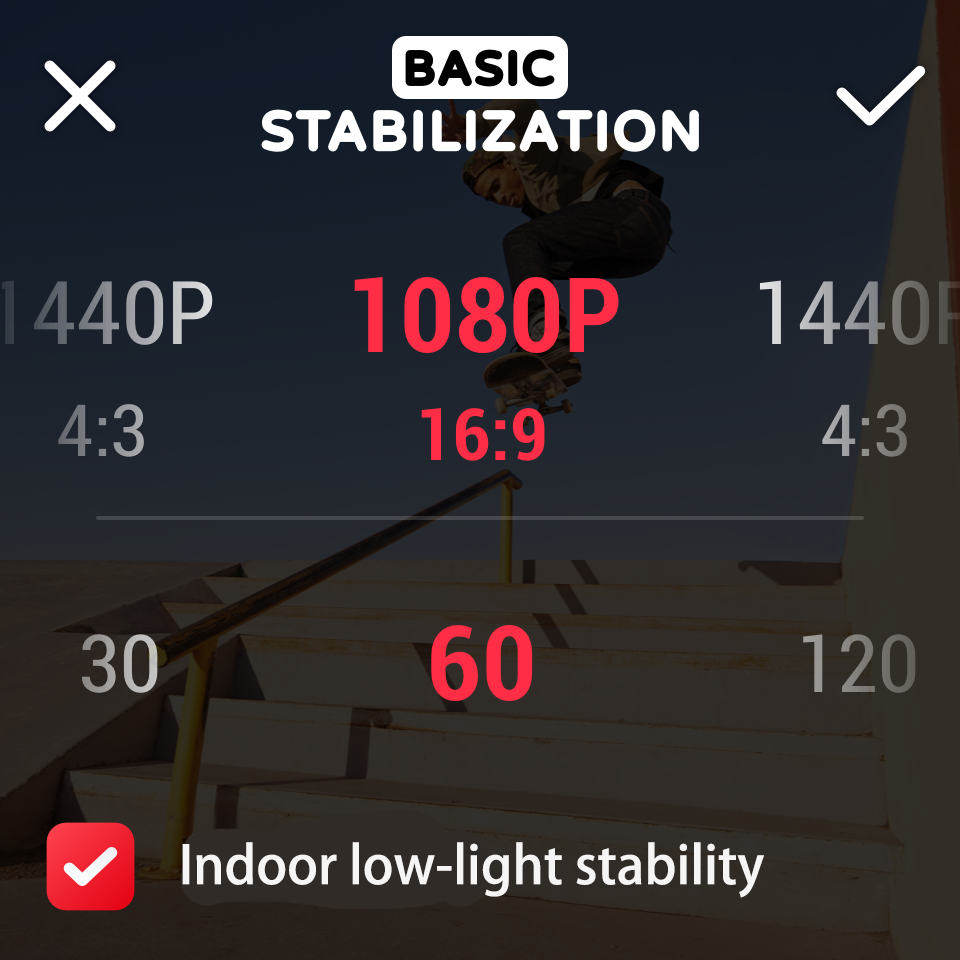
5. Set resolution settings: Tap the icon at the bottom right corner
1) In photo mode, set the aspect ratio and timer for shooting.
2) In video mode, set the resolution and FPS.
*Click here for a detailed tutorial on shooting modes and setting parameters.
![]() Please click here to contact us for further support.
Please click here to contact us for further support.
.svg)

