Webcam Live Streaming Tutorial Using OBS
If you encounter an error message during the live broadcast, you can click here to view the meaning of the live broadcast error code, or get in touch with our support team to help diagnose the issue.
Step 1: Connect X5 to the Computer
- Ensure the X5 camera is powered on.
- Use a USB cable to connect the camera to the computer.
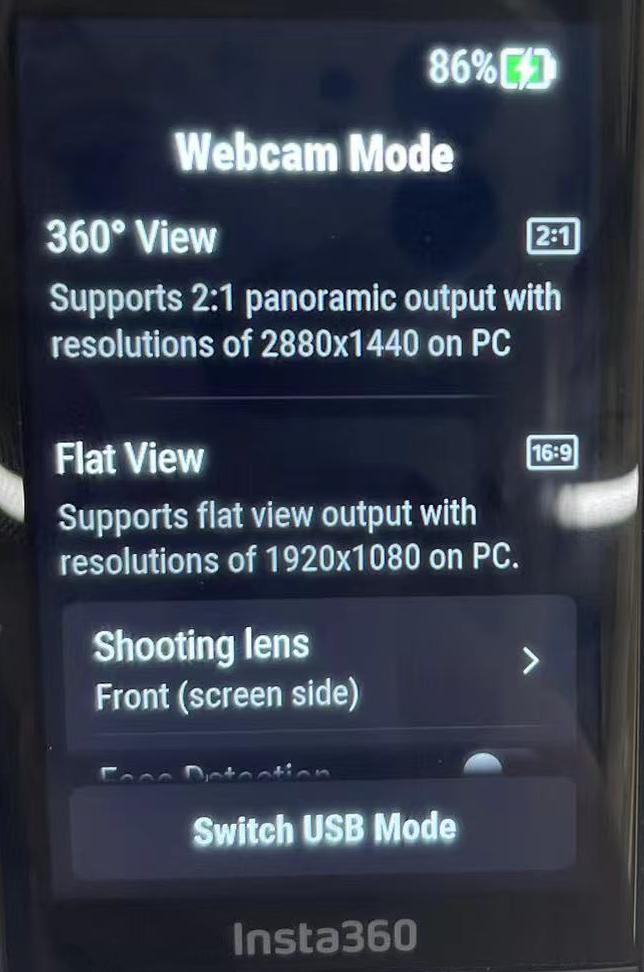
- The camera will automatically display a USB Mode selection menu. Please choose "Webcam Mode".
Note: At this point, there is no need to manually select the "360° View" mode on the camera (it's normal that this option is unavailable). When the resolution in the OBS live streaming software is set to "2880x1440", the system will automatically display the 360° 2:1 panoramic output.
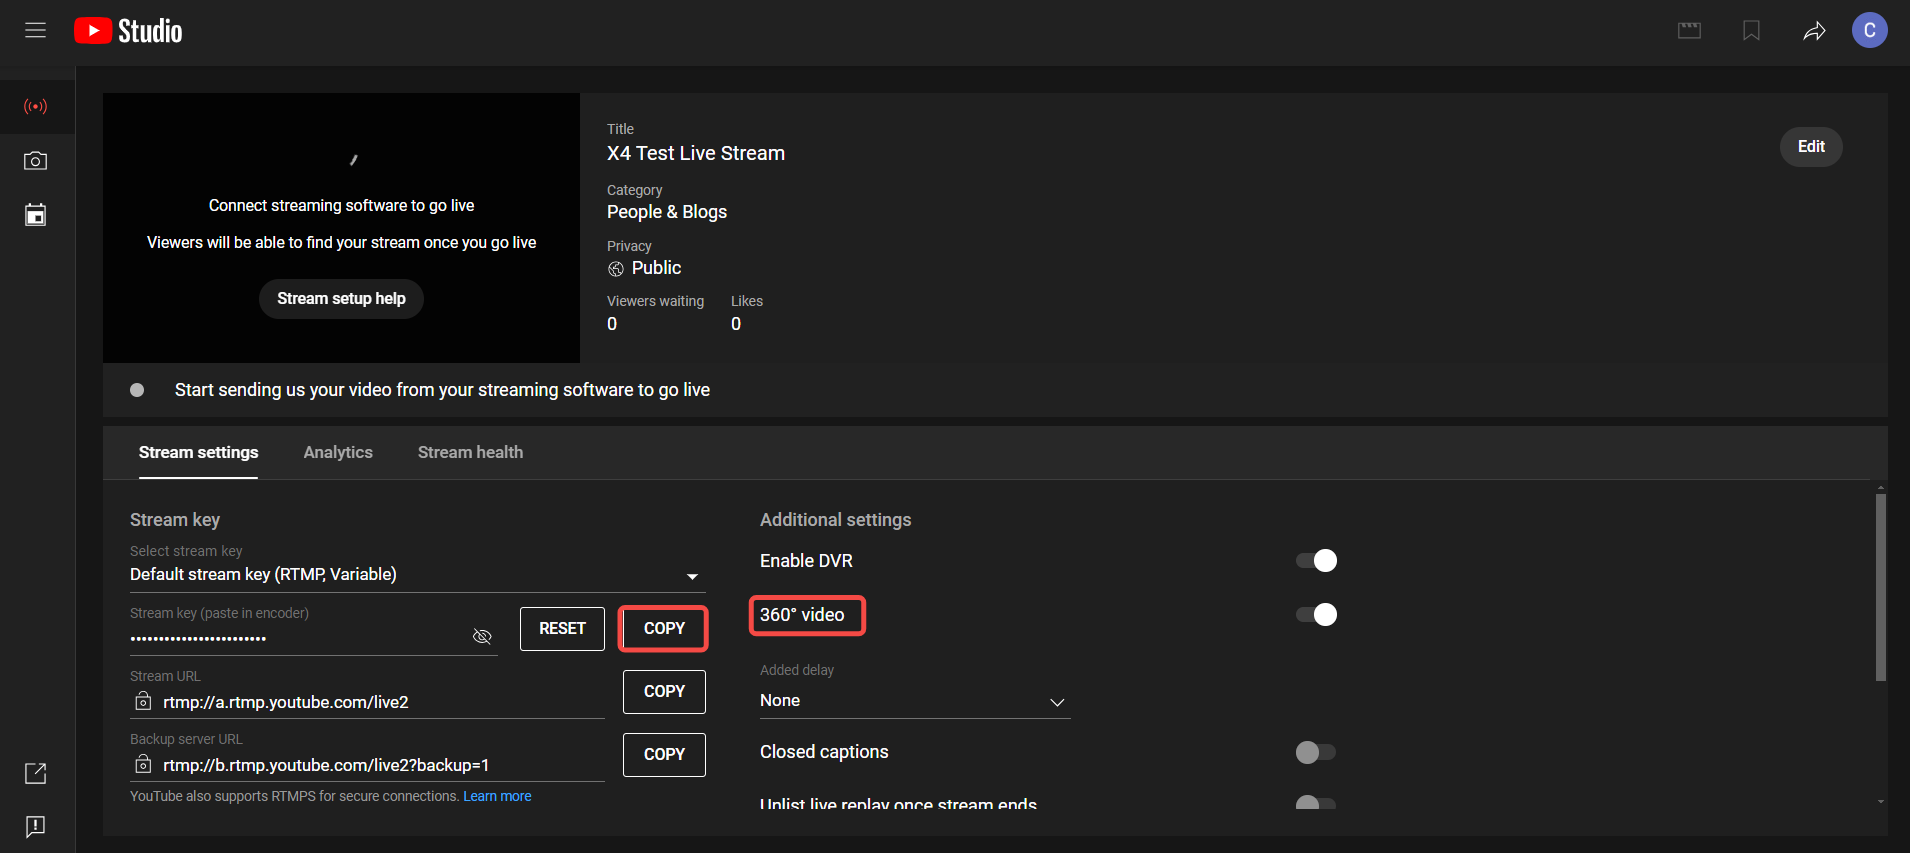
Step 2: Copy the Live Streaming Code
- On the live streaming platform, click "Start Live," and enter the settings page.
- In "Other Settings," enable the "360 panoramic video" option.
- On the left side, click "Copy" next to "Live Streaming Code" to copy the code.
- Open OBS live streaming software. Under "Sources," click "Video Capture Device" > Device "Insta360 X5" > Uncheck the box for "Use Preset" > Set the resolution to "2880×1440" > Set the common FPS values to "30". After completing the capture device setup, click "Settings" on the right side of the main interface to enter the streaming settings page.
.png)
- Select the "Stream" tab on the left, choose "Use Stream Key (advanced)", and manually input the stream key copied from Facebook/YouTube.
.png)
- Select the "Output" tab on the left, choose "Output Mode: Advanced", tick "Rescale Output", and set it to "2560x1280" or "2560x1440".
.png)
- Select the "Video" tab on the left, set the "Base (Canvas) Resolution" to "2880x1440" and the "Output (Scaled) Resolution" to "2560x1440".
.png)
- If the network is unstable, it is recommended to tick "Dynamically change bitrate to manage congestion (Beta)".
.png)
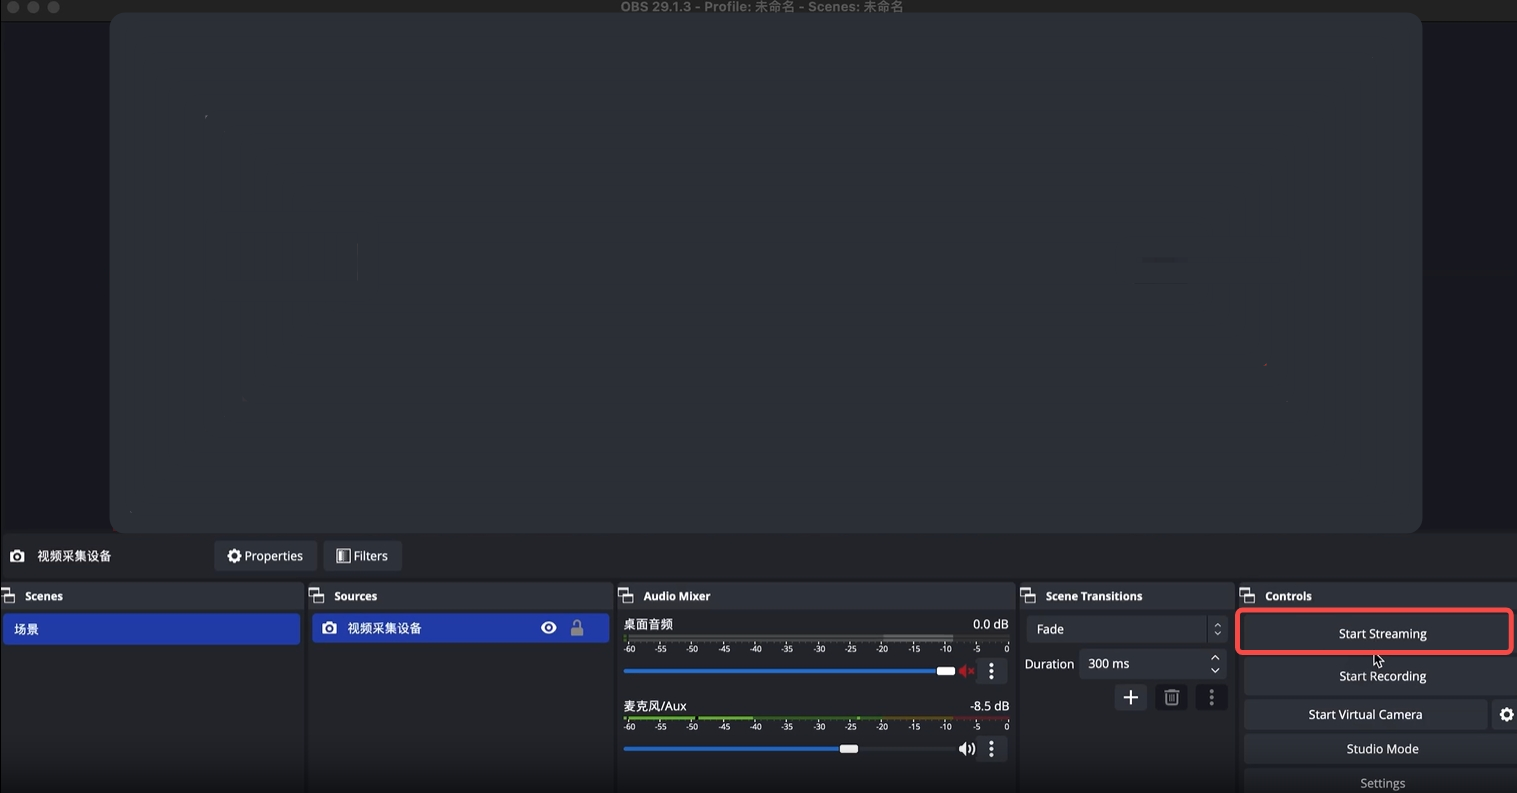
- Click "Start Streaming" to begin. You can use the mouse to drag and adjust the perspective in the video.
.png)

.png)
.svg)

