Install Lens Guards
Insta360 X4 comes with Standard Lens Guards for basic protection. If you're looking for more rugged protection, use the Premium Lens Guards (purchased separately).
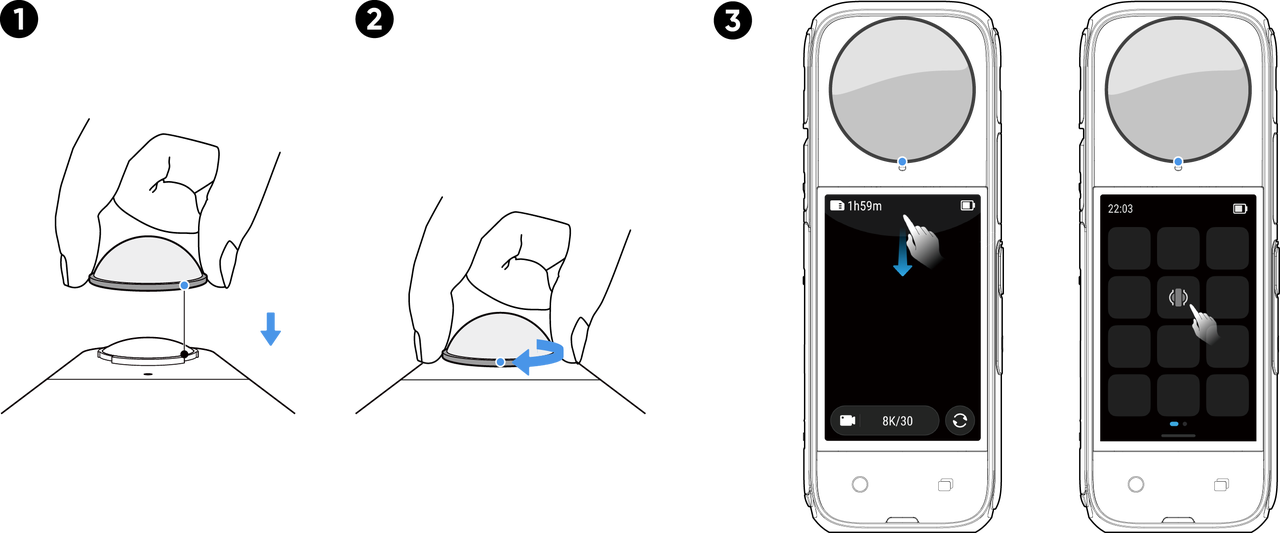
Both front and rear Lens Guards are installed in the following way:
- Align the mark on the Lens Guards with the slot on the lower right side of the lens.
- Rotate the Lens Guards clockwise and align it with the camera's microphone. Make sure they are screwed on tightly.
- Once installed, please turn on "Lens Guards Mode" in camera settings. Swipe down from the top of the touchscreen to access the Shortcut Menu and tap the Lens Guards icon.
If you film in "Auto" mode, the camera will automatically detect if the Lens Guards are installed and automatically adjust to get the best stitching in 360º footage.
- To remove, hold down the edge of the base of the Lens Guards and twist counterclockwise. Then, turn off "Lens Guard Mode".
Auto is selected by default and will automatically detect if the Lens Guards are installed and removed. However, for the best stitching results, you should select the Lens Guards Mode according to the type of Lens Guards, Standard or Premium, you are using. After removing the Lens Guards, ensure the camera is set to "No Lens Guards", otherwise, you may experience stitching issues.
Notes:
- Do not squeeze or pull the base too hard when installing the Lens Guards, as this may change the shape or reduce the adhesiveness.
- Dirty or worn Lens Guards may affect the final image result.
- Avoid using the Lens Guards in water or rain due to the non-sealed structure.
- To avoid fogging, dry the Lens Guards thoroughly with a soft cloth if they get wet from water, snow or fog.

.svg)

