Online Chat
Office Hours: 24/7
Start Chat

Insta360 Wave is compatible with both Windows and macOS systems. To avoid compatibility issues, it is recommended to use the included USB-C cable to connect it to your device.

Remove the Dongle from Insta360 Wave and insert it into a computer or other device to connect.
The Dongle features a USB-A port. You can also use the included USB-A to USB-C Adapter to connect the dongle to your device's USB-C port.
When connecting the Dongle for the first time, it will automatically pair with Insta360 Wave without any manual operation required from the user. If the original Dongle is lost or damaged, the user will need to unbind it in the settings page and bind a new one.
Tips: When storing the Dongle, please place it according to the orientation indicated by the silk-screen in the storage slot to ensure a secure fit.

Once connected, set the Insta360 Wave as the audio input and output device in the system settings or within conferencing software.
Once connected, you can control the device using the speaker and microphone buttons on the touchscreen.
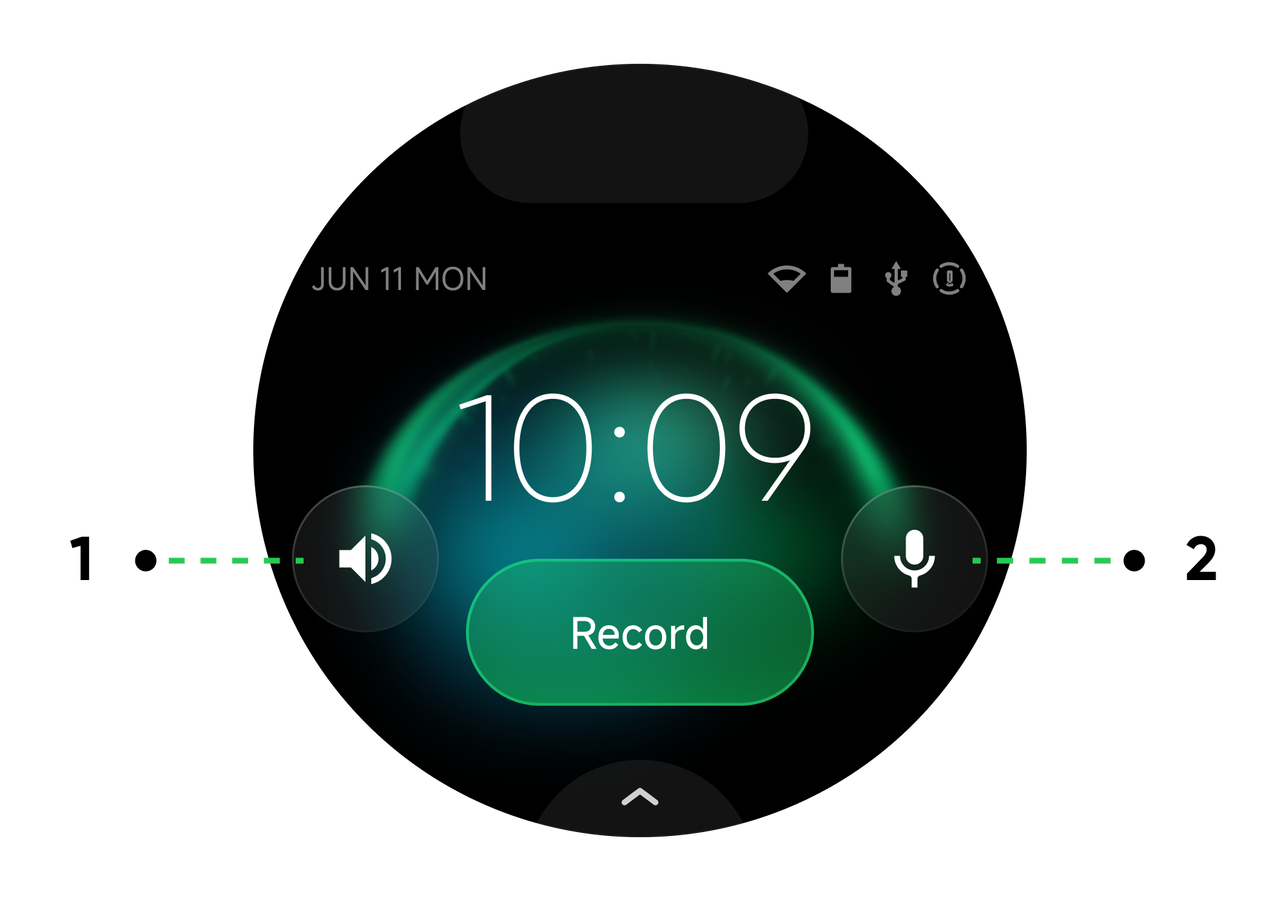
| No. | Button Name | Button Function |
| 1 | Speaker | Adjust speaker volume, turn the speaker on or off. |
| 2 | Microphone | Turn the microphone on or off. |
Tips: To adjust the microphone volume, please go to the "Settings > Mic Volume" screen.
.svg)

