Online Chat
Office Hours: 24/7
Start Chat

Mocha VR stabilization
Open Premiere to create a new sequence for video that needs to be stabilized. Add Mocha VR attribute to the video.
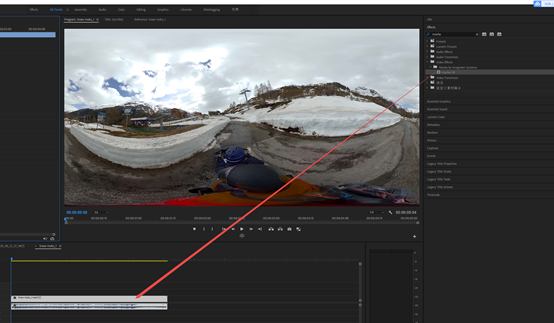
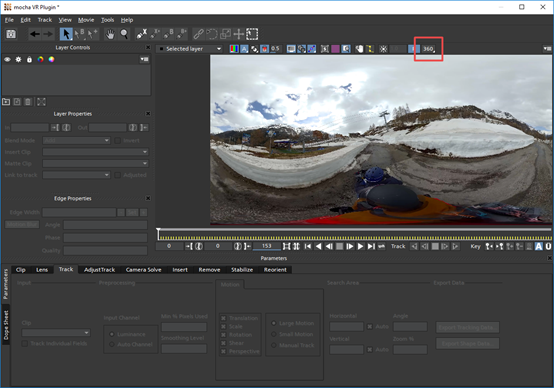
View video effects, click MochaVR icon to enter mocha VR interface, and open 360 mode to observe screen from various angles.
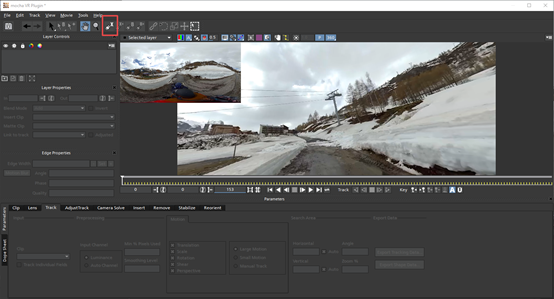
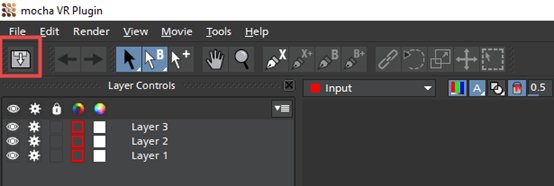
At position 1, use pen tools to select tracking objects, where 1-3 more visible buildings are checked here. In other scenarios, select appropriate tracking objects and numbers according to actual conditions.
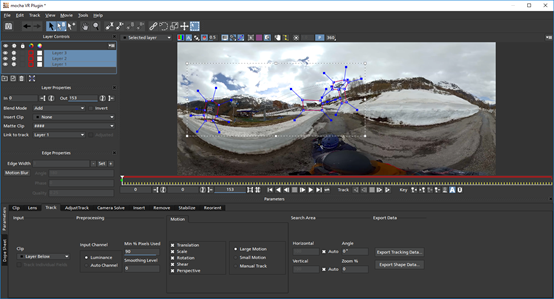
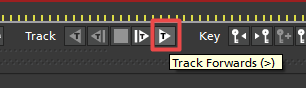
After box selection completes, select three tracking layers and click "Track Forwards" . Waiting for the completion of calculations, the calculation requires some time, which depends on computer configuration, video resolution and length.
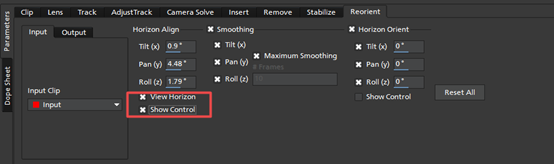
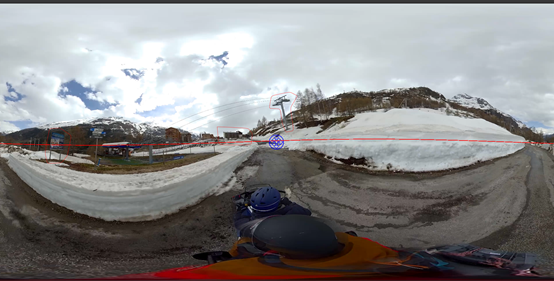
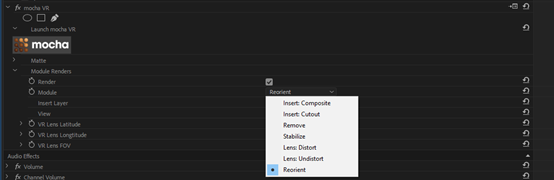
Open "View Horizon" and "show control" in Reorient to observe and adjust horizontal lines. The blue circle of Control to allow horizontal line to coincide with the ground line.
Click "Save" icon, save, and then close mocha VR.
Back to the effect, open Render and check for real-time rendering. Selecting Reorient in Model to apply the previous stability effect in Mocha. Then you can preview the effect on timeline and export it at last.
Mistika VR stabilization
Open Mistika VR, in lower left function area, "Stabilize" has one-key stability function. Select the area that needs to stabilize. Click Stabilize, and the software will automatically calculate. Computing speeds are related to computer configuration and video size, which applies equally to 3D video.
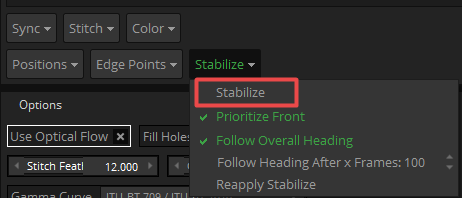
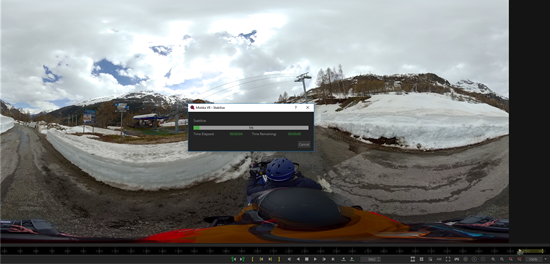
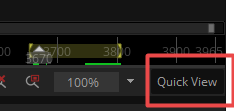
After computing completion, click QuickView to quickly view the effect. Close optical flow stitching option to speed up.
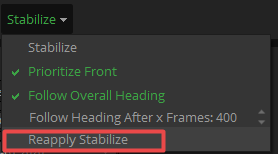
The value of "Follow Heading After x Frames" can be modified to further optimize front-body stability. Click "Reapply Stabilize" for application.
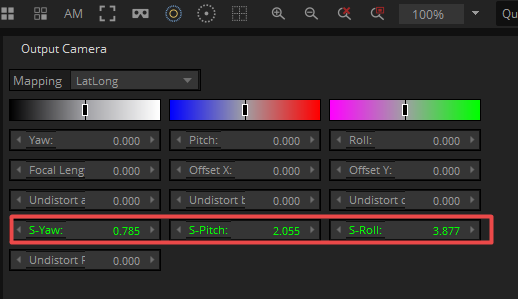
After stabilization, S-Yaw, S-Pitch, and S-Roll in Output Camera become green, with a value for each frame, which is the data after reapplying stabilization.
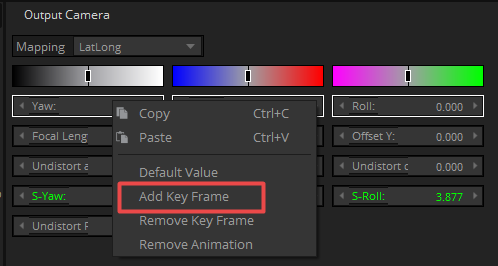
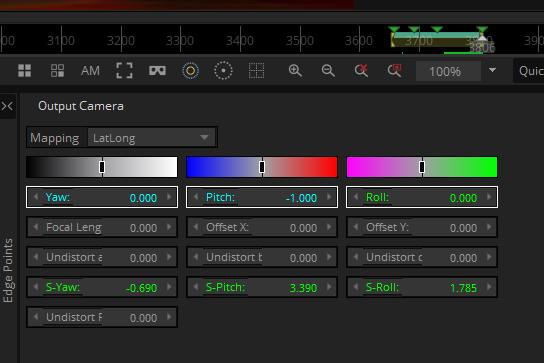
If the line image is tilted overall, you can correct it by adding key frames and changing the Yaw, Pitch, and Roll of output images.
Mistika VR’s stability attribute is suitable for ground movement, and the stabilization of video type with jitter. Although the stabilization effect cannot reach FlowState level, because it doesn't need to track object, the operation is relatively simple, which is a convenient and efficient choice.
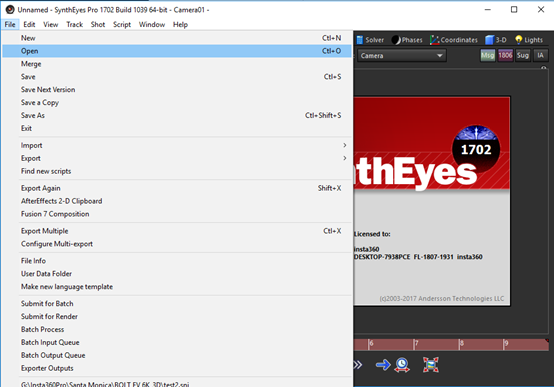
Synth Eyes stabilization
SynthEyes is a post-production software.
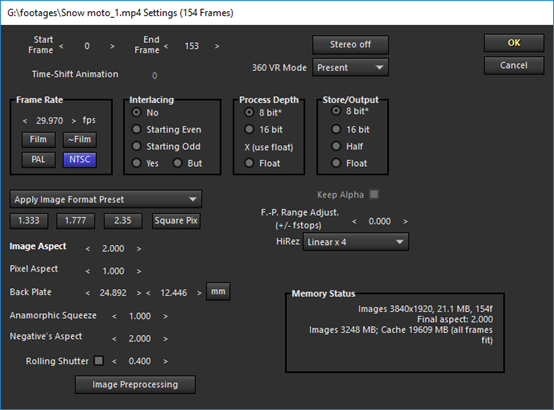
Open Synth Eyes, File->Open, Open video files that need stabilization, which supports only 360 videos, not 3D panoramic video. The resolution is unlimited, but processing speed is related to computer configuration.
Typically, just use default settings. And confirm that 360 VR Mode has been opened.
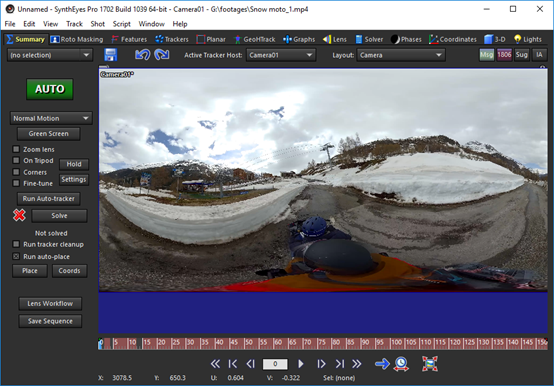
Wait until the video has been completely loaded. After loading, the red progress bar at the bottom disappears.
During import, you will be prompted for saving your project files.
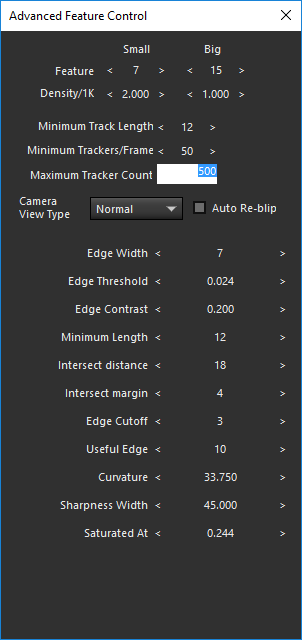
Select "Feature" above window. Click "Advanced" . Open feature point to for the window settings.
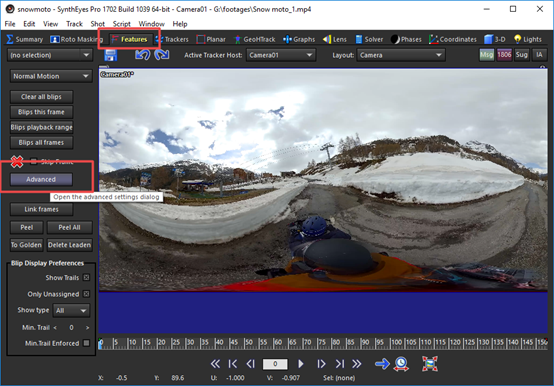
Modify "minimum Trakers / Frame" to be around 50, "Maximum tracker Count" to be around 500.
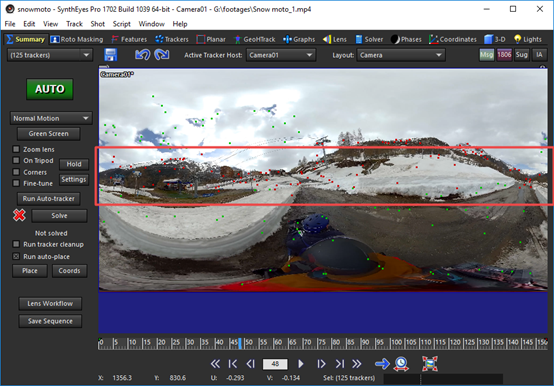
When setup completes, close back to "Summary" , click "Run Auto-tracker" , and the software starts automatically calculating tracking points. The computing time is related to computer configuration and video duration.

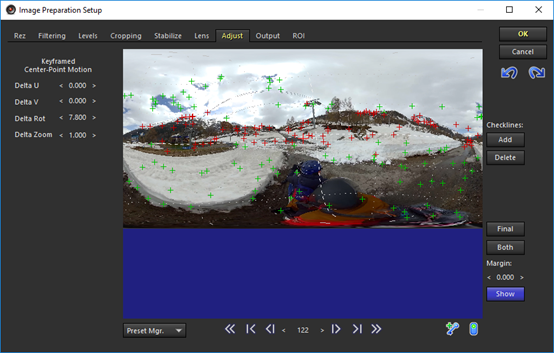
After calculation, each frame will appear many green tracking points. Next, we need to hold down "shift" key, select the track point near ground line, drag timeline, ensure that it is along with time schedule, and tracking points should be all checked.
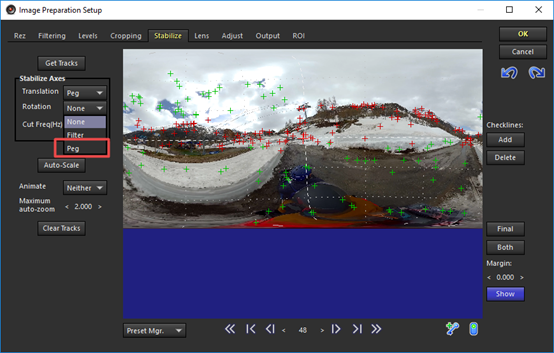
After check-out, press "P" on the keyboard, pull out stable settings window, select "peg" in "Transition" , select "peg" in "Rotation" . Click "OK" , close the window, wait for the software to complete automatic computing.
After calculation completes, red progress bar disappears, and you can preview stability effect. If the horizontal tilt is found, you can press "P" key again to enter the setting panel, and set adjustment parameter in "Adjust" .
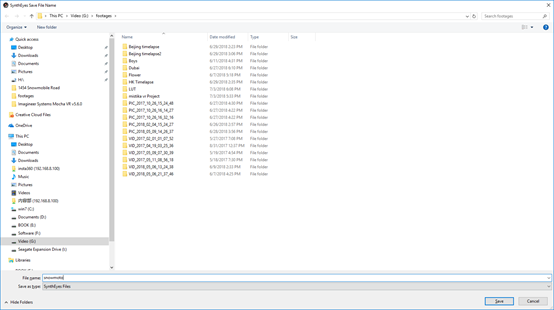
Finally, output, open Output, click "Save Sequence" , and then you can export video.
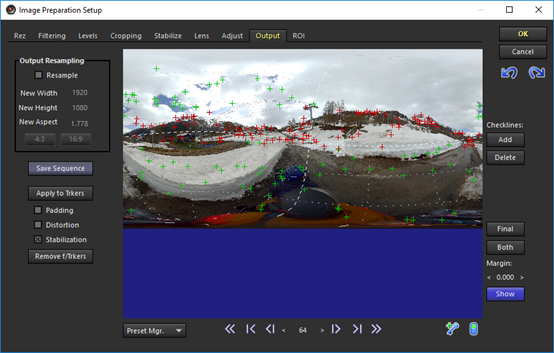
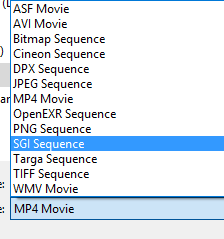
In export settings, you can select different formats, and set coding rate in "Compression Settings" .
Click Start to start rendering and export.

.svg)

