Online Chat
Office Hours: 24/7
Start Chat

Format of video files
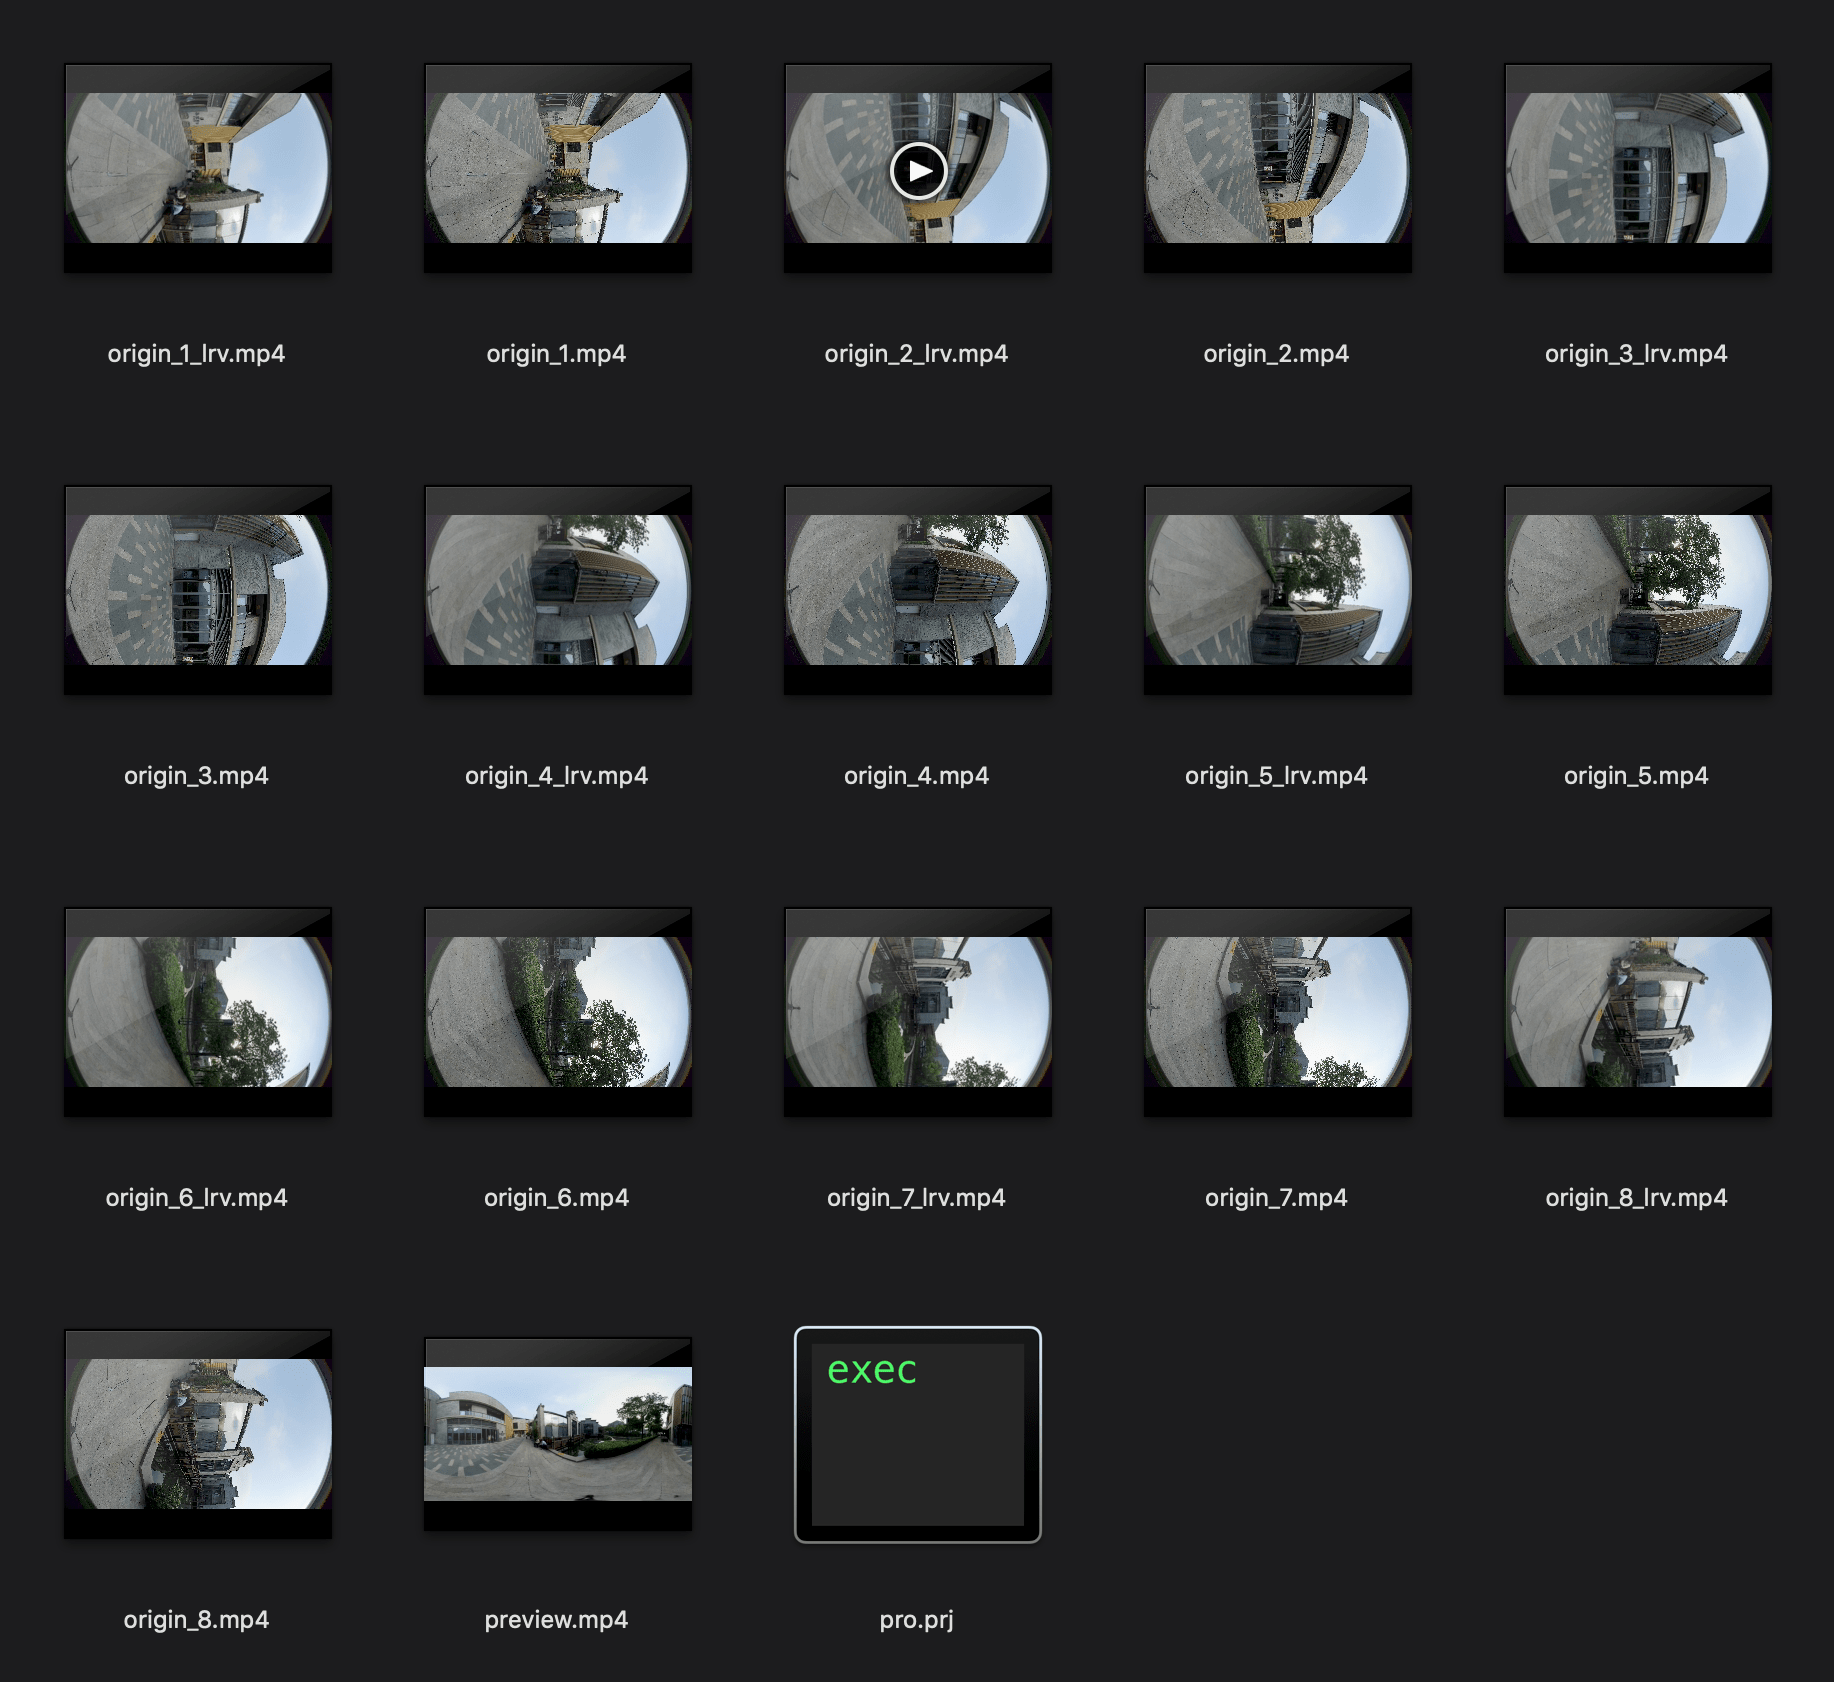
Video shot on Titan is stored in MP4 format, encoded by H.264.
Each shoot creates a new folder in SD card (0), which contains 8 low-resolution proxy videos, preview file (Preview.mp4), project file (pro.prj) and some necessary data files (gyro.mp4) as well as video files. The other SD cards (1-8) are used to store original high-resolution videos shot on 8 lenses respectively.
origin_*.mp4 sequences are original files captured by each lens for post stitching. Videos in 5280 x 2972 resolution can be stitched to 11K 2D panoramic video at the maximum and those in 4800 x 3072 resolution can be stitched to 10K 3D panoramic video at the maximum.
Preview.mp4 is a preview file of 1920 * 960 with frame rate of 30 fps, which can be used to quickly review the video effects like exposure, composition and so on. Please note that FlowState stabilization doesn't take effect in the preview file.
Insta360 Stitcher interface introduction
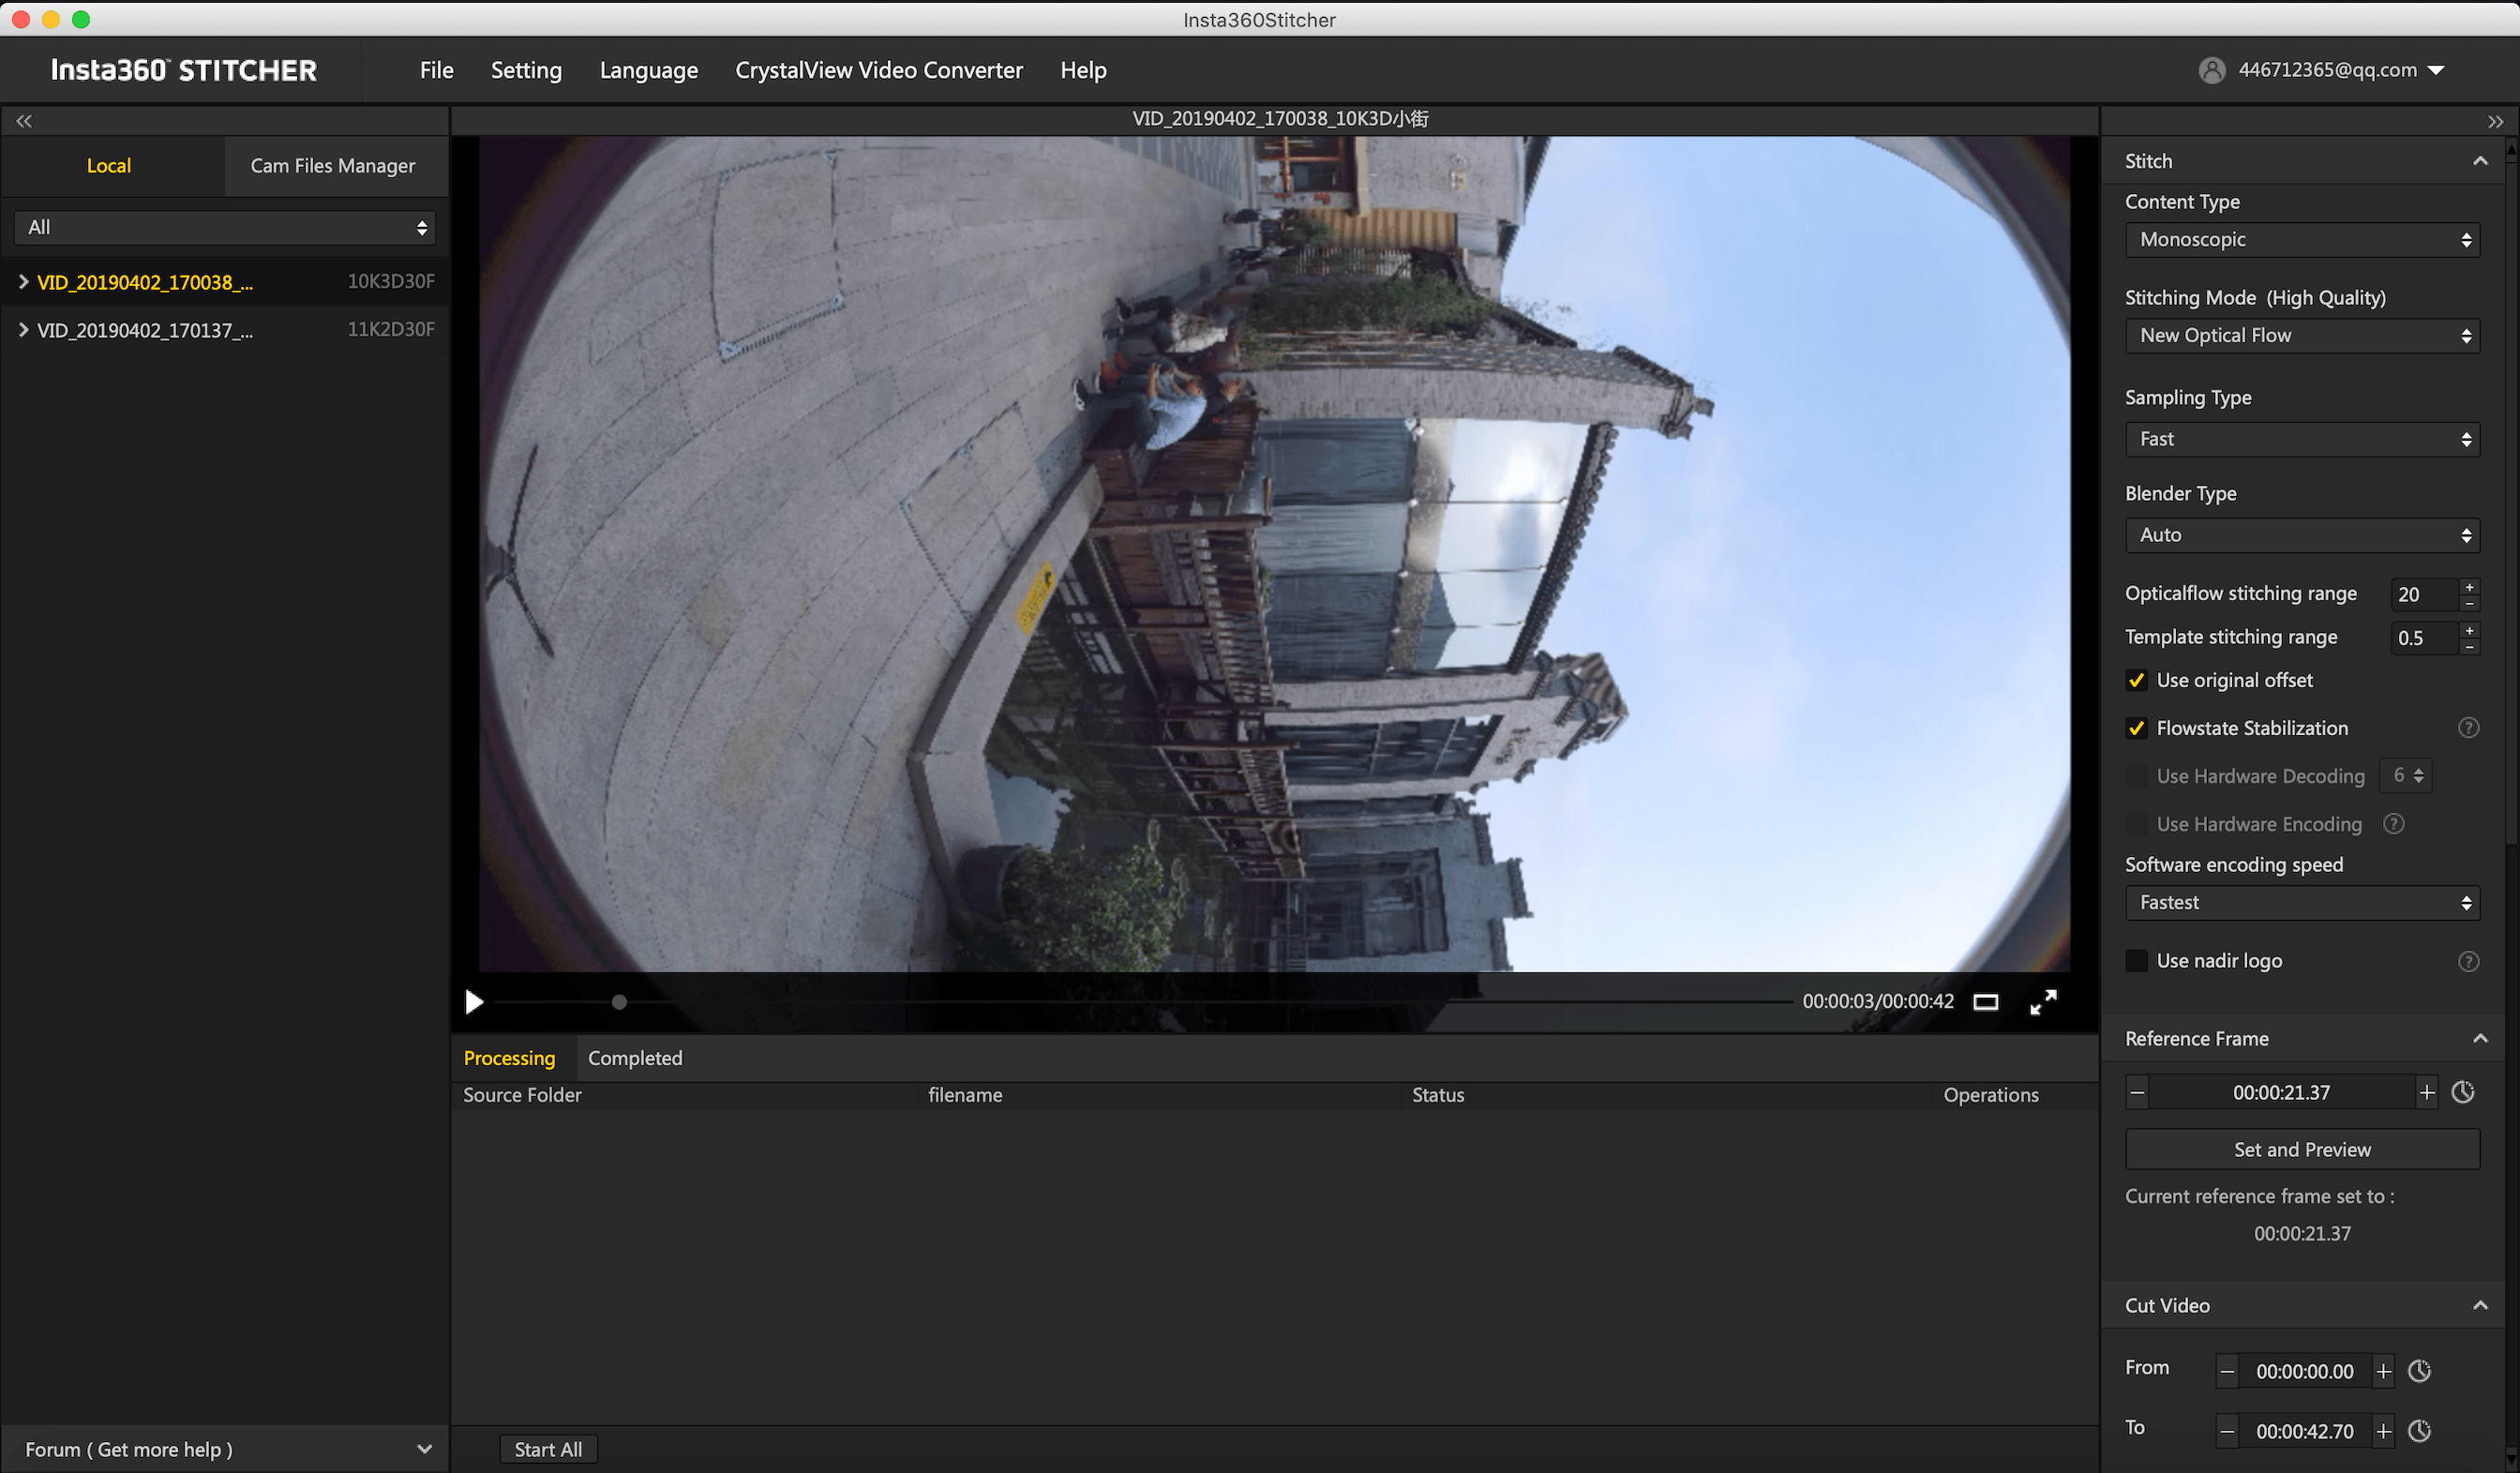
On the top is the menu bar: File, Settings, Language, Help. You can find functions of file import, google street view upload, log display, preference settings (hardware decoding or software decoding) , hardware performance test, language settings, log upload, etc.
On the left is a list of files. You can drag folders directly to import files. (Please refer to 1.1.8 for the instructions of how to import files from multiple storage cards in Titan)
The official forum is shown at the bottom left, which provides latest software information, tutorials, technical discussions, feedback and suggestions to Insta360.
In the middle is real time monitor window, supporting the playback of the file in any lens.
Below is task status bar, where you can see the stitching process and check what has been done.
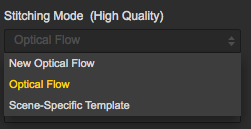
In the upper right is stitching setting area, where you can set up stitching Content Type (Monoscopic and Stereo) and Stitching Mode (optical flow and template stitching). Sampling type and Blender Type generally have default settings.
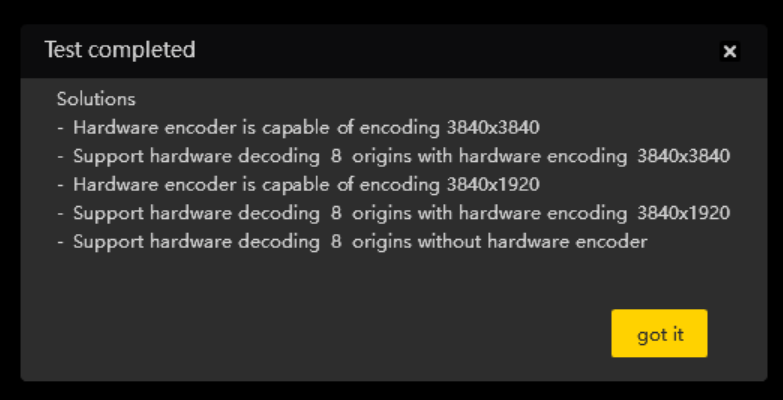
Hardware performance testing
Because video stitching has high requirements on computer performance, it is suggested that speed test should be carried out first before using Stitcher. Select hardware performance test in the settings, and the test will take a while.

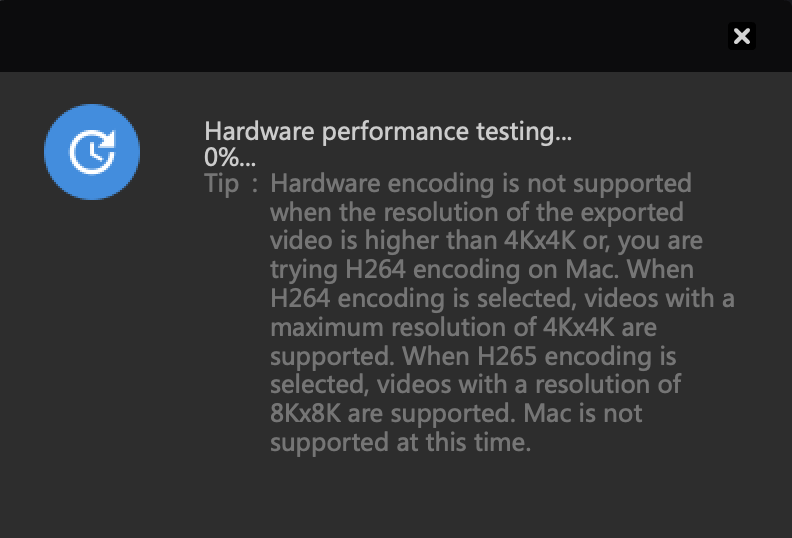
After testing, results for computer performance will be provided for your reference.
Stitching step
Import a video folder
Content types include Monoscopic, Stereo (Left Eye on Top) and Stereo (Right Eye on Top).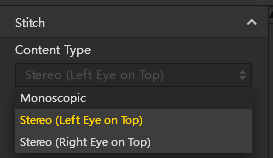
For Stitching Mode, you can select new optical flow and optical flow to calculate new template according to current picture.
Optical Flow: basic optical flow algorithm, general stitching speed.
New Optical Flow: an increase of nearly 3 times of stitching speed on original basic optical flow but few scenes can achieve less stitching effect than basic optical flow. It is suggested to try basic optical flow and compare effects when you feel dissatisfied about the stitching effect of new optical flow.
Scene-specific Template: speed is fastest but it is not optical flow stitching, so it has limited effect when there’s parallax error and in near distance.
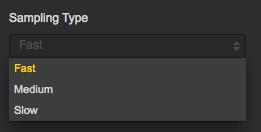
As for Sampling Type, if the camera is still static then three sampling types are not very different from each other. If the camera is moving, sampling with slower speed can obtain better image quality which is commonly used in video stitching.
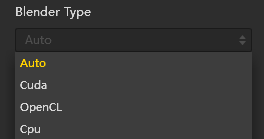
Blender Type is generally automatically chosen by the computer.
CUDA: if the computer use NVIDIA graphics cards, you have to select NVIDIA CUDA technology to enable hardware acceleration.
OpenCL: if the computer doesn’t use NVIDIA graphics cards, we also provide hardware acceleration through OpenCL.
CPU: non hardware acceleration, pure CPU computing.
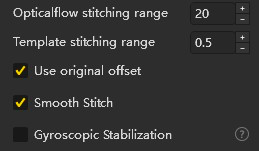
Optical Flow Stitching Blender Angle: This is used to adjust and calculate the image area of optical stitching. The larger the angle is, the slower the speed is, the better the stitching effect is, and the shorter the nearest stitching distance is. Generally, it’s best to set the maximum angle as far as possible (the maximum angle of 2D video is 20, and the maximum angle of 3D video is 16).
Template Stitching Blender Angle: Adjusting the width of the stitching seam and increasing the stitching angle properly can make the transition at the seam smoother, but may produce overlap.
Stitching Smooth Transition: By eliminating the inter-lens chromatic aberration by using an algorithm, the overall brightness and color of the picture remains the same.
Hardware decoding and encoding are selected according to the resolution and computer performance of the derived video. Hardware decoding is not supported when the output video resolution is higher than 4K*4K or when H.265 encoding is used on MAC.
Software encoding speed means the higher encoding speed you choose, the faster the stitching is, but quality details may lose.
For example, for some static scenes, fast encoding speeds can also get good quality, but mosaic may appear for fast encoding of moving scenes in terms of screen details. This requires users to make choices according to content scenarios, stitching quality and stitching speed.
Please note that if you select Cuda or OpenCL hardware acceleration, there is no software encoding speed option because it uses hardware coding in these modes.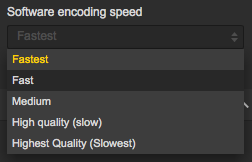
Setting reference frame in video stitching is especially important. Stitcher applies the stitching parameters of the selected reference frame to to the whole stitching process.Therefore, when selecting a reference frame, one should select the frame in time interval of output time which should be at important moment of the video, such as the moment when the camera is at the closest distance between characters, or setting one frame as key frame in high-proportion scene, like scenery shooting.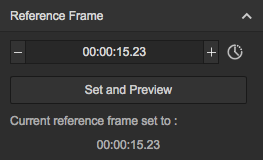
When preview stitching effect, you can change reference frame, adjust screen level, center angle of view and make simple color correction. Zenith Optimization function can optimize scenes with regular lines at top, such as air conditioning exhaust vents on the ceiling. Please note that there is no function of adjusting screen level and center angle in 3D video stitching.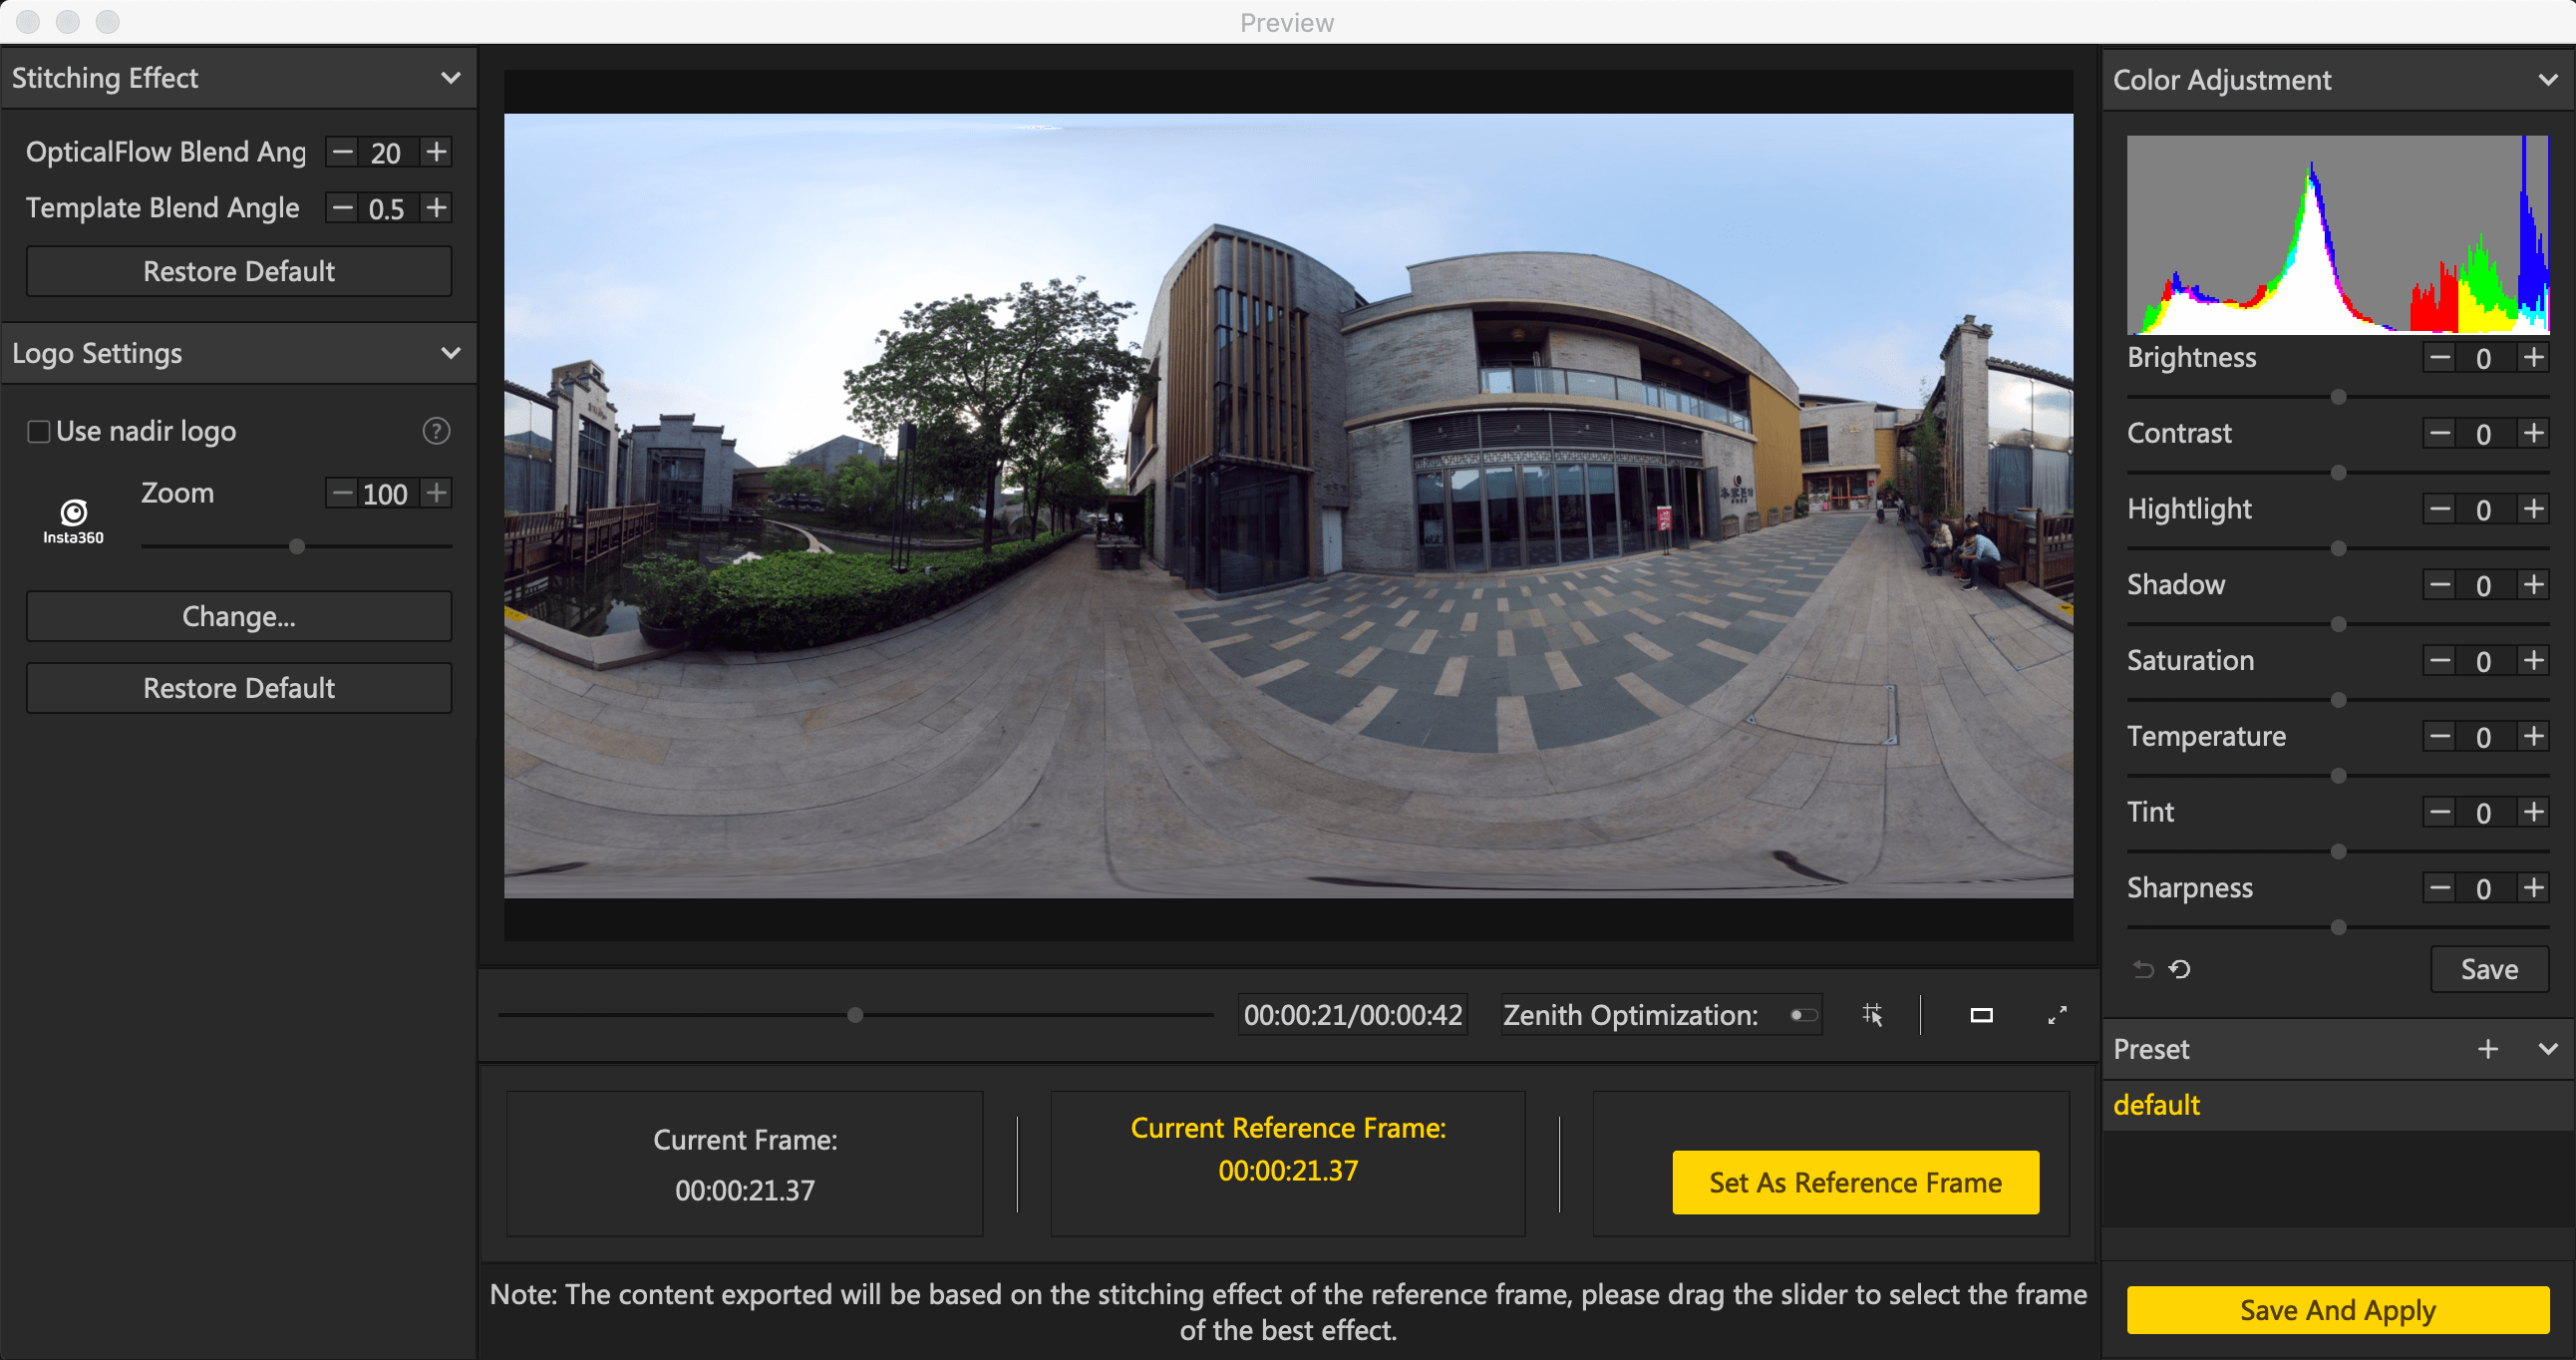
Selecting time periods that need to be exported can save time and computer resources to export valid snippet, which is convenient for post editing.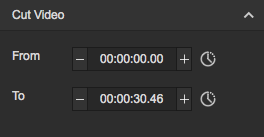
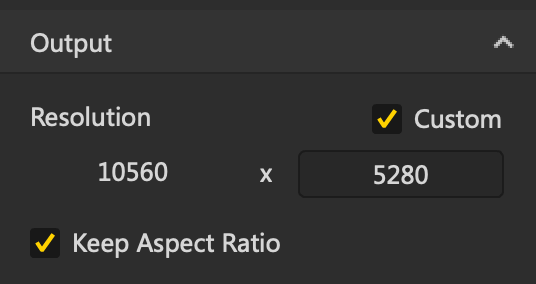
Resolution can be customized except for preset resolutions.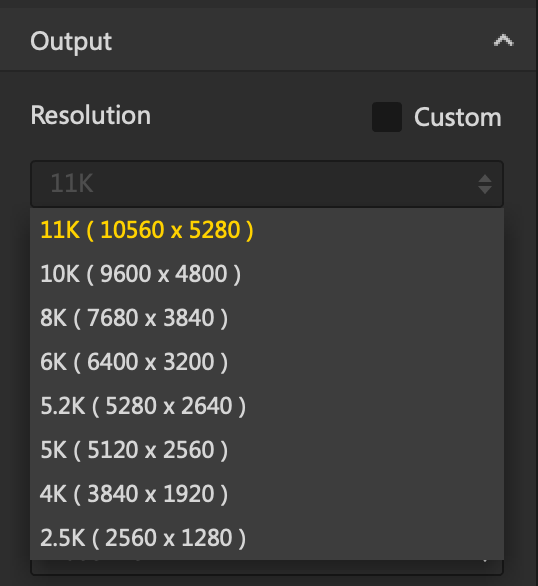
Stitcher supports coding of both H.264 and H.265. H.265 encoding has better quality and need less storage space, but it is not well supported by many VR player and editing software. Especially when editing the video, H.265 encoding has high requirements on hardware.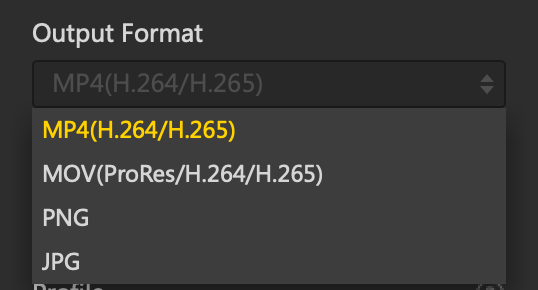
Profile is an optional configuration parameter for H.264 encoding. The higher the compression ratio of Baseline, Main and High, the higher the requirement on the decoding performance of players.
Generally speaking, Stitcher can automatically match preset bitrate, based on resolution settings. 455Mbps is recommended for 11K 2D panorama content, while 750Mbps for 10K 3D panorama content.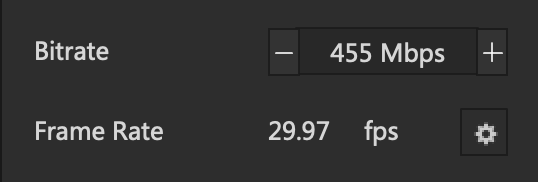
Audio type: if Spatial audio is selected, the video will have 4 sound tracks. If Normal audio is selected, there will be only stereo orbit.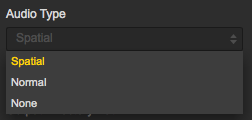
You can also choose to export audio files separately.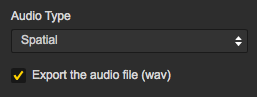
Output directory path and output file name can be set. When setup completes, you can add to batch list for pending processing or stitch immediately.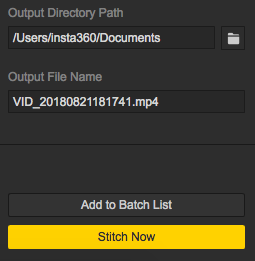
The stitching process can be checked in stitching taskbar. During the process of panoramic video stitching, stitching can also be terminated, and the software will automatically save the parts already stitched.
.svg)

