Online Chat
Office Hours: 24/7
Start Chat

How to upgrade firmware with booting?
Please make sure that battery is not lower than 30% and is connected to power adapter. The camera may be booted by pressing "POWER" key under the power-off state.
Insert SD card that has the latest version of firmware into the camera.
Please make sure that you have deleted the previous firmware bin file, and keep the file name (Insta360_Titan_Update.bin) of newly downloaded firmware unchanged; otherwise the system may not be able to automatically identify the latest firmware and thus cannot upgrade regularly.
Restart the camera after finishing all preparations mentioned above; then the camera will enter upgrading stage to upgrade the firmware. Once the work has completed, it will restart again.
You can click "Info" in setting to check the version of your camera and Titan Serial Number.
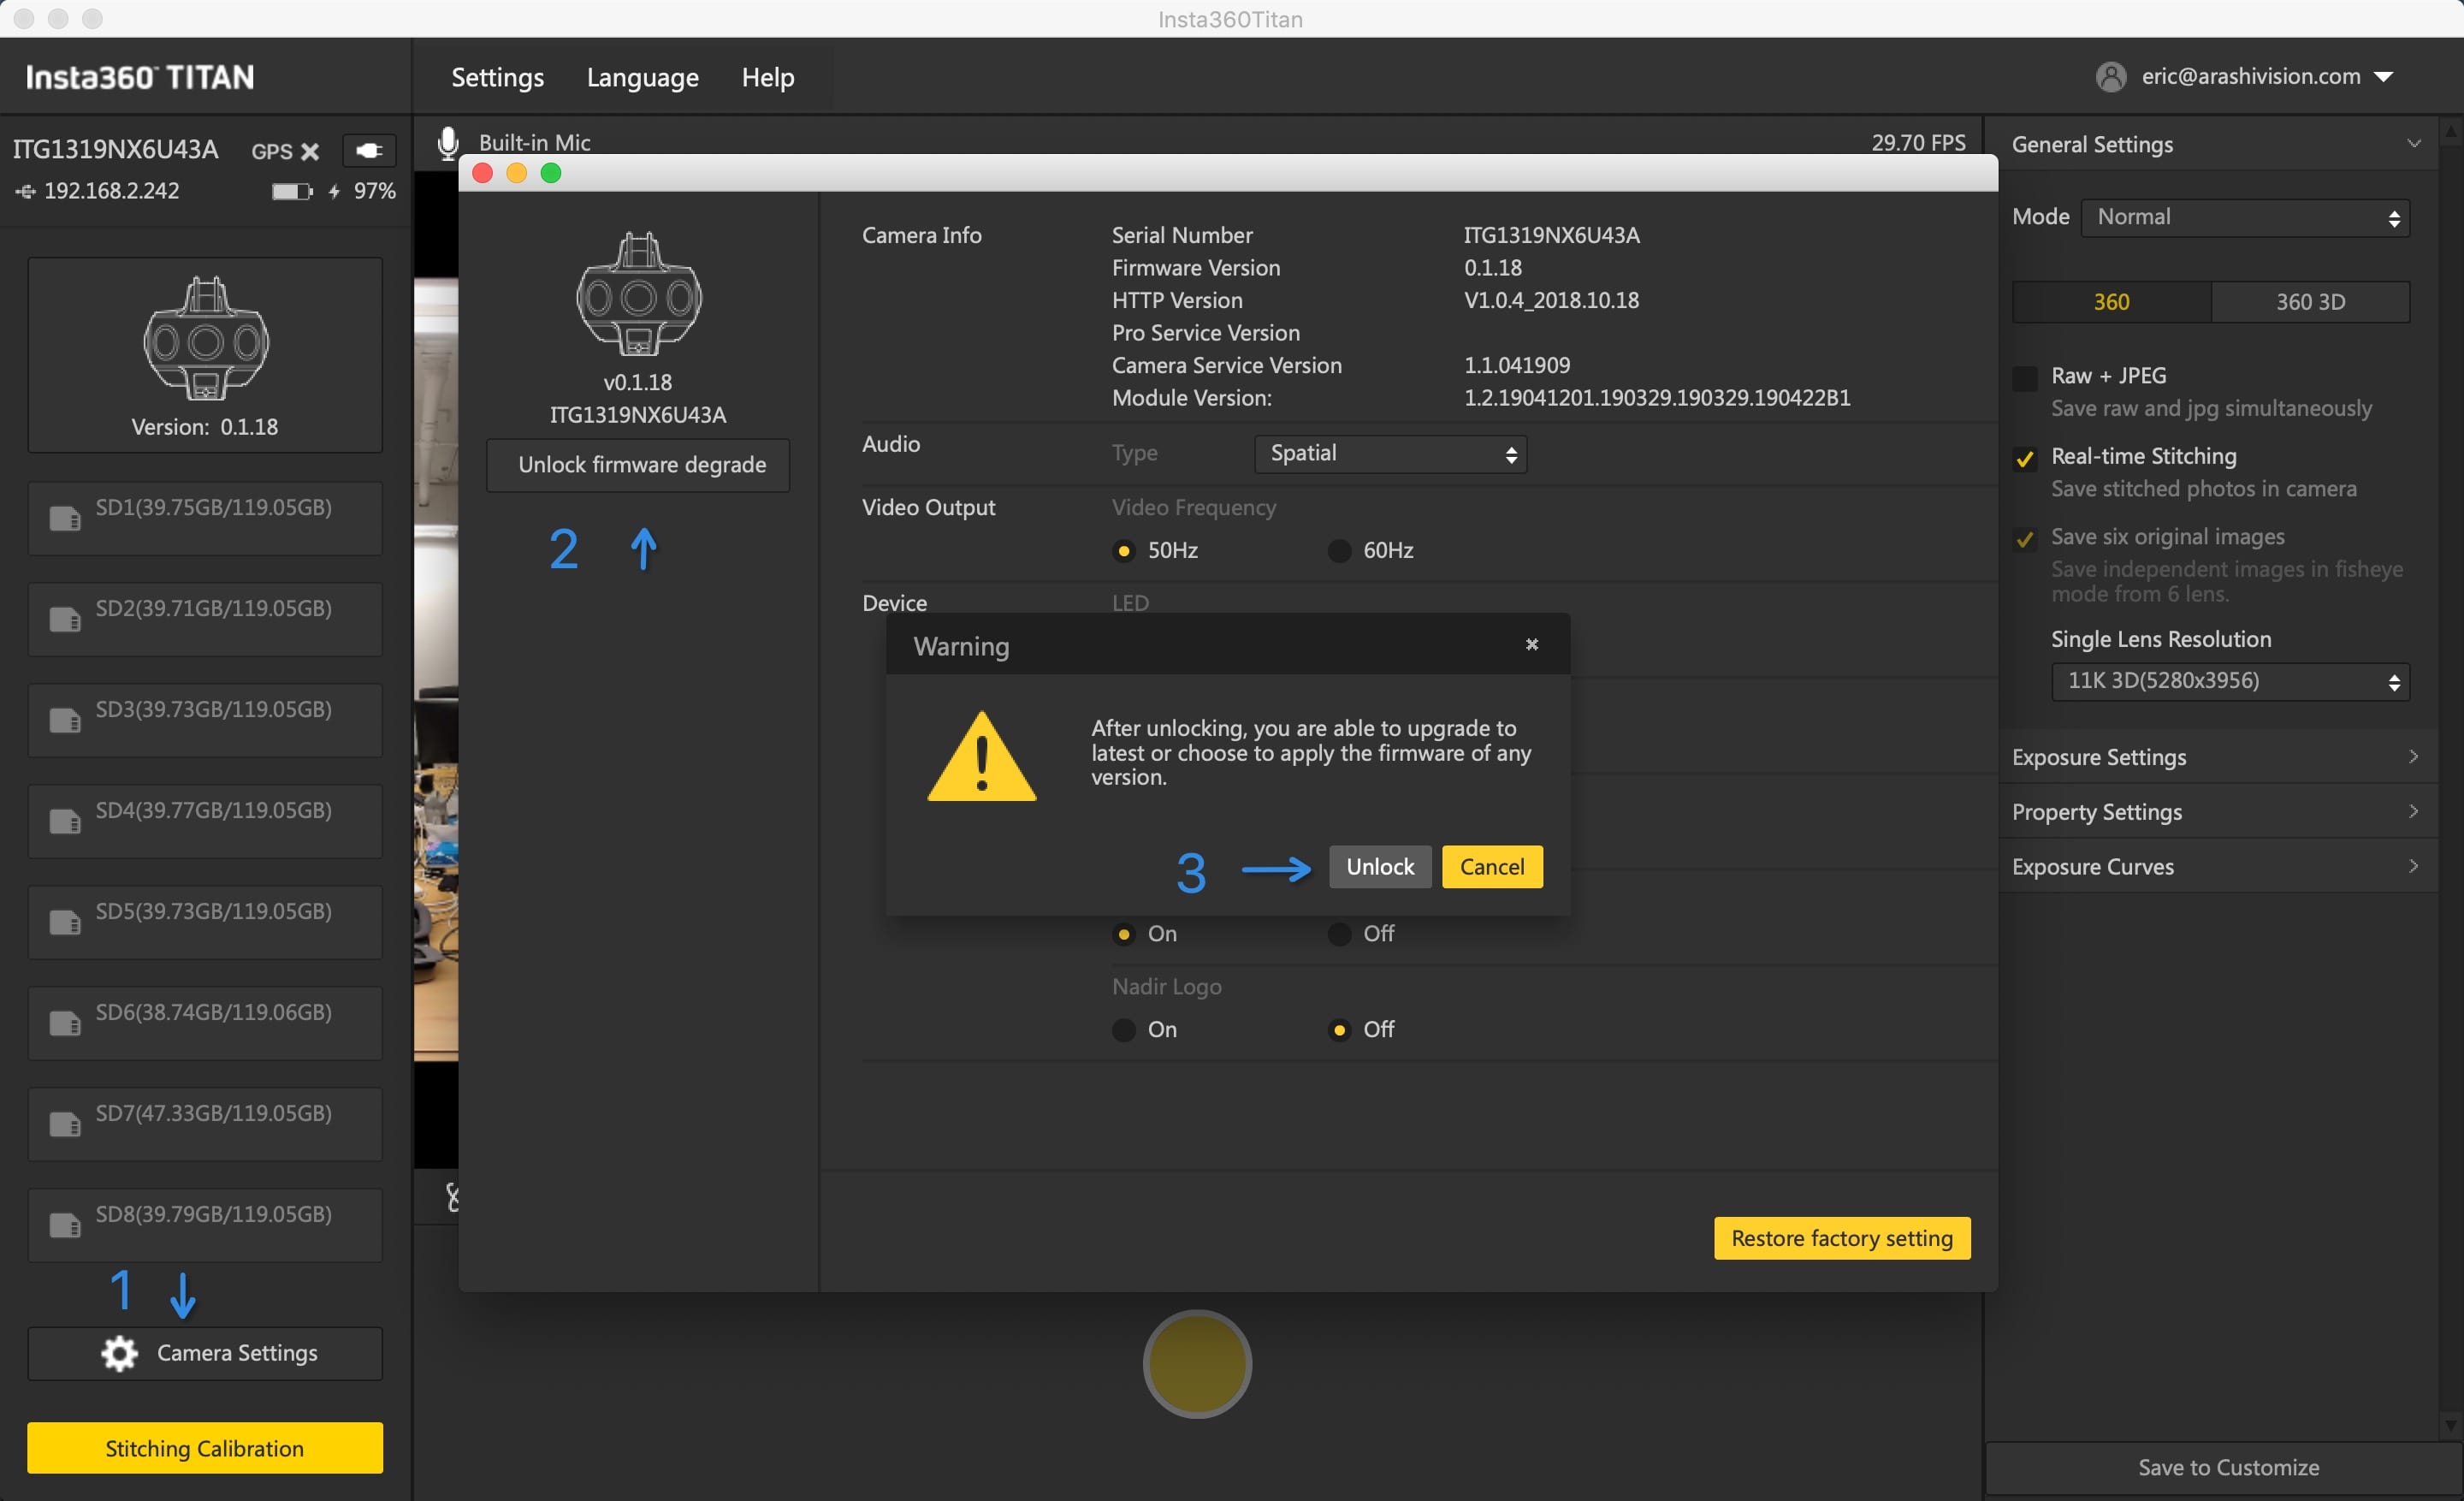
How to downgrade firmware?
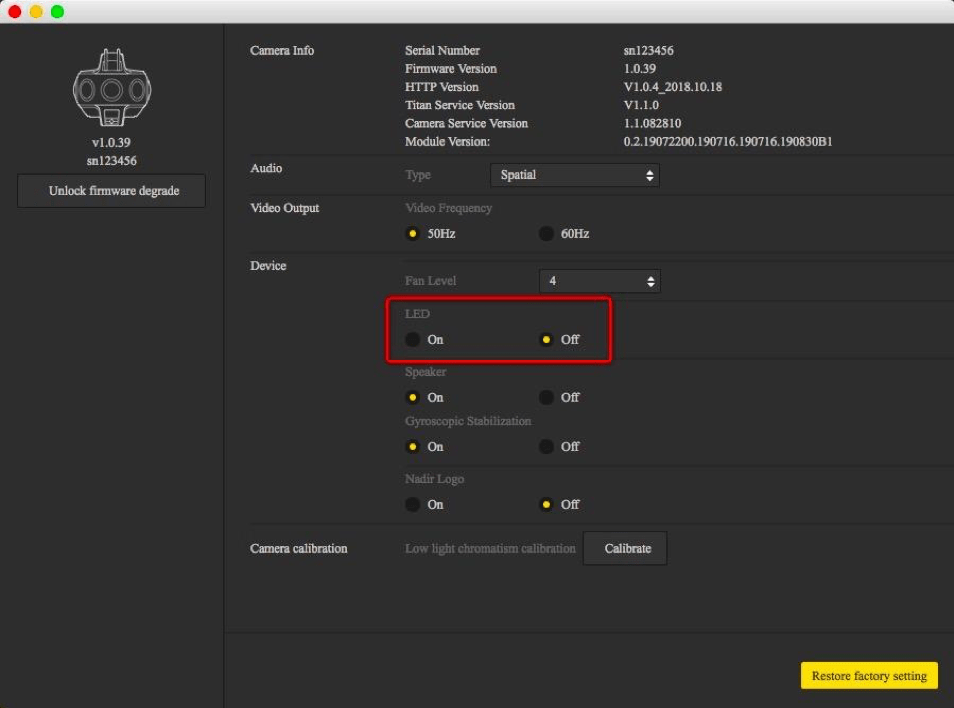
If you want to degrade from Beta firmware to the lower version firmware, please unlock the degrade limit of your camera's firmware first. Follow the steps as below:
Use the Titan PC software to connect to the current camera.
When the camera is connected, open "Camera settings" and click "Unlock firmware degrade" under the camera icon.
Once unlocked, the camera's firmware can be updated to any version via regular updating.
In order to ensure that Titan can be in optimum working condition, the recommended working environment temperature range is 0-40 ℃.
Because Titan itself needs heat dissipation to maintain normal work, the camera is equipped with heat hole, so it cannot be waterproof and dustproof. Therefore, do not place Titan in excessive humidity or excessive dust environment, to avoid damage the machine and make it unavailable.
Frequent recording of high-resolution video will lead to accumulation of data fragments generated by multiple files, affecting the card speed. So, it is recommended to periodically format storage devices, especially before important shooting.
Titan features standby formatting and is easy to operate, and camera formatting saves hours and is more completed than using computer software. It is strongly recommended that cameras be used to format storage devices.
Detailed operation steps are shown below.
Select camera settings on the screen menus, sequentially, Settings -Storage-Storage Space
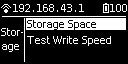

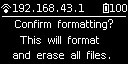
Under this menu, you can view the amount of available capacity / residual capacity information of storage devices inserted in the current camera. Press "Power" to click on a storage device into the next step to be formatted, and then the camera will remind you whether to proceed with formatting, continue to click on "Power" to confirm and then it will start to format the selected storage device. (Please note that before formatting, you must backup the original data on storage devices and the data cannot be restored once formatting completes.)
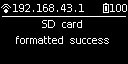
(1) Once formatted, if you are prompted by Formatted success, it means that formatting succeeds.
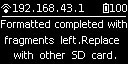
(2) If it shows "Formatted completed with fragments left", it means formatting is completed, but there are still some file fragments existing. The SD card cannot be formatted into the required format, please contact the manufacturer of the card to fix it or replace it with a new card.
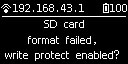
Once formatting is completed, if it prompts "Failed", it represents a format failure. Please check whether the change storage device’s write-protection is turned on or it has been corrupted. Please try formatting again after you remove write-protection.
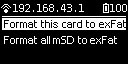
Titan camera can format the 8 SD cards together at the same time. Choose any one of the SD cards and proceed to the next step. There will be two selections for you to choose: format this card to exFat or format all devices to exFat.
If in the operation of Titan, the camera body is overheating, please stop shooting and place it in ventilated environment. After waiting for the camera temperature becomes normal, you can use it again, or use other equipment to cool it down.
Noise problem:
Please confirm whether the specification of the connected microphone is Mic-in, because currently Titan supports only Mic-in devices; moreover, if access devices are line-out, noise may occur;
No-sound problem:
Please confirm whether the connected microphone is four-part form. Currently, Titan only supports 3.5 mm two-part single channel, three-part dual track, but not support four-part form; please also confirm whether the microphone is mic-in.
Currently, four microphones of Titan have positions at the same level without vertical sound, so one less channel is normal.
If it is recorded indoors, GPS signal is weak and easily affected by object shelter.
Additionally, GPS is vulnerable to electronic devices. Please maintain a certain distance from other electronic devices when shooting with Titan.
Timelapse photography uses gyro corrections, which will cause jitter; if gyro correction is not used, please verify whether it is due to floor jitter or tripod instability.
After updating your firmware from 1.0.34 to version 1.1.0, 60fps may be used in low light environments, and chromatic aberration may occur between the images of the various lens of the camera.
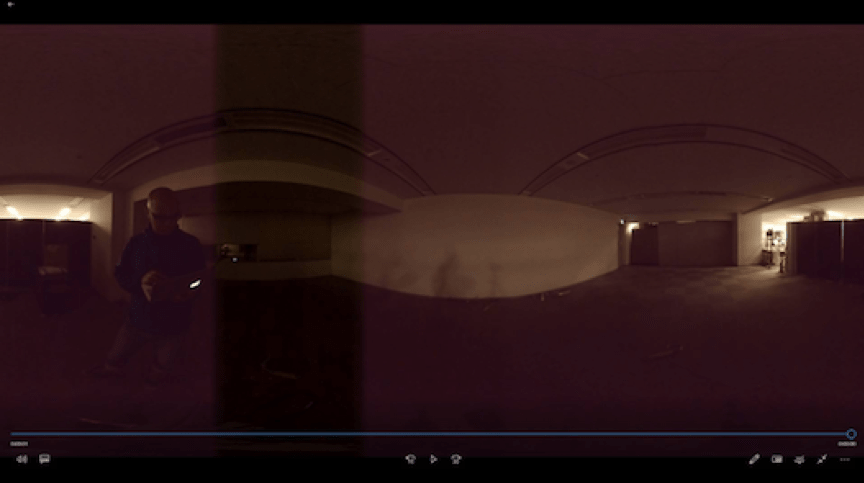
When such situation as the picture above occurs, the following methods can be used to solve the problem:

.svg)

