1.1.5 Connection mode of the camera
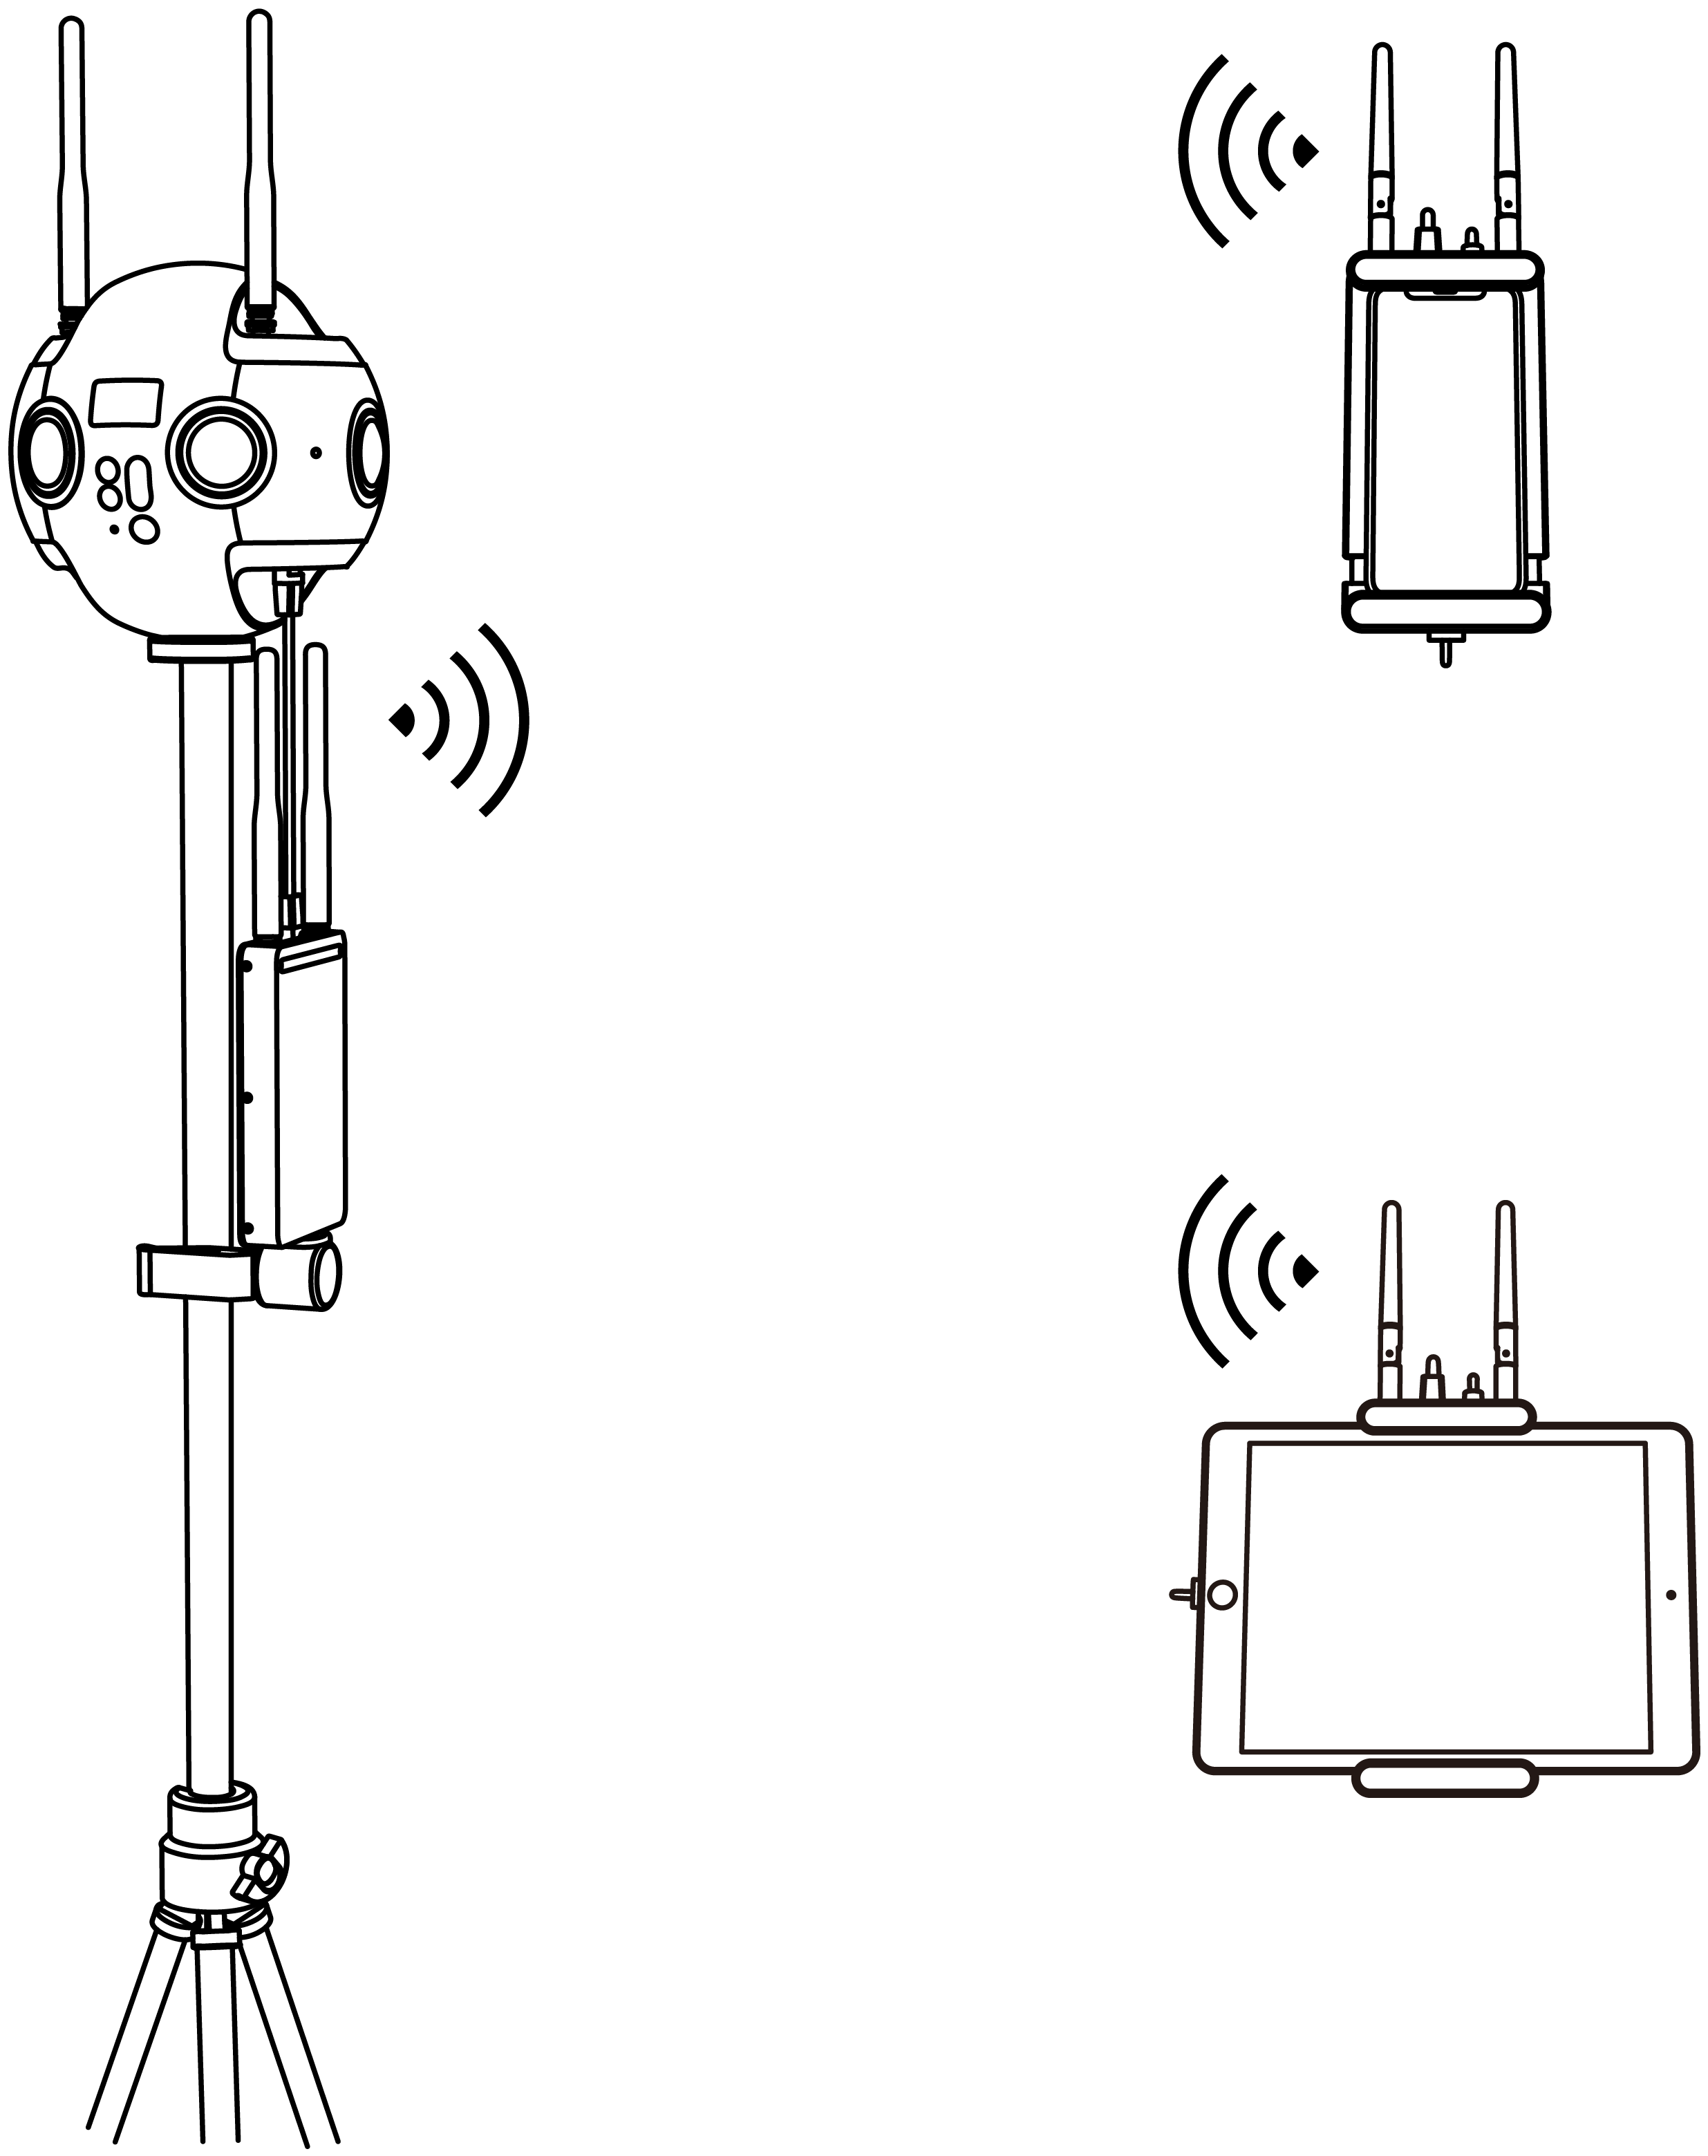
Insta360 Pro 2 provides a variety of camera connection modes, which can be divided into three types, namely, Farsight, wired connection, and Wi-Fi connection. It can be connected to a computer, iPad or mobile phone, for the remote control of the camera. Among them, the wired connection is achieved through a network cable or local area network (LAN). It is strongly recommended that the camera be remotely controlled through Farsight, which enjoys the most stable signal and the farthest communication distance.
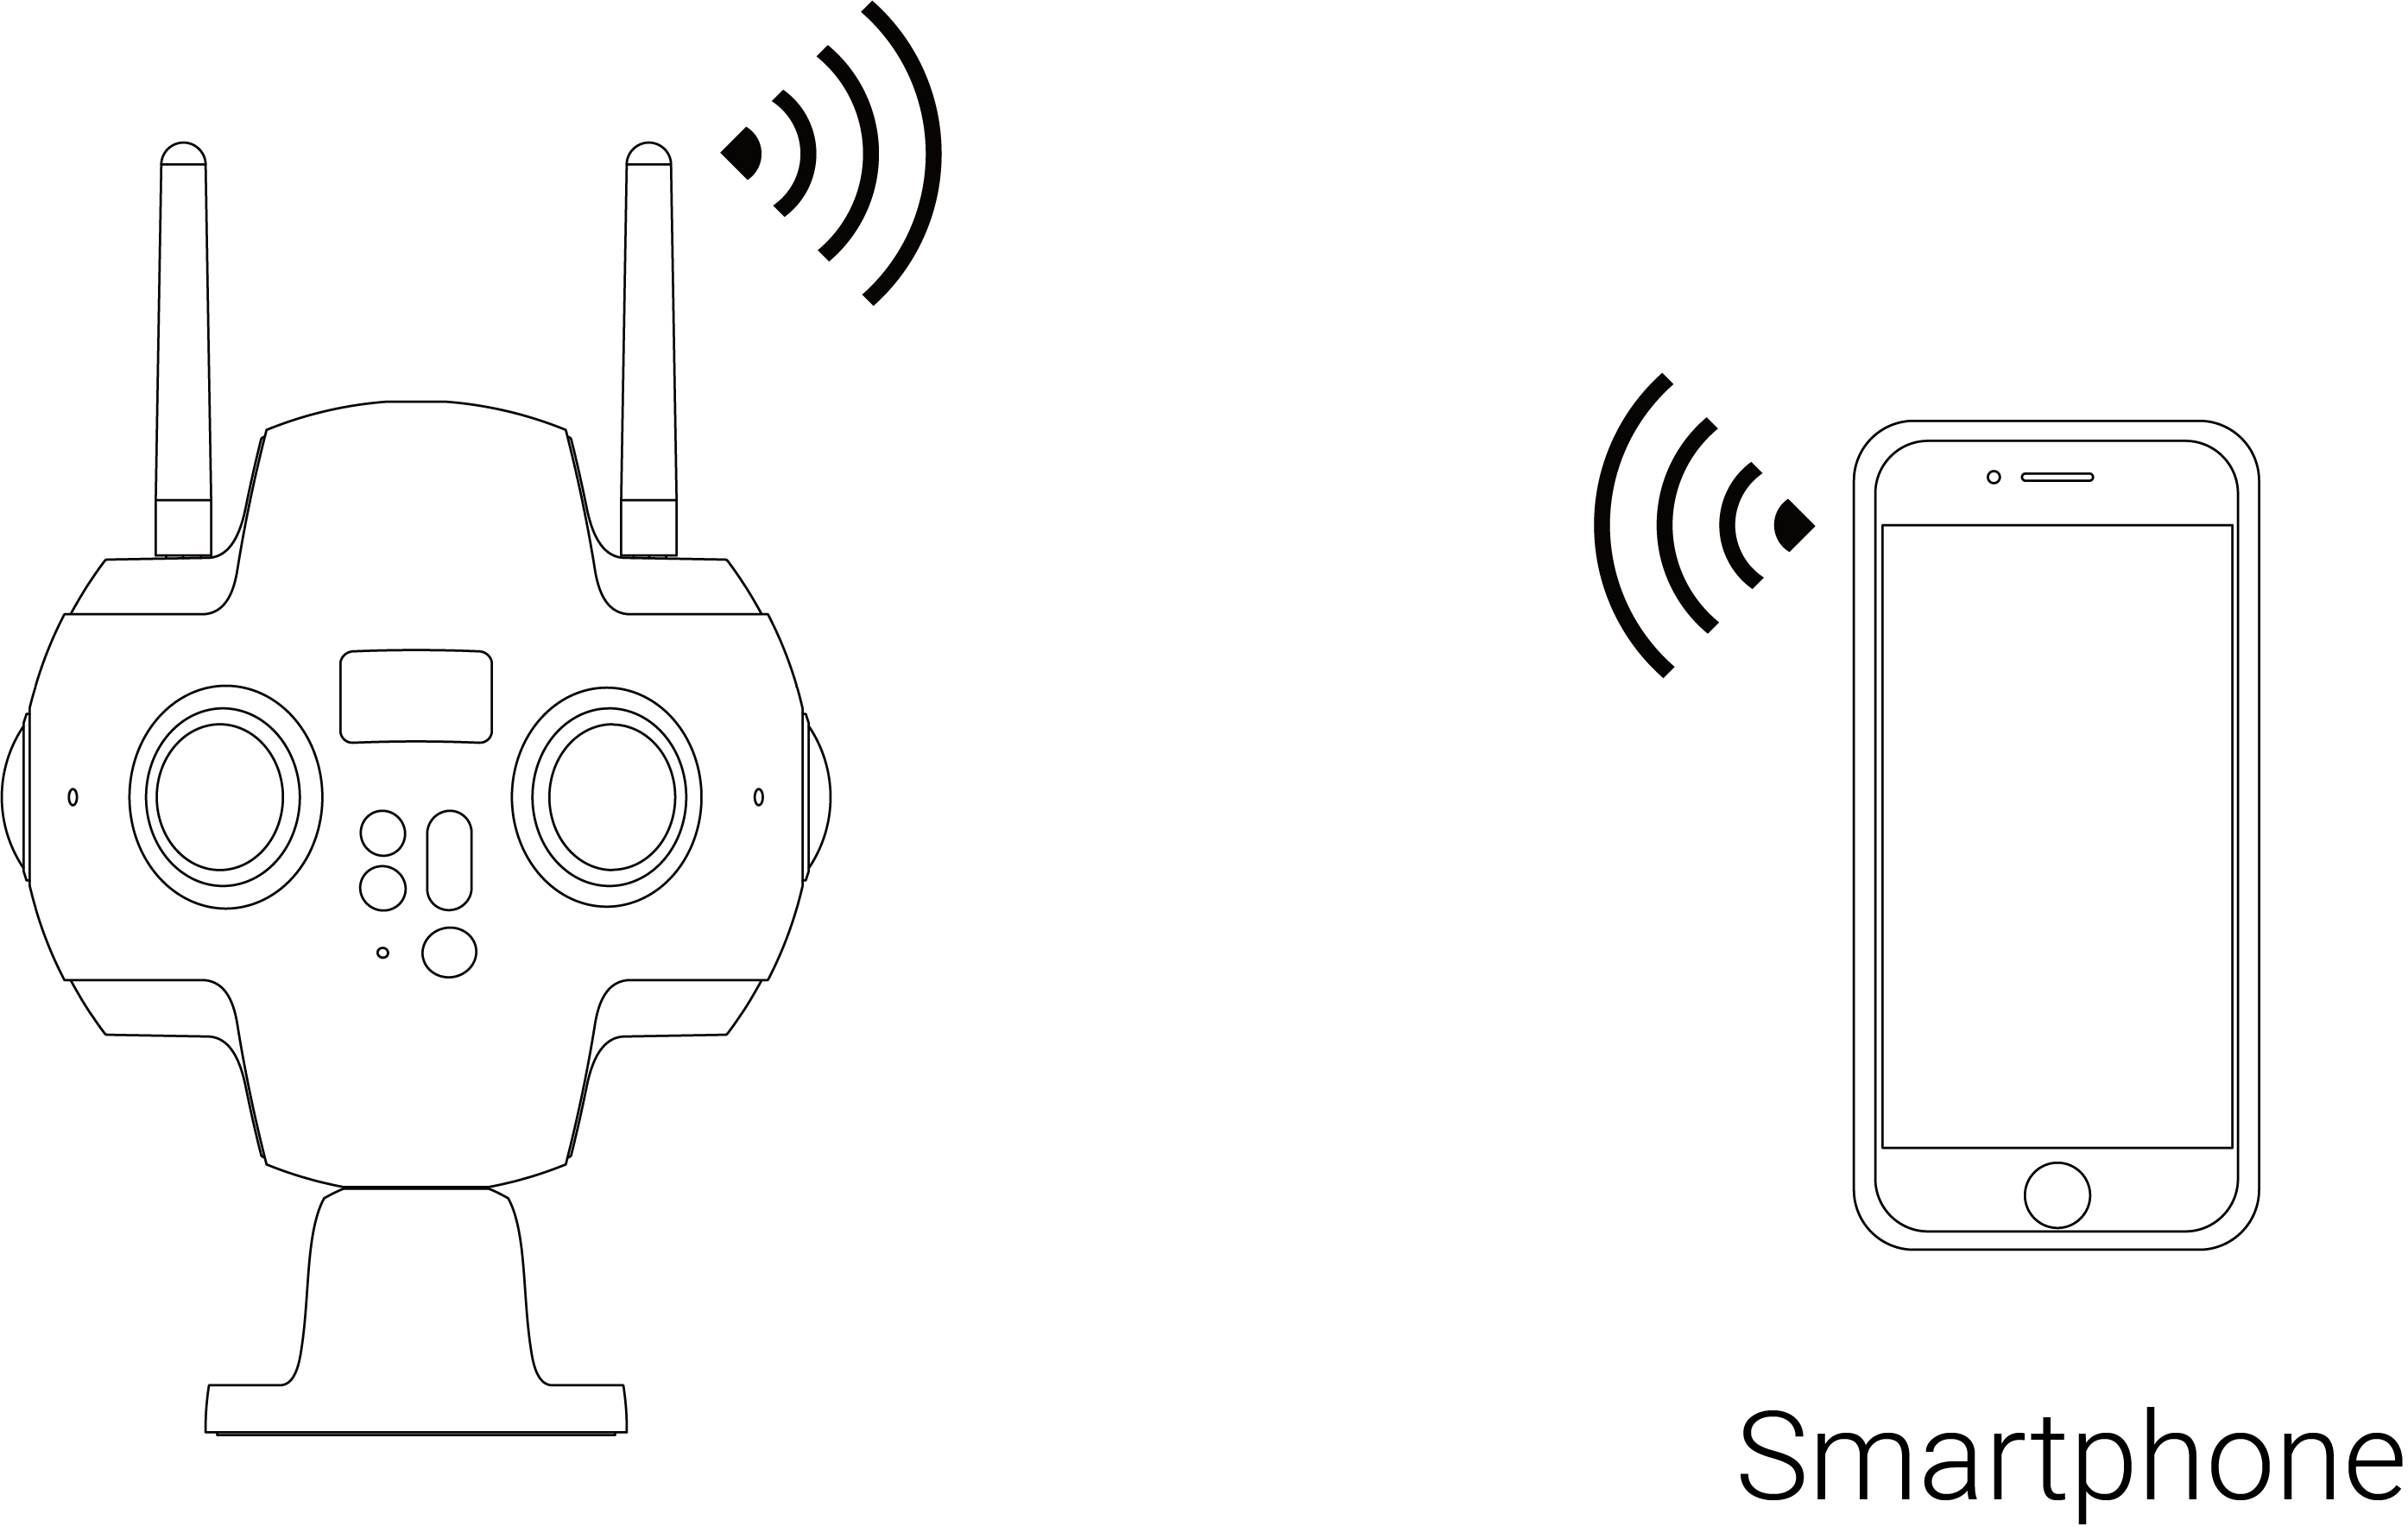
If there is no Farsight device, Wi-Fi connection is more convenient and commonly used. The mobile app provides two ways of camera connectivity: LAN connection and AP hotspot connection of camera. Each of these two ways has its own characteristics. Hotspot connection is convenient and fast, and the connection distance is usually 5m ~ 10m, which is suitable for outdoor and quick preview; however, if the LAN is stable enough and the signal coverage area is large, the LAN connection can be preferentially selected, for the safety range of the connection between the person and the camera is larger in theory.
These different connections are described in more details below:
Farsight connection
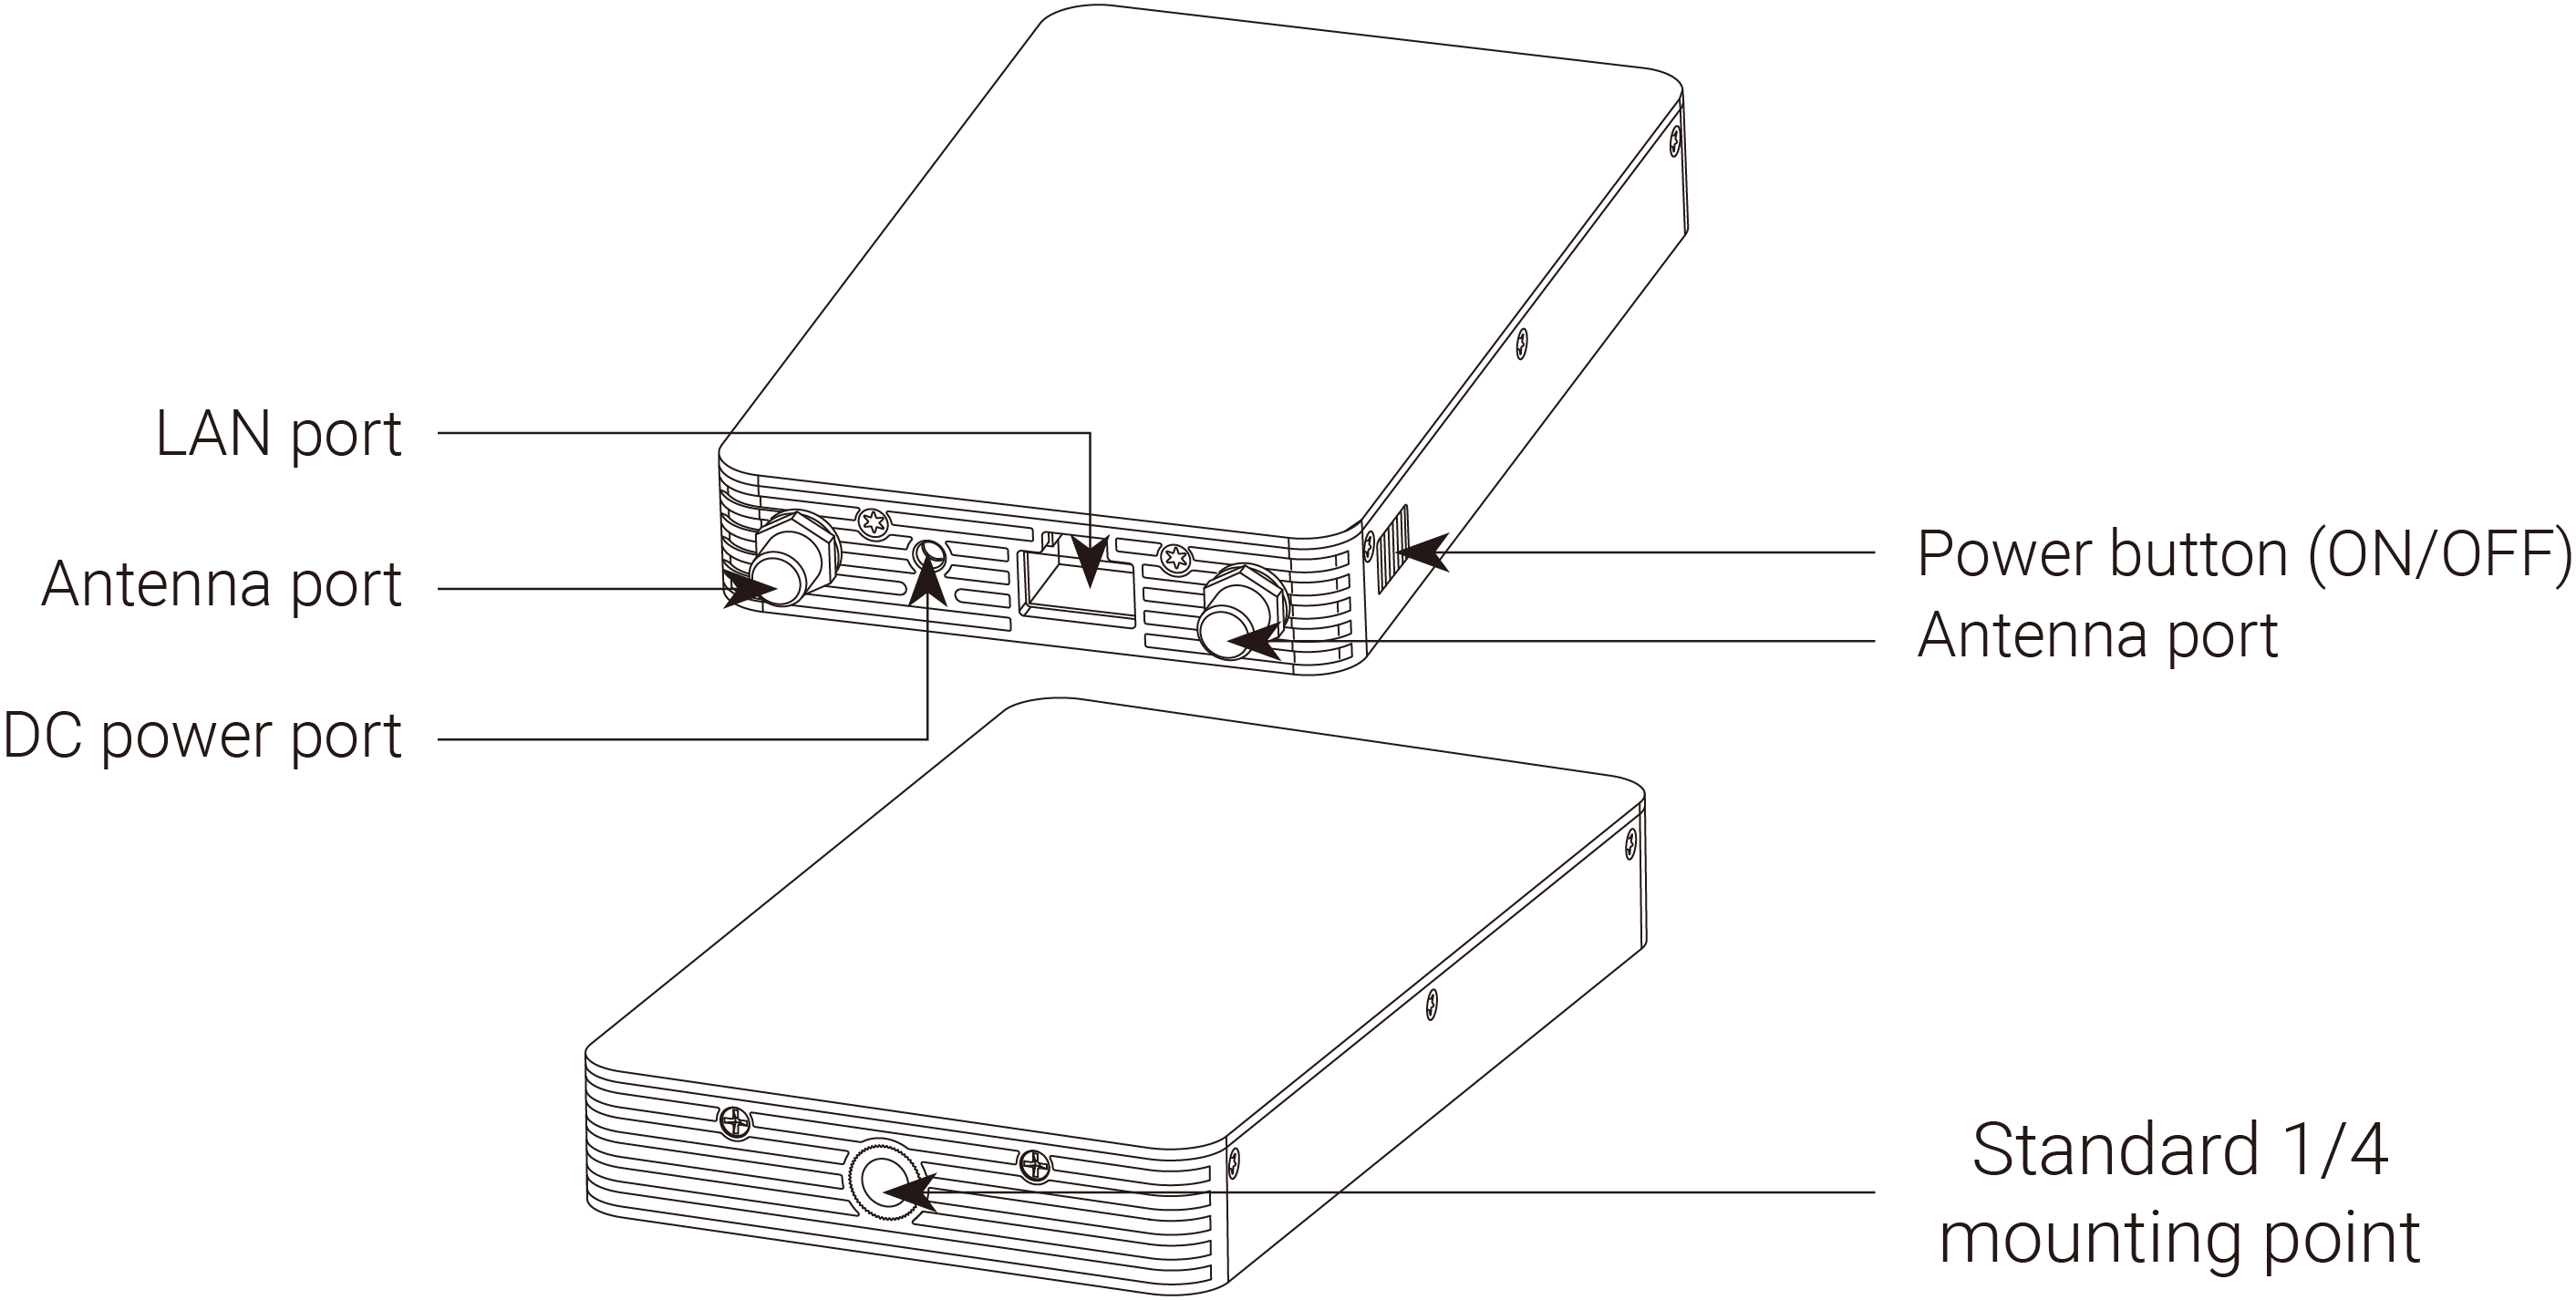
- Install antennas onto the Farsight’s transmitter and receiver respectively.
- Go to the Pro 2 camera Settings, set Ethernet to DHCP.

Please also turn off AP (WiFi) on the camera.

- Turn on the camera and Farsight transmitter. It takes 15 seconds to start after the transmitter is on.
- Connect the transmitter with the Pro 2 camera via network cable. Waiting for the display of IP address of 192.168.100.XXX on top of the camera screen, which represents a successful connection between camera and Farsight transmitter. If no required IP shows after waiting for a long time, please replug the cable until the displayed IP address meets the requirement. The transmitter can be fixed on a tripod with a clip given by the factory.
Farsight transmitter
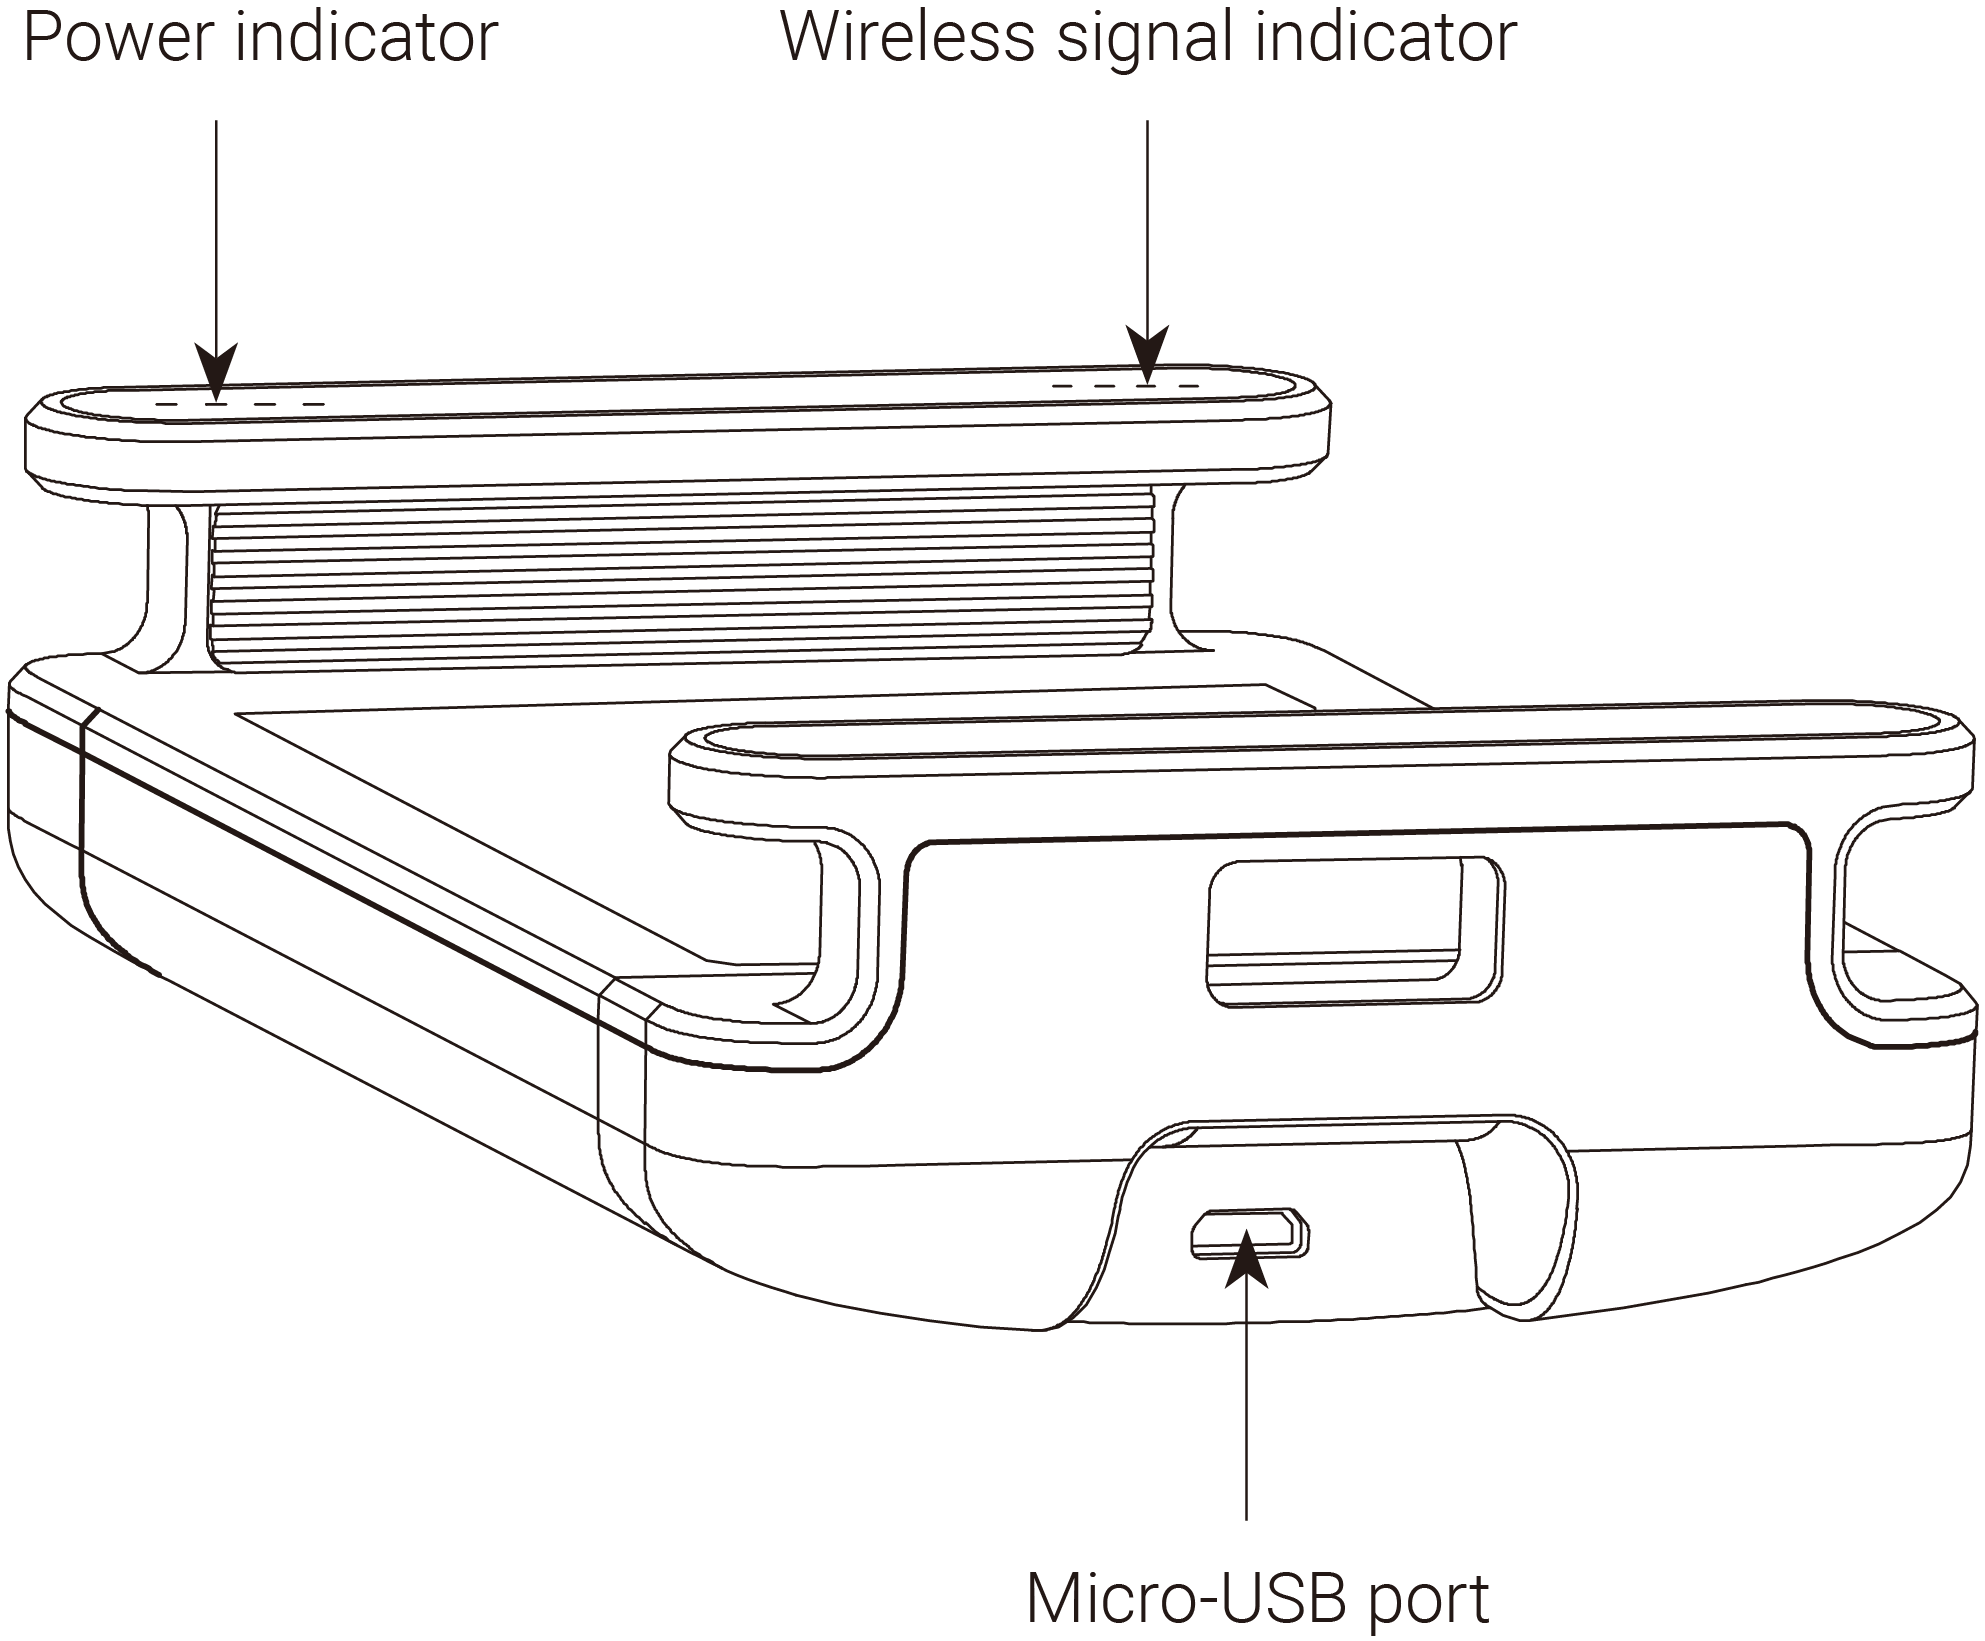
- Turn on the receiver, and connect the phone / iPad to the receiver through USB cable. Take iOS as an example. Wait about 15 seconds or so, the phone / iPad settings (generally in the system settings menu) will show "Ethernet" option, click to enter the interface of Ethernet settings. Set "conFig. IP" to automatic, and confirm whether the IP address is also 192.168.100.XXX. In most Android devices, there is no "Ethernet" option. The set-up is ready after connecting your devices to the receiver via USB cable. If you can’t connect, turn on your phone’s airplane mode and try again. Please refer to the Compatibility List below for the supported Android devices.
If there is no required IP available after waiting for a while, replug the USB cable and reconnect until the desired IP address is displayed.
If you want to connect the receiver to your computer, please use a network cable to connect. After connecting, set the computer network to DHCP, which can automatically obtain the IP address assigned by the receiver.
Farsight receiver - Micro USB port
Farsight receiver — antenna port
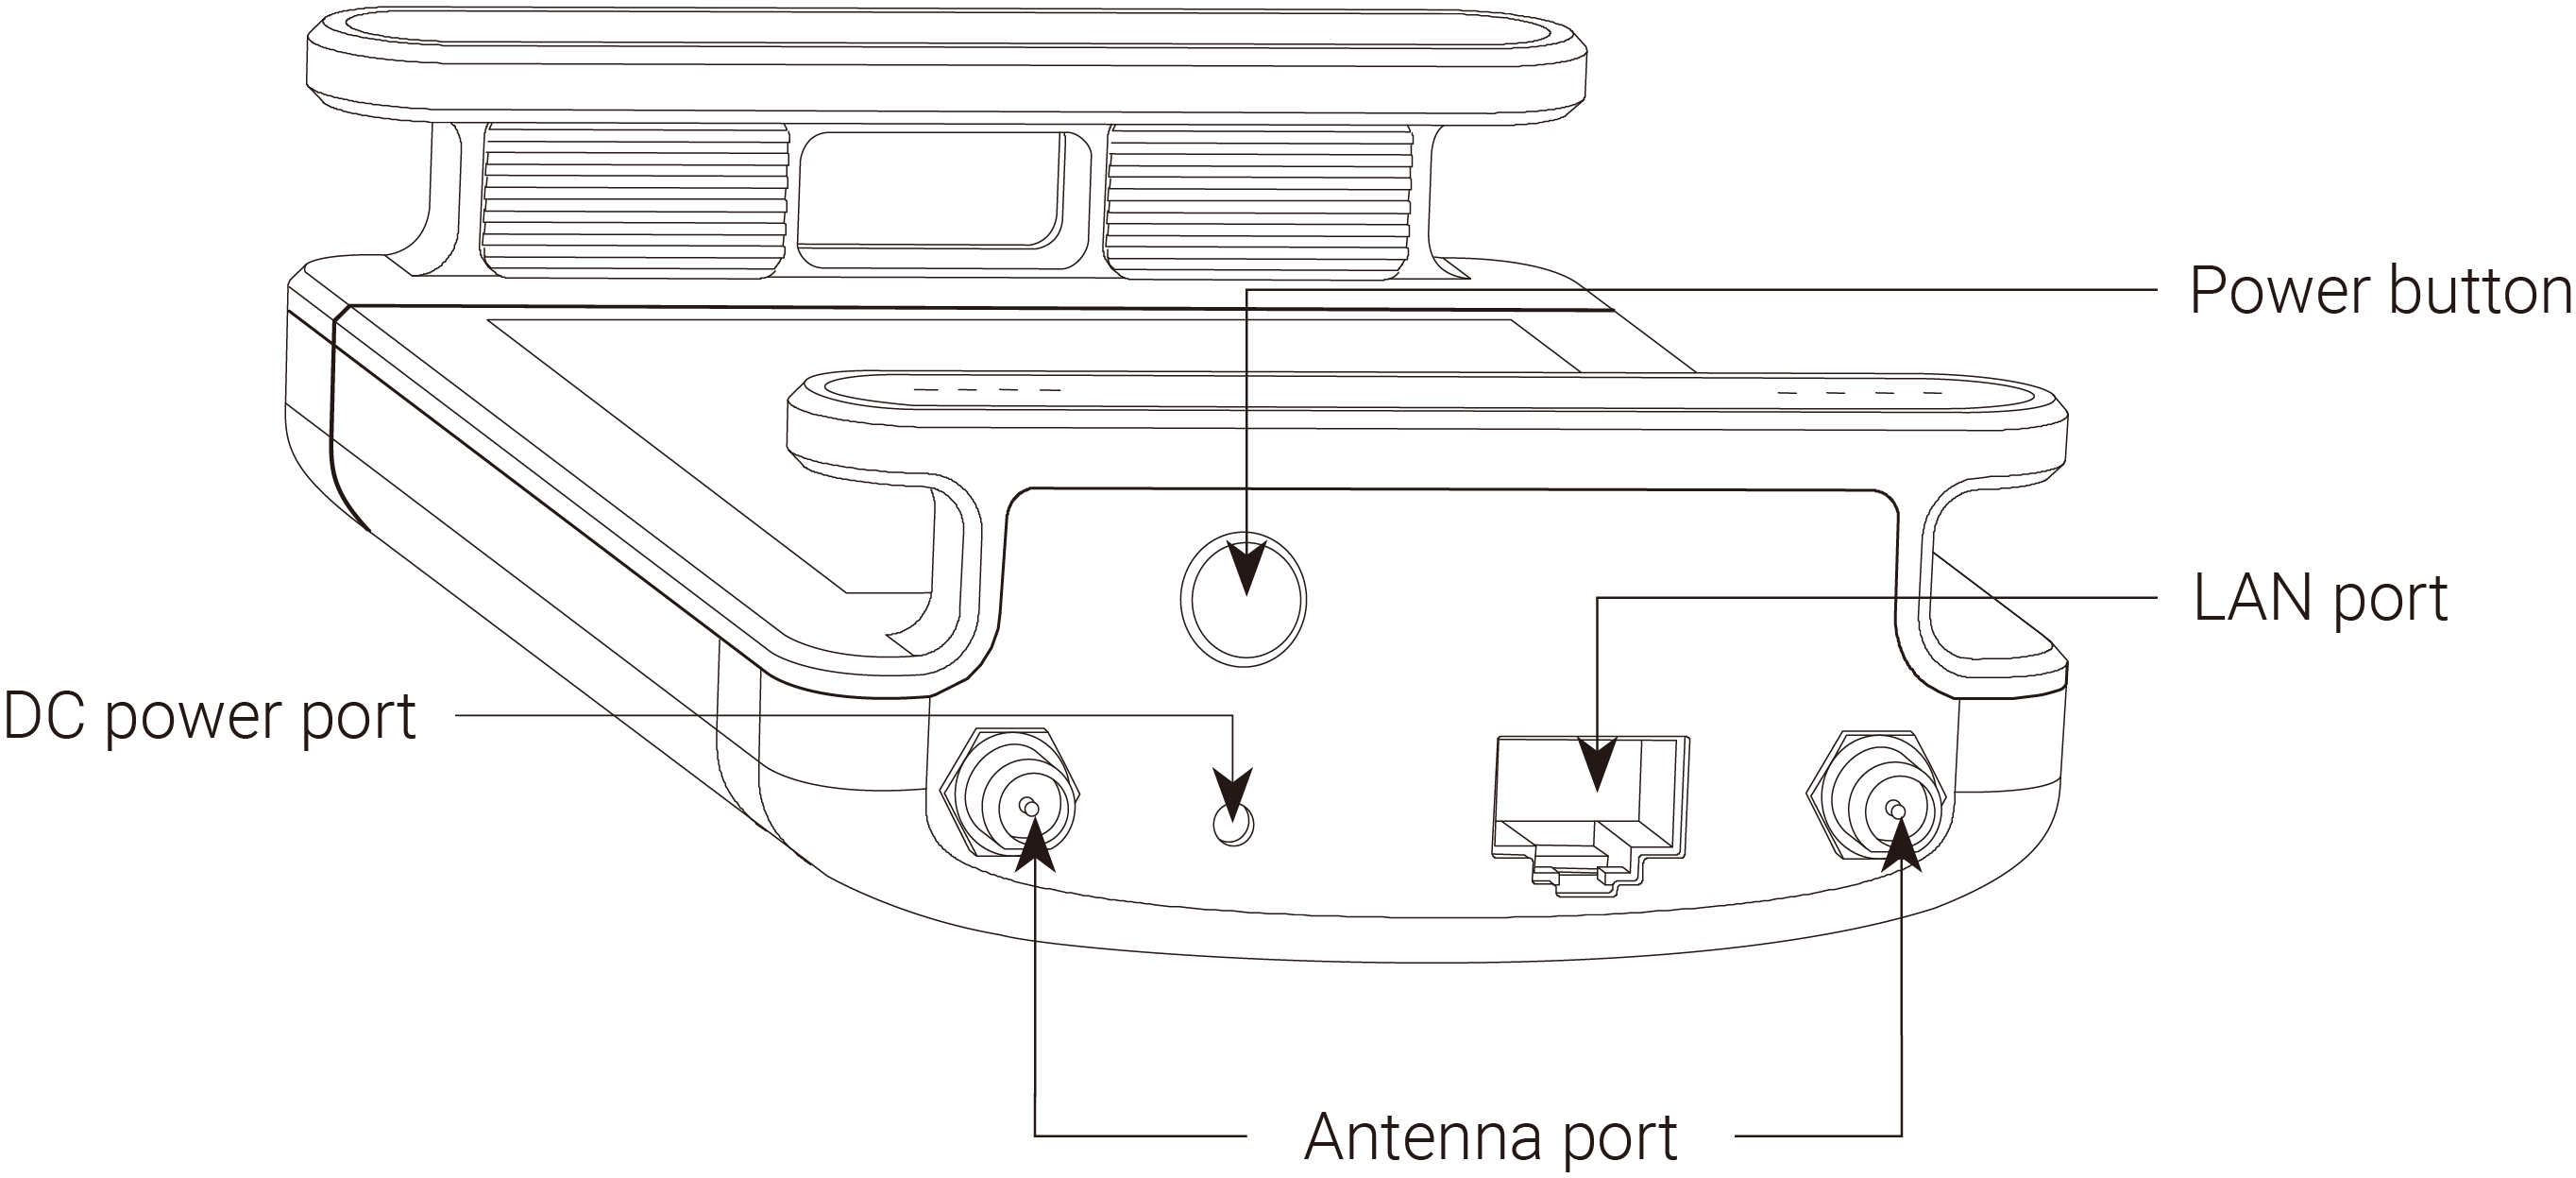
- Please ensure the IP address displayed on top of the camera screen and that assigned to the receiver is 192.168.100.XXX. It represents a successful communication of Farsight. At this point, open the control app on the device connected by the receiver, which can be connected by inputting the IP address displayed on top of the camera screen. If the receiver connects to a computer, you can also complete the connection by inputting the IP address displayed at the top of the camera screen in the connection interface of the camera's controlling client Insta360 Pro software.
- Compatibility List of Farsight receiver (devices added continuously)
| Device |
System |
| Huawei P9 |
Android 7.0+ |
| Huawei P10 |
Android 7.0+ |
| Huawei Mate9 |
Android 8.0+ |
| Huawei Mate10 |
Android 8.0+ |
| Huawei Honor V10 |
Android 8.0+ |
| Samsung Galaxy S8 |
Android 8.0+ |
| Samsung Galaxy S9 |
Android 8.1.0+ |
| Google Pixel 2 |
Android 8.1.0+ |
| Moto X Pro |
Android 5.0.2+ |
| iPhone & iPad |
iOS 10.3+ |
Wired connection -- DHCP mode
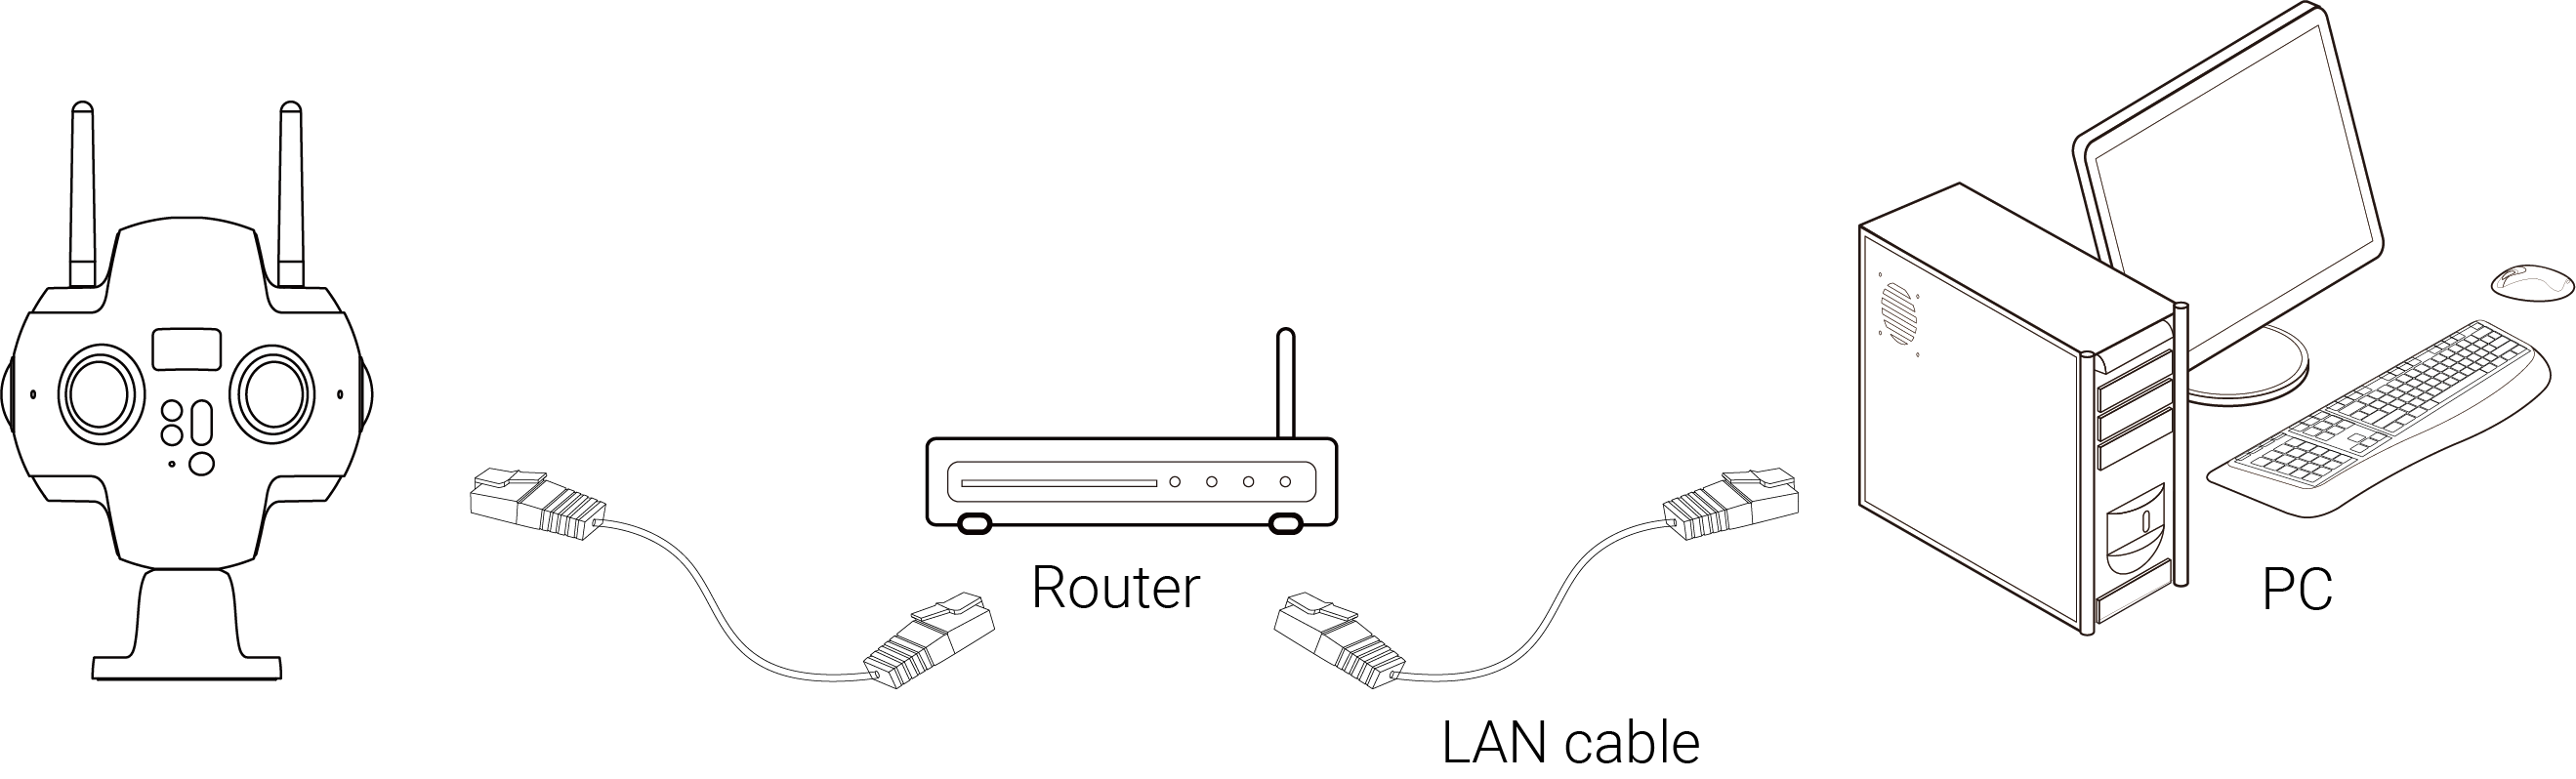
Enter the settings menu of Pro 2, set Ethernet to DHCP mode.
Connect Pro 2 and a computer to a router through LAN cable. Set the router's allocation mode to DHCP.
Make sure the camera and computer are inside the same LAN, open the controlling client software on the computer, and input the IP address displayed on top of the camera screen.
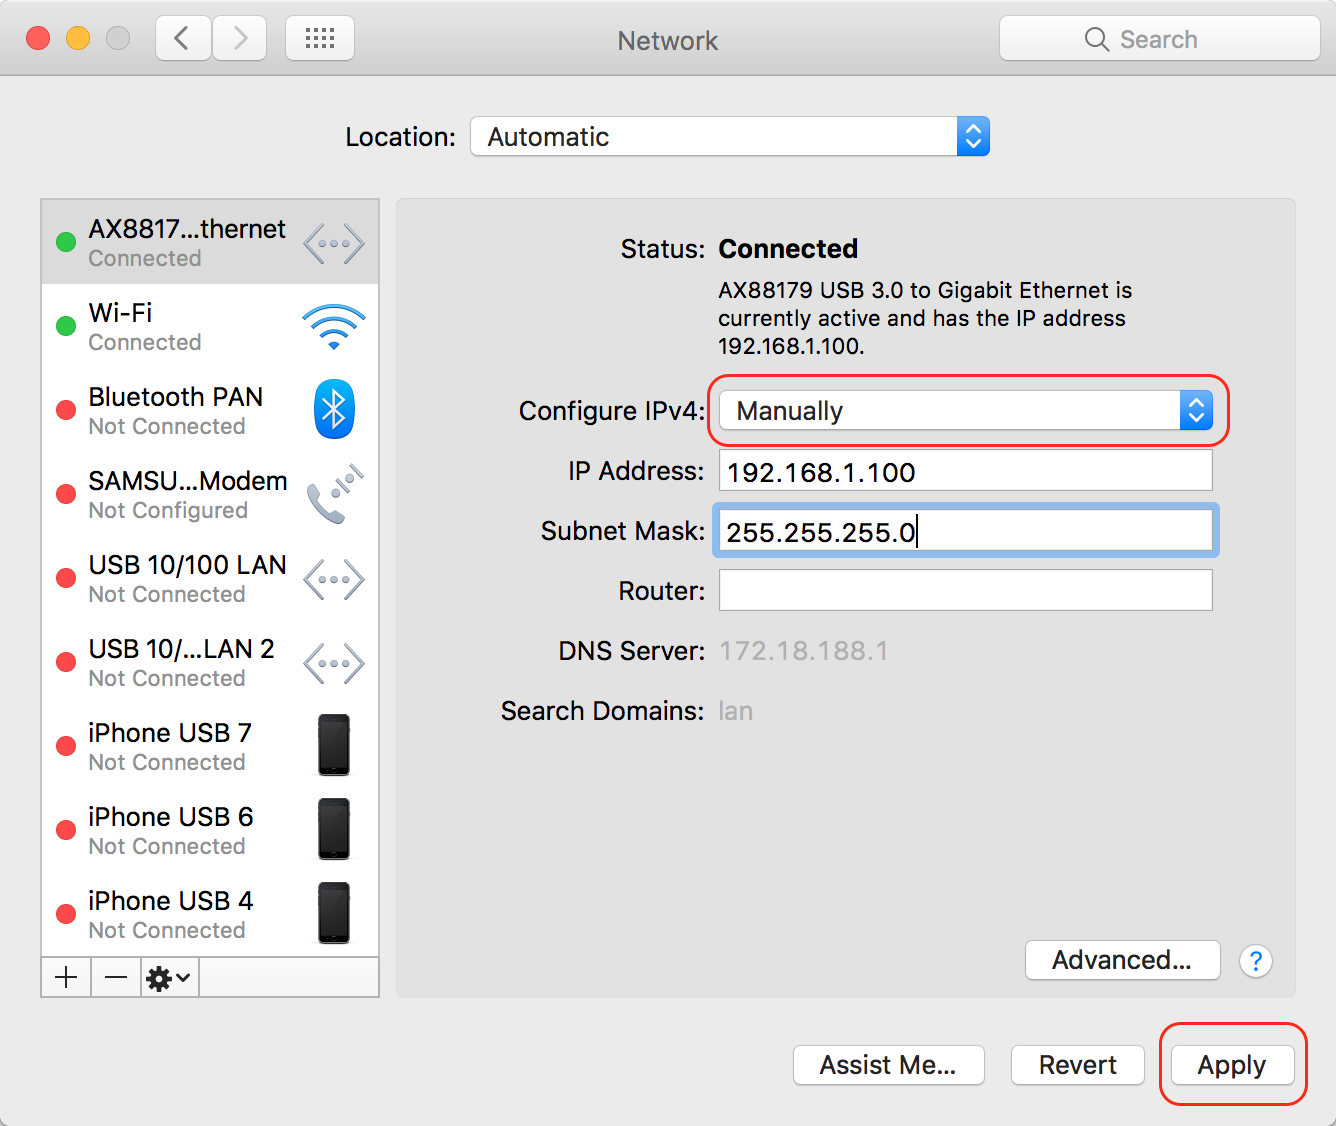
Wired connection -- Direct connection mode
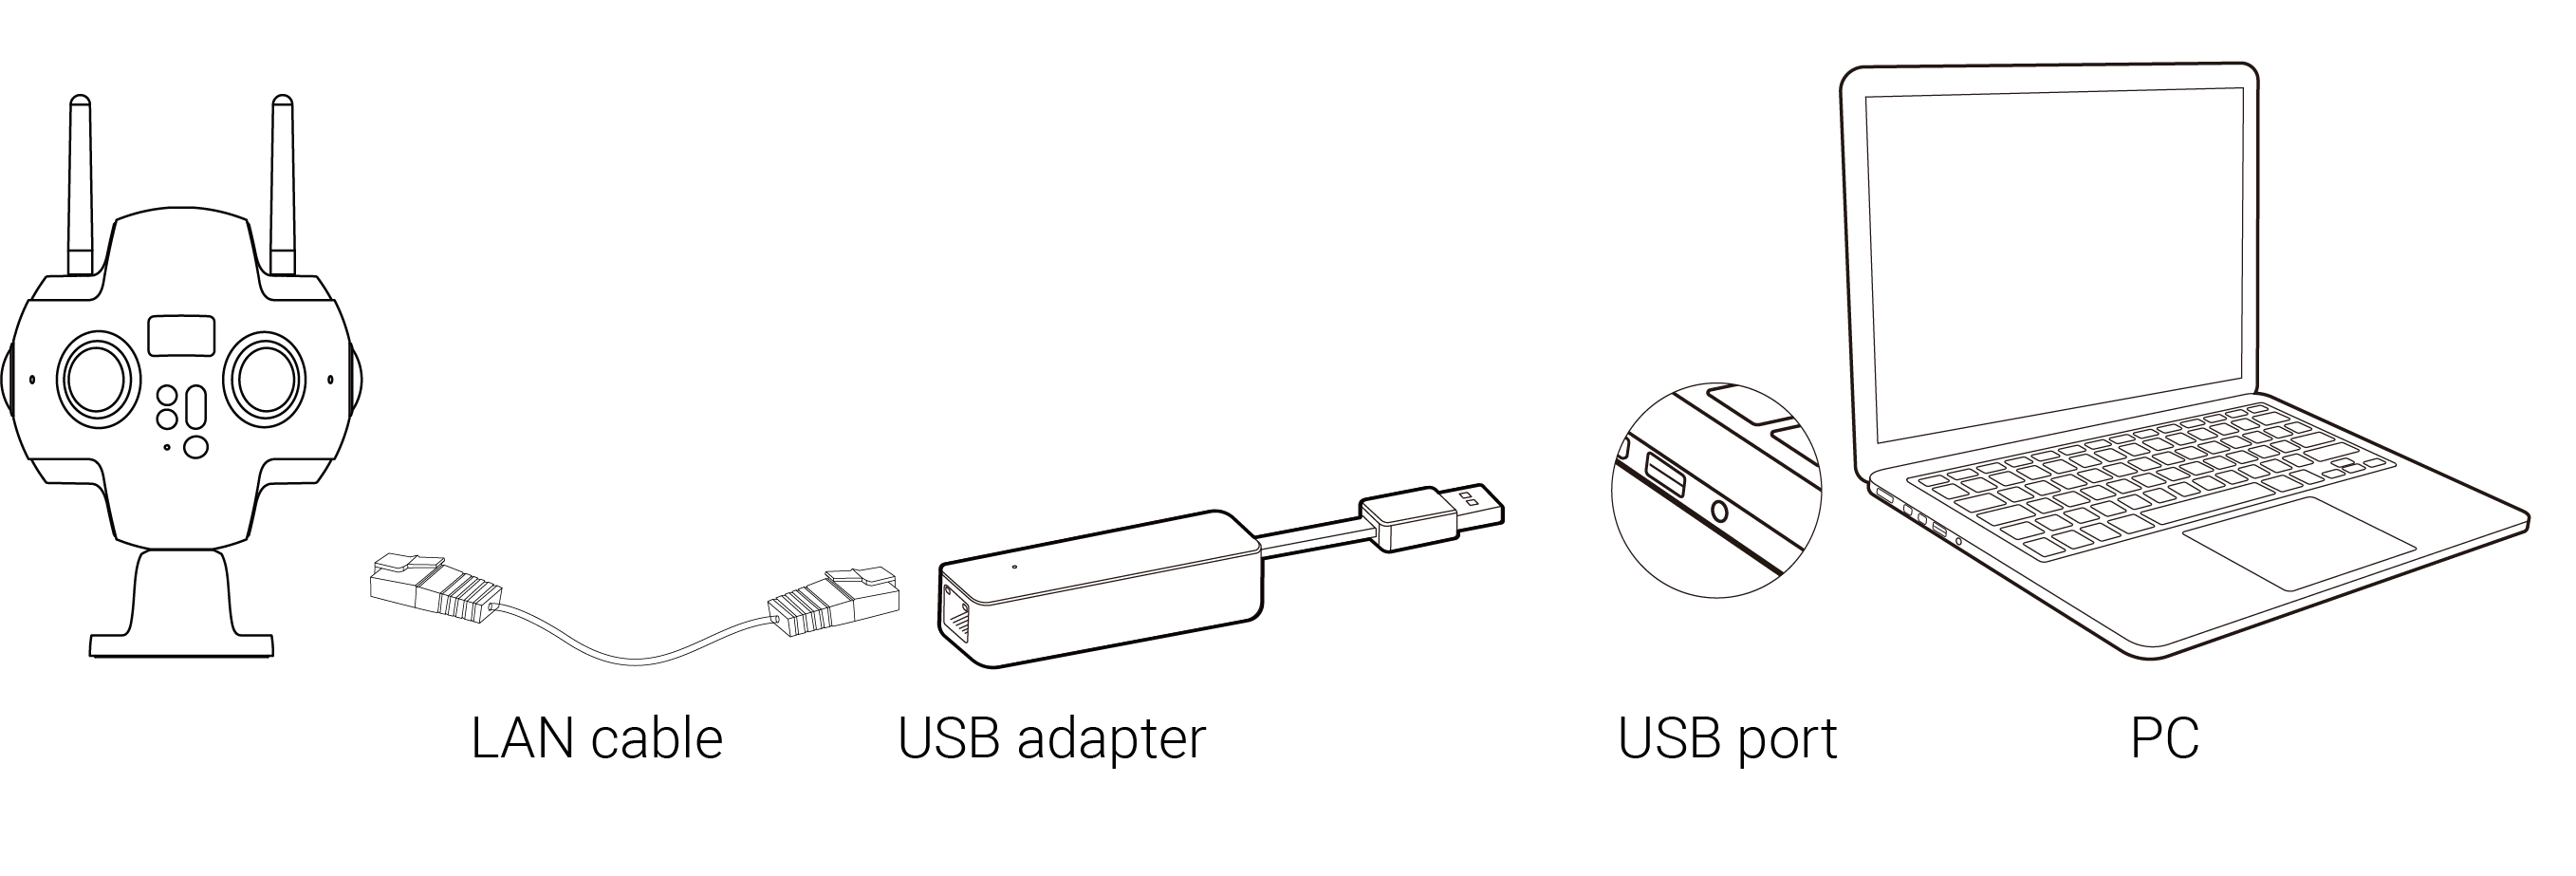
- Enter the camera settings menu of Pro 2, set Ethernet to Direct mode.
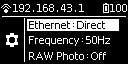
- Connect Pro 2 to a computer with LAN cable. If there is no LAN port on your computer, please use the USB ethernet network adapter to connect. In this mode, the IP address of Pro 2 is fixed as 192.168.1.188, which requires to set up static IP for the PC network segment of 192.168.1. And it is recommended to set as 192.168.1.100, with the subnet mask of 255.255.255.0.
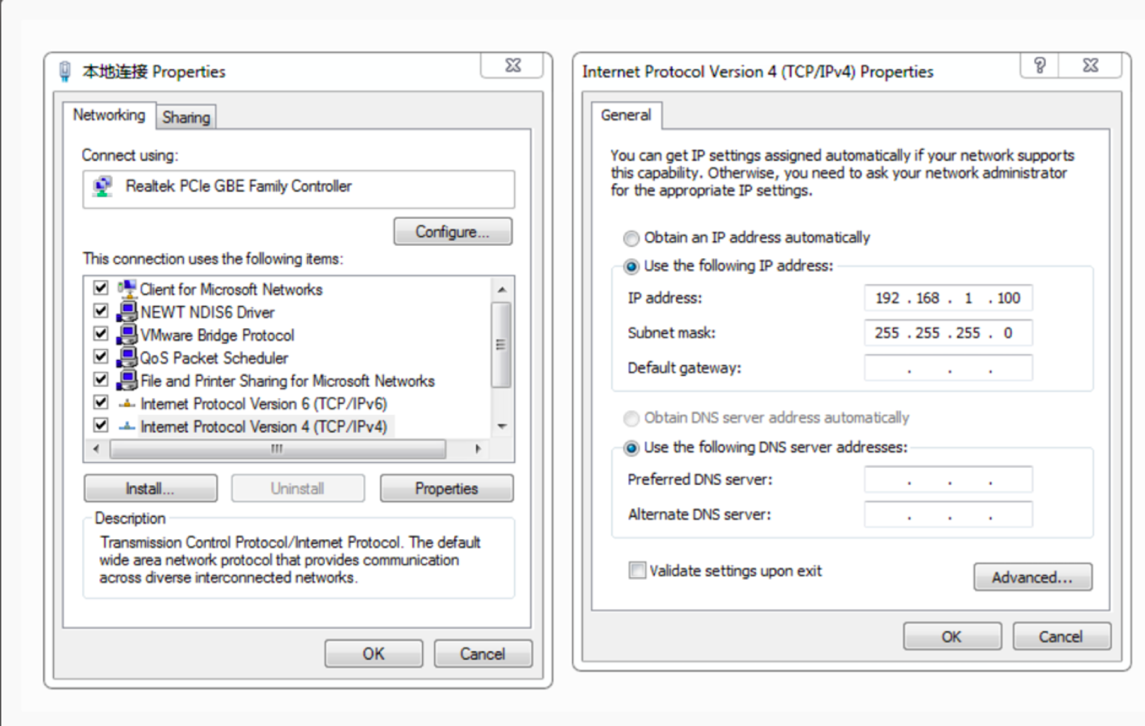
(IP configuration Interface for Windows)
(IP configuration Interface for Mac OS)
- After completing the above configuration, enter 192.168.1.188 on client operation software, and then connect.
WiFi connectivity -- connecting client devices to camera's AP hotspot
- click on the WiFi logo on the homepage of the camera screen, and the camera will open its own AP hotspot.
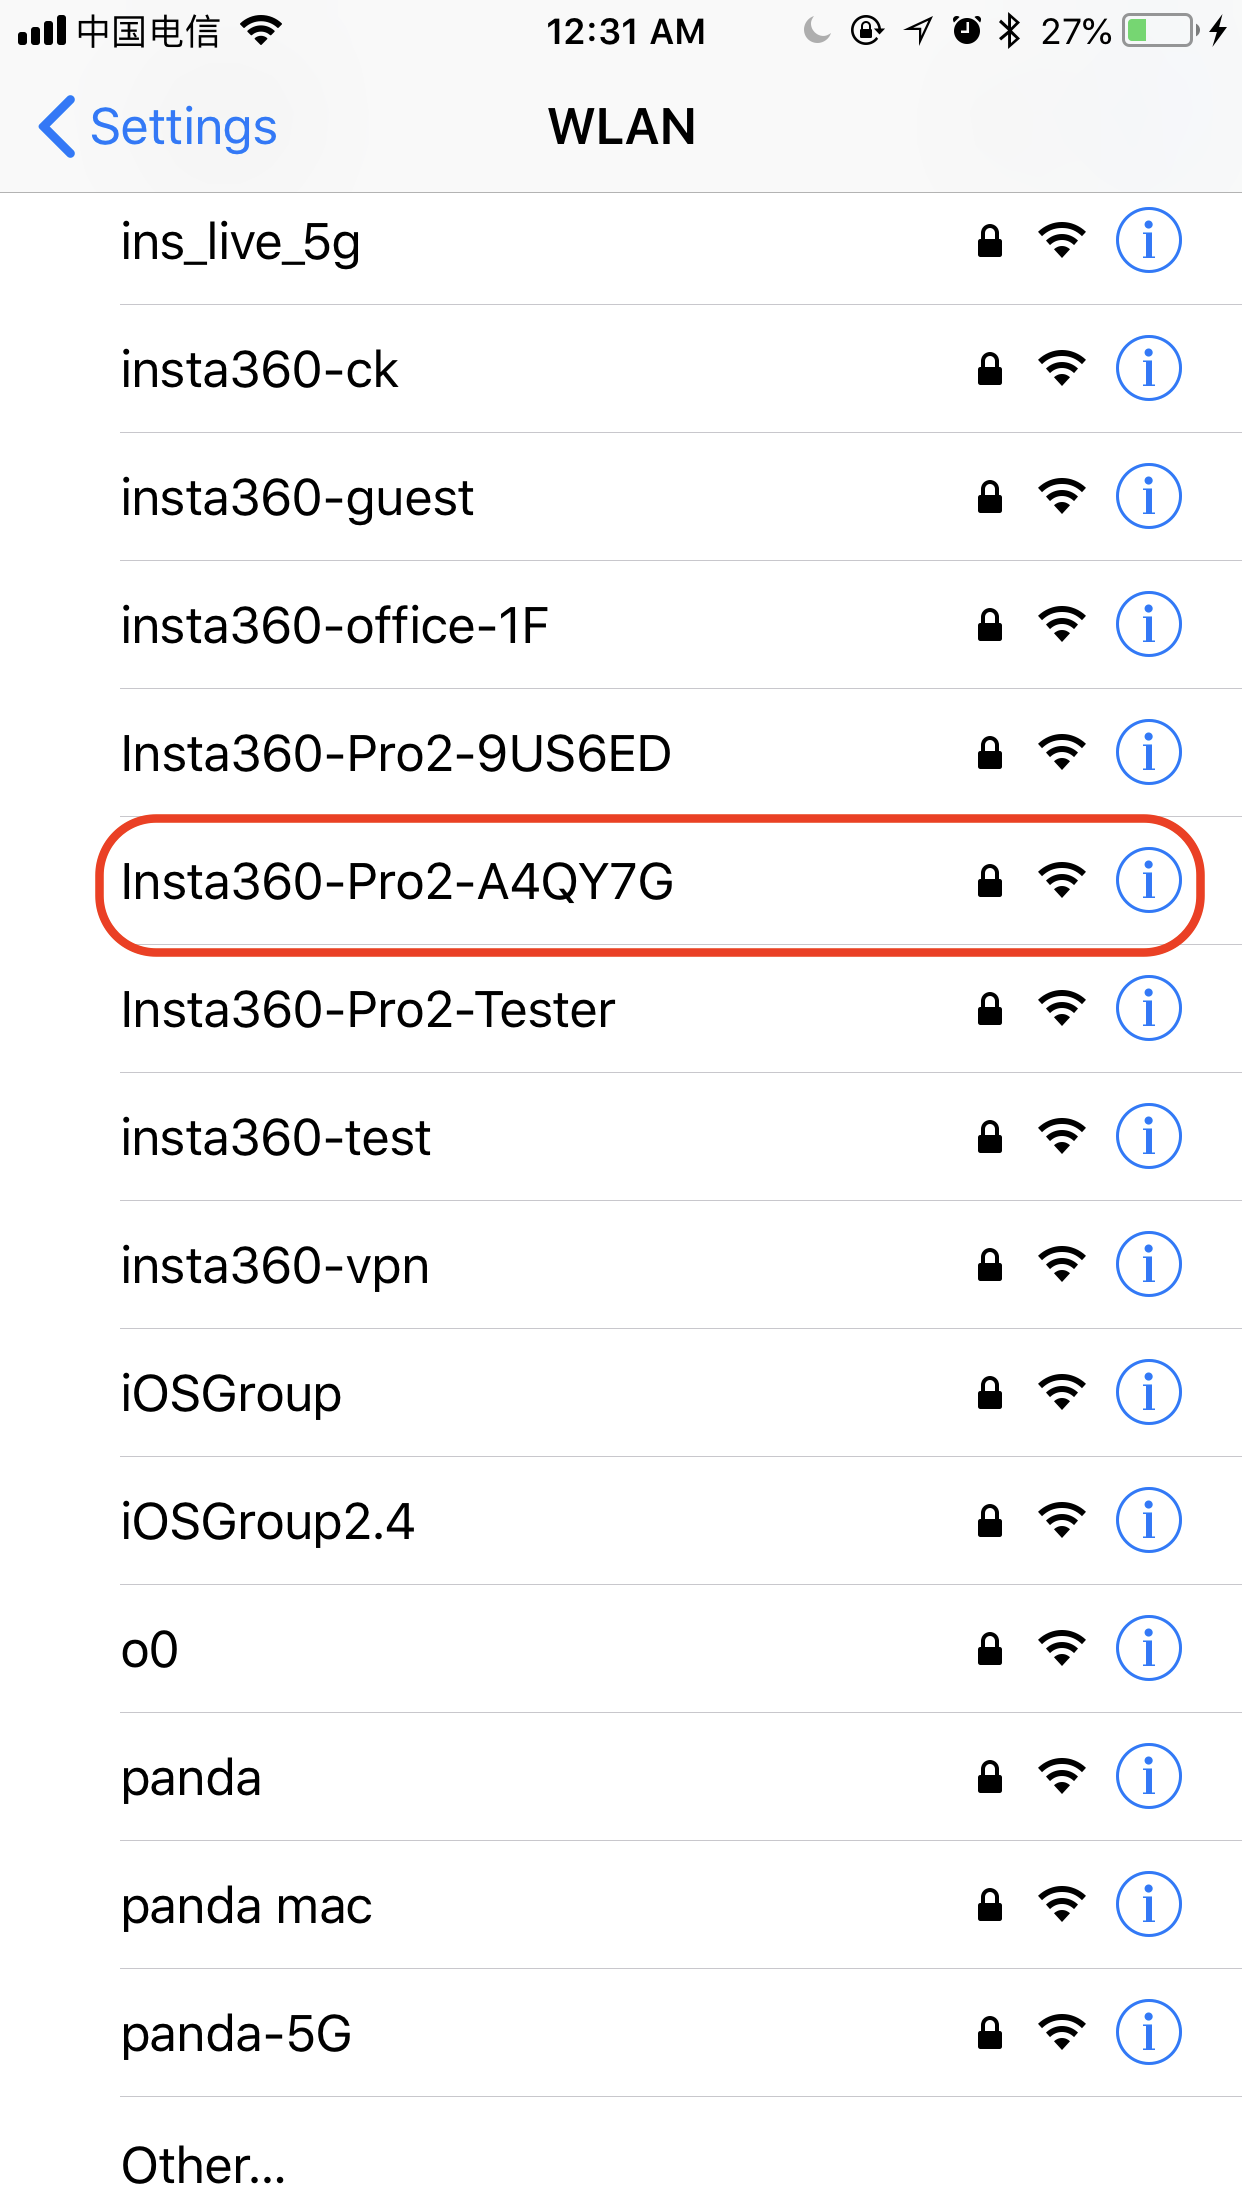
- open your client device (phone, tablet, laptop) to search nearby WiFi hotspots, and find the hotspots of "Insta360-Pro 2-XXXXXX". Click to input 88888888 (repeat eight for 8 times) to connect.
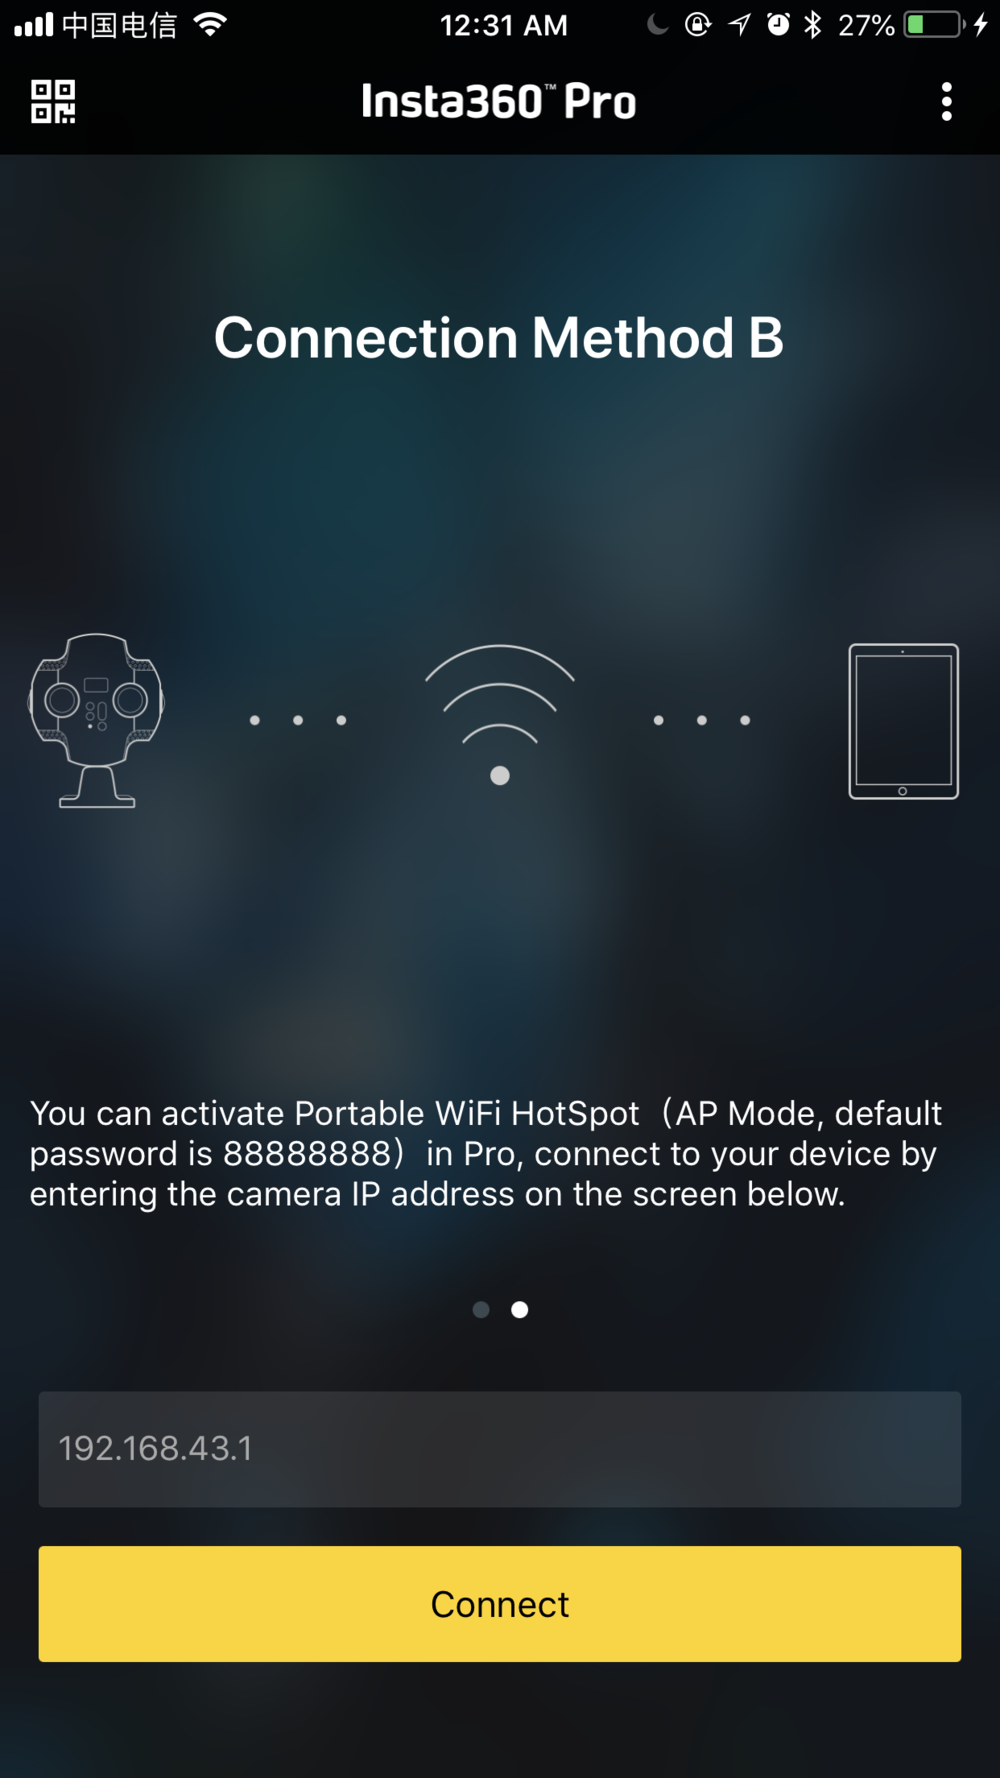
- after a successful connection, client device and camera have been in the same wireless network. Input IP address 192.168.43.1 on client control software, and then click to connect (phone app can choose Connection Method B for one-key connection)

.svg)

