Online Chat
Office Hours: 24/7
Start Chat
Mistika VR official tutorial https: //vimeo.com/channels/1242739
Mistika VR purchase link https: //www.sgo.es/mistika-vr/
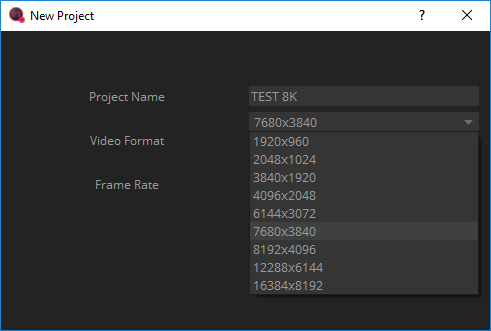
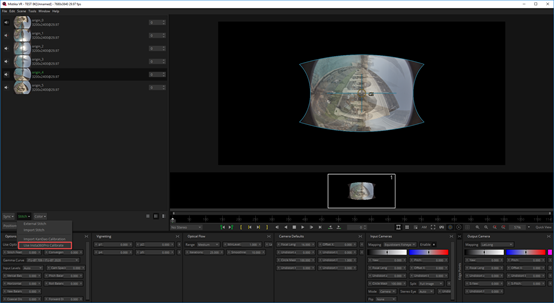
Open Project manager to select New manager, all the resolution of Mistika VR must be set in advance in the project. In this way, it will allow you to export at the desired resolution. Select here to set Video Format to 7680x3840.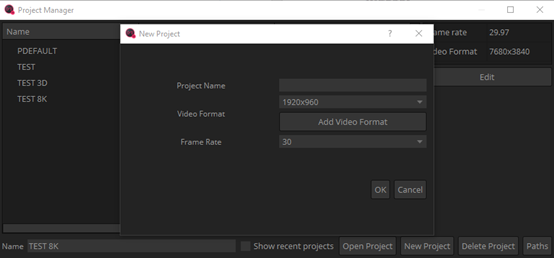
File import method 1:
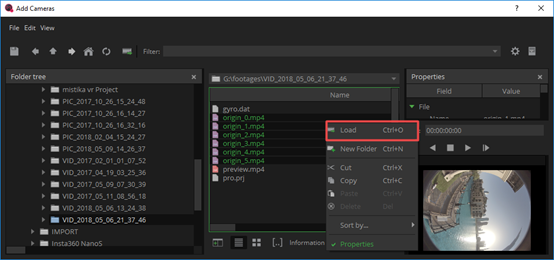
In the top menu bar, select Scene->Add Cemaras, to open the material preview window, find the material path, check the six-lens file names, right click to select Load.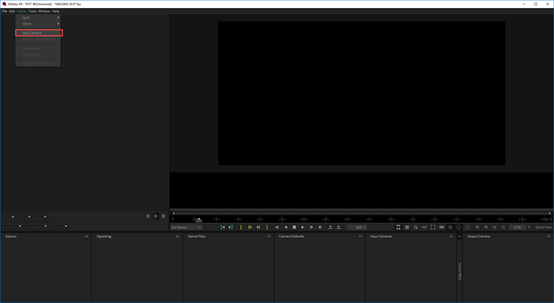
As for the method of file selection, File Per Segment can be set to 6 because this is the material of six lens.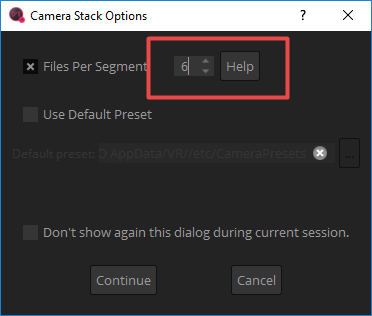
You can also choose “Use Default Preset” , to use preset quick stitching, and find the appropriate shooting settings of Insta360Pro_3200x2400.grp in the folder, because the material was shot in 6K3d mode, with a resolution of 3200x2160 for each shoot. If the material is shot in 8K mode, you should select Insta360Pro_3200x2400.grp.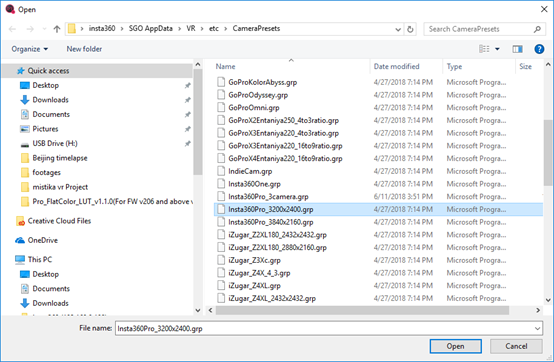
File import method 2:
Select six-lens material directly from the folder and drag them to Mistika VR's main interface.
As for the method of file selection, File Per Segment can be set to 6 because this is the material of six lens.
After the import, you can quickly stitch by using Stitch->Use Insta360Pro Calibrate.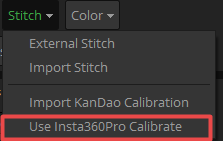
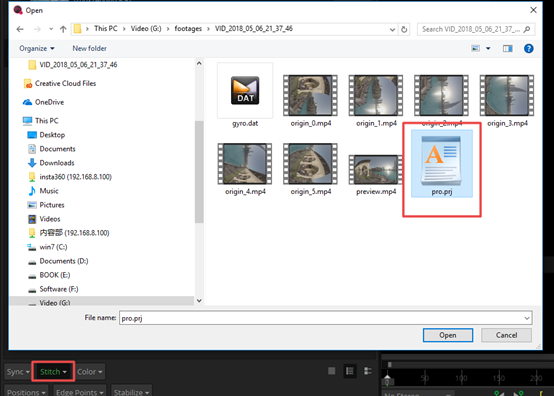
Import Stitch can also be used to import pro.prj files saved when shooting the material for fast stitching.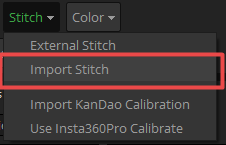
This is the result of quick stitching. The following describes the functionality and settings of the various windows at the bottom.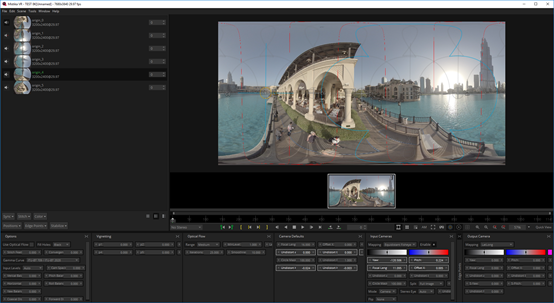
Optimize the parameters of stitching in Positions. Generally, choose “Improve Offsets” and “Improve Angles” once for each.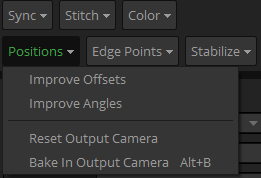
Add boundary protection points in Edge Points to avoid stitching of key objects and people.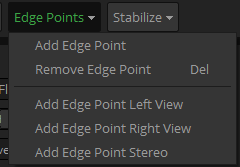
Click once on “Stabilize” to stabilize the video. The stability depends on the amplitude and speed of jitter, and this feature has better anti-shake effect in terms of walking jitter.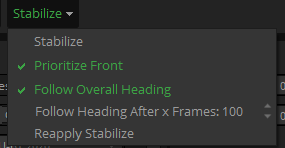
In Options, select Use Optical Flow, set 8-25 for Stitch Feature generally.
Convergence means parallax. In 3D mode, the parallax should be set to 60.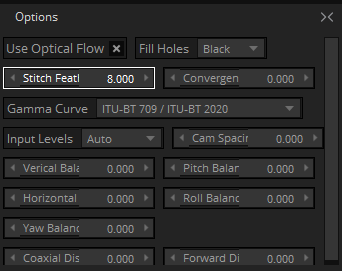
Generally after these steps, most of the material can be stitched well and exported. But there are also times when you come across a handful of tricky material, such as people’s face. So we add Edge Points, to offset the stitching edges to protect the characters.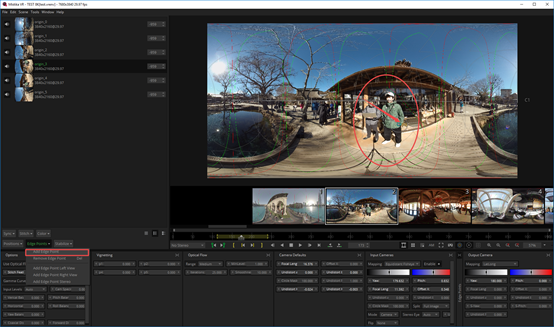
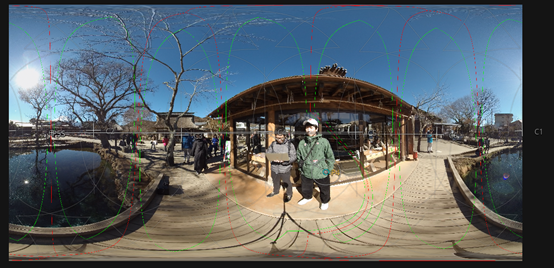
Note that Feature Overlay and Camera Overlay should be turned on in the playback window.
Look at the lens and stitching edges.

In addition, you can add options in Optical Flow to adjust the depth of optical flow stitching.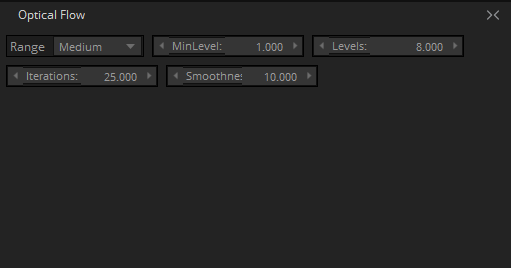
Use the time interval for sequence settings of edit in and out tool, so that the segment exported is corresponding to the selected time interval.
File->Render, to open the Export Options interface, which can be exported after rendering, and select settings when exporting audio files such as no audio, independent audio files, and audio in movie.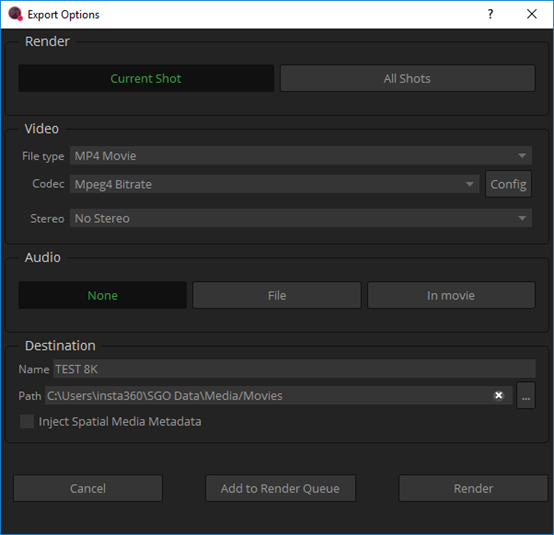
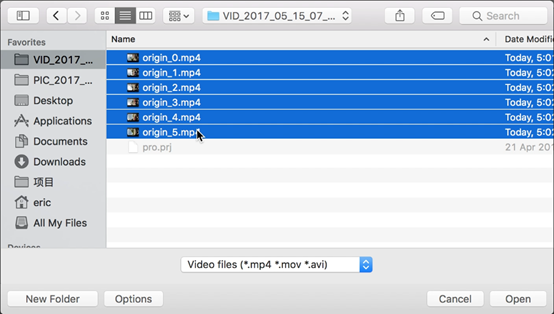
Open AutoPano Video, import videos.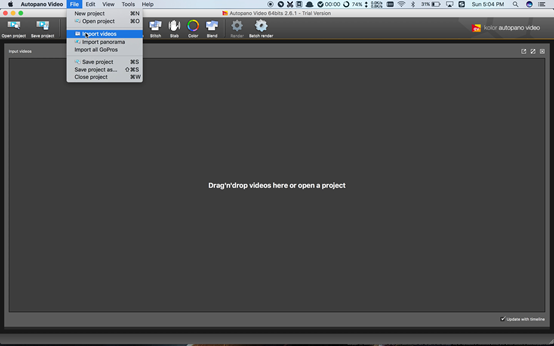
Select Stitch for quick stitching.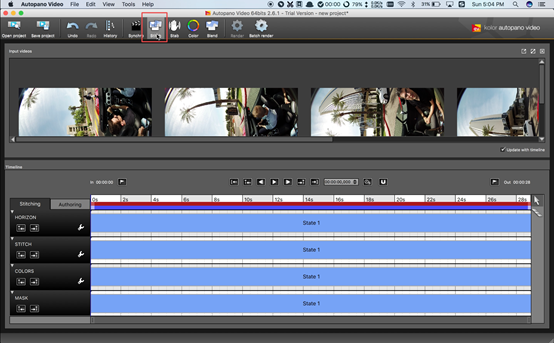
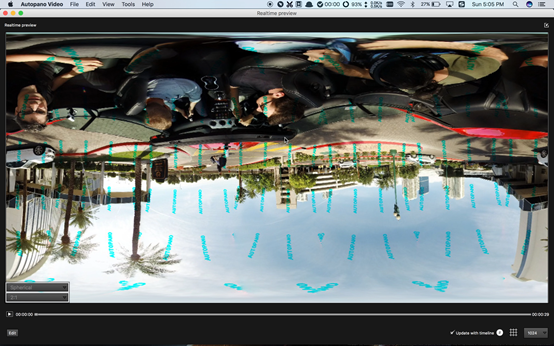
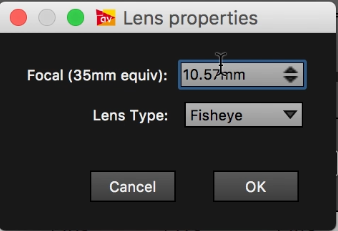
Press Stitch button, set Lens properties, 10.57 for focal length, Fisheye for lens type.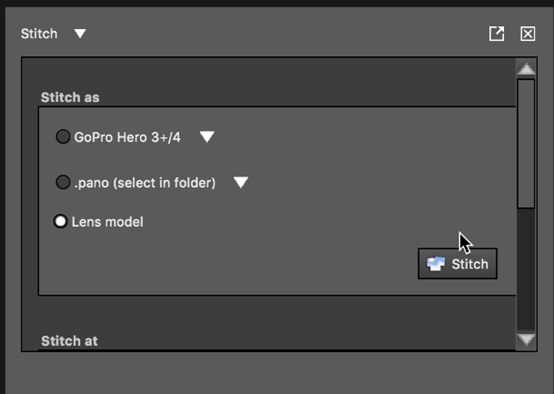
Adjust the lens in Realtime preview. You can also turn on the Auto pano Giga for more detailed tuning.