Online Chat
Office Hours: 24/7
Start Chat
Premiere plugin can be installed for Insta360 Stitcher version 1. 7. 0 and above. The plugin can help directly import Pro video to edit and export in Premiere. It supports Premiere CC Pro017 / 2018.
Download link: https: //www.insta360.com/download/insta360-pro?inspm=6f8b88.d9d6a3.0.0
When installing Stitcher, if you come to “Select Additional Tasks” interface, you will see an additional “Install plug-in for premiere” option, which is checked by default. Click next to continue the installation. This plugin is compatible with Premiere Pro CC 2017 / 2018. Please note that you must close Premiere during the installation of Stitcher, or else the plug-in installation will fail.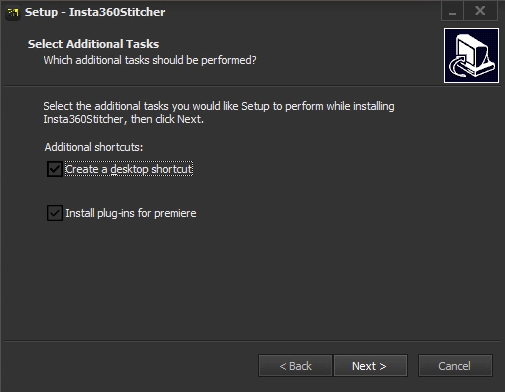
When this version of stitcher is installed, open Premiere and start the plugin by clicking “window”->“Extensions”->“Insta360Pro Importer” in the top menu of the new project.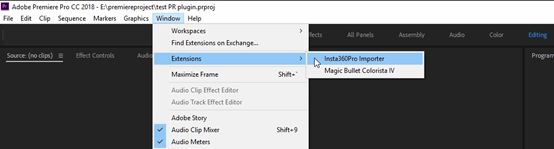
Click on the Import icon to import the folder where the original video is located. Before importing Insta360 Pro original video material, the plugin needs to select content types, such as “Monoscopic”, “Stereo (Left Eye on Top)”, and “Stereo (Right Eye on Top)”. The current version only supports importing video files, not images.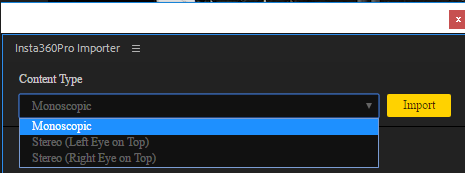
Note that the folder path should be the disk path, not the shortcut path. For Insta360Pro video material, material with the original single-lens proportion of 16: 9 can only choose Monoscopic when imported, material with the original single-lens proportion of 4: 3 can choose one from three arbitrarily when imported. It is supported to import multiple folders at the same time for each import, but any video material that does not match the content type will be ignored. (For example, when you choose to import a “Stereo (Left Eye on Top)” video, if you select an 8K material with a single-lens proportion of 16: 9, the video will not be imported.)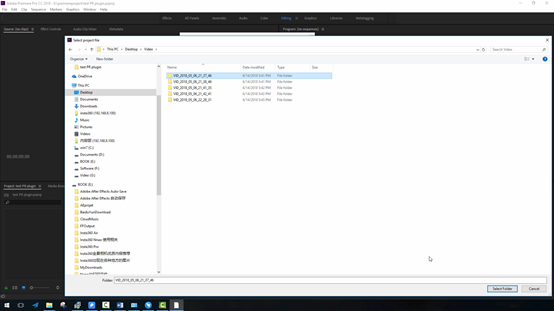
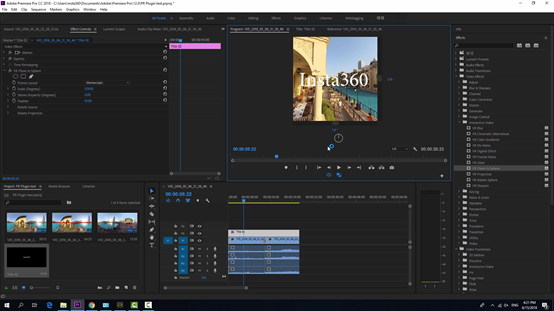
Clicking Import to import an 8K video folder. The source material area at the bottom left of premiere would immediately show the original video material, and has already shown the stitched attribute, the video material will be added to the timeline, and we found that when the video was played, the button for associated proxy video was turned on by default. This is exactly the plug-in mechanism. When importing the original video of 8K resolution will generate a fast proxy, and the generation of the fast proxy file does not consume performance and time.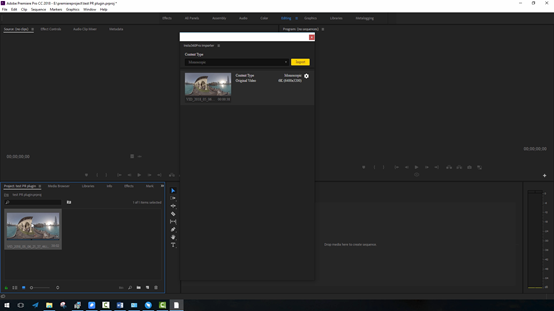
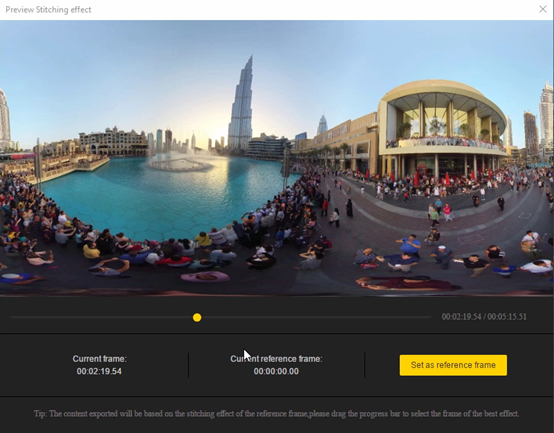
Click on the stitching settings, video stitching attribute can be adjusted and previewed. Like desktop software Stitcher, you can choose a different Stitching Mode, sampling Type, use Default circle Position, and Gyroscopic Stabilization. Here the settings will be automatically invoked when the video is finally exported, and ultimately will be stitched and exported together with the video rendering. The speed of the stitching export is the same as that of the stitcher, and both of them can accelerate the export of the hardware.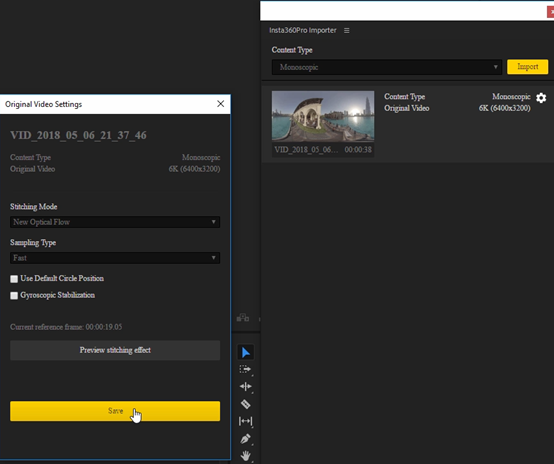
As a result, panoramic video is processed efficiently, multiple video folders can be imported in batches, and we use Premiere for quick editing and export. In accordance with methods described in 3.3.5, we can create a new sequence of clips and edit the video directly on the timeline. Since we are editing 8K video, the playback of the video at this time depends on the performance of the computer. High-performance computers can play at the rate of 3fps per second.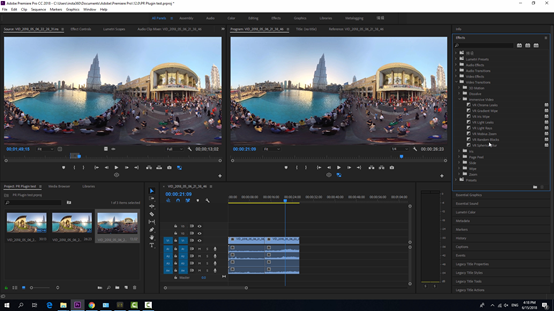
According to the methods described in 3.3.5, we can add transition, text and so on. When we export the video, it will automatically render the video stitching and export, which greatly saves the stitching time.