Online Chat
Office Hours: 24/7
Start Chat

When we get Insta360 Pro camera, before starting your professional panorama experience, please learn some necessary knowledge first.
Lens protection and cleaning
Insta360 Pro is a six-eye panorama camera, whose fish-eye wide-angle lens is parallel to one lap of the camera itself. Because of protruding shape, please be careful during use and shooting lest and avoid grinding or unnecessary damage.
The camera is equipped with a rubber protective jacket for the lens. When the camera is packed in the box or in non-shooting status, please use the protective jacket to minimize lens damage risk.
It is also easy to leave a fingerprint on the convex lens, so we’ve equipped the camera with camera cloth. Please keep the camera clean, avoid any stain that impacts the quality and stitching effect.
About power supply and electricity quantity
For panoramic photography, electricity guarantee is important. Insta360 Pro provides two types of power supply. You can use multiple batteries or connect directly to the power supply at suitable locations to extend camera usage time.
For details please refer to the following information.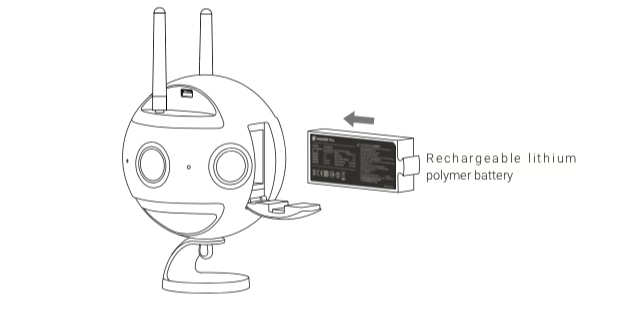
Power adapter:The camera adopts12V 5A power adapter with DC interface.
Battery type and duration:the camera uses 5100 mAh replaceable battery. Without Wi-Fi, the battery life is about 75 min. To fully charge a battery takes about 2.5 hours.
Charging with power off
When the camera is not fully charged, the red power indicating lamp will go on. When the camera is fully charged, the green power indicating lamp will go on.
Charging with power on
When the electricity quantity of the camera is below 10%, the red power indicating lamp will go on until the low-point protection is enabled or the camera is shut down upon exhaust of electricity;
When the electricity quantity of the camera is between 11% and 20%, the yellow power indicating lamp will go on;
When the electricity quantity of the camera is between 21% and 100%, the white power indicating lamp will go on;
When the camera operates, the work indicating lamp will be in the same color as the power indicating lamp. Refer to the section about camera operation instructions for the flashing description of the work indicating amp.
Tip: With WiFi connection, Pro preview mode consumes more power, so please try to return to the homepage when standby (as shown in the figure)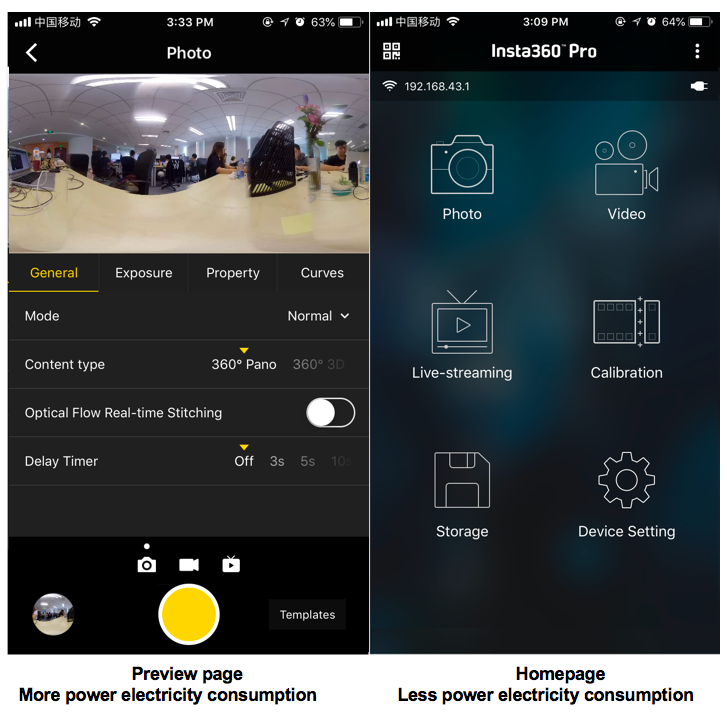
About stitching calibration
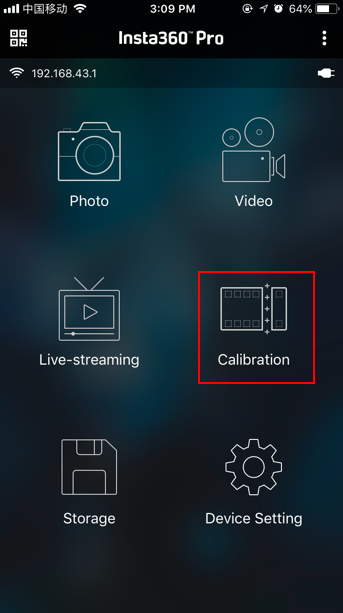
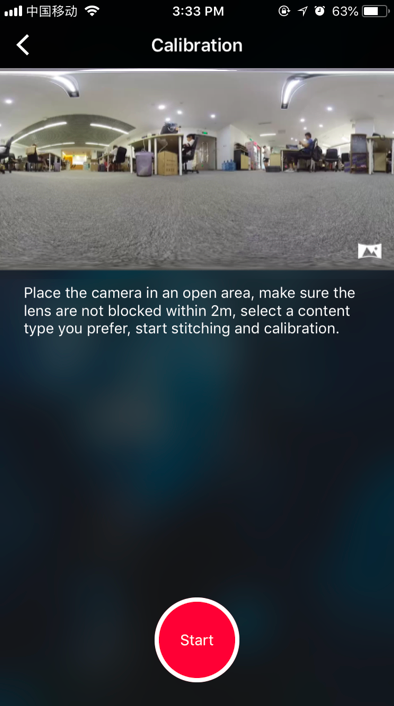
Insta360 Pro machine stitching is accurate and fluent, but due to differences between specific shooting scenes such as distant view and close range, or when surrounding environment structure is special, the splicing effect may vary. So users who find that real-time stitching isn't satisfactory enough when previewing or trying to shoot, can calibrate cameras in this method (especially illustrated here that this feature makes sense for users who use machine stitching and live online. If you use external software for stitching, you can skip this feature). There are two ways to operate, either on camera or app respectively.
About Gyro calibration
Gyro calibration can be performed for the first time using cameras which ensures that camera functions are as accurate as possible. Please first place Insta360 Pro on horizontal desktop or ground, on the function navigation menu, click settings on the lower right to find "Gyro calibration", and complete operation based on prompt (as shown in the figure).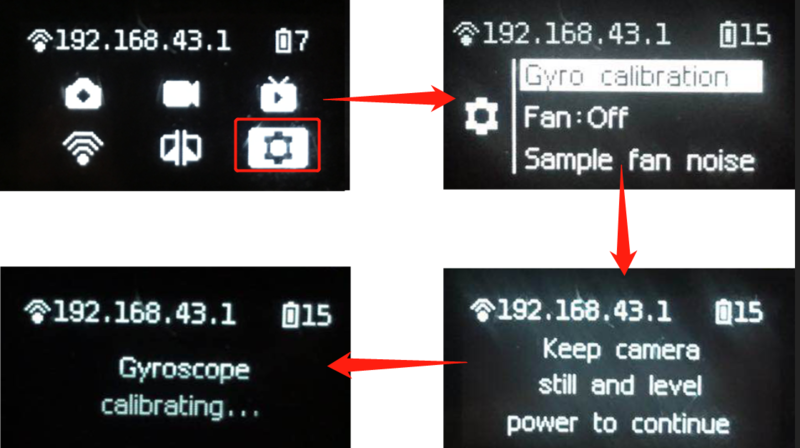
.svg)

