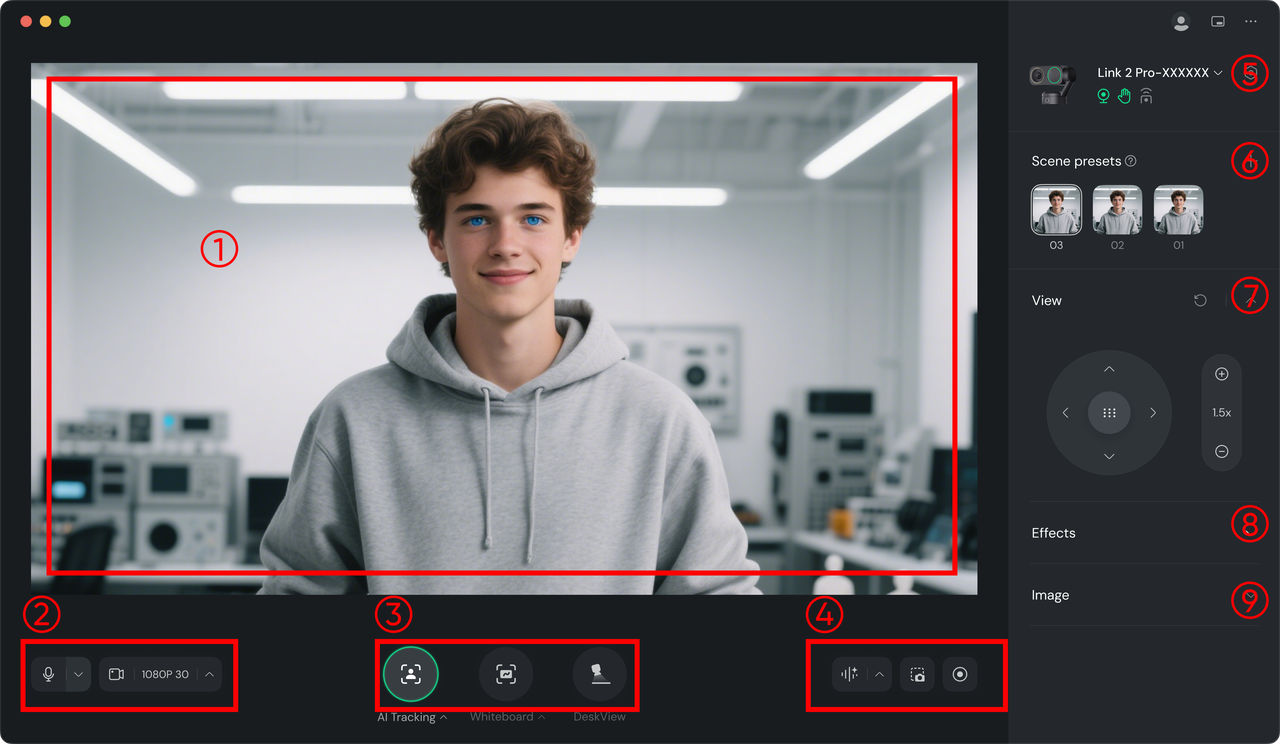
Preview Area: Real-time preview of the captured footage.
Video and Audio Settings Area: Connect or disconnect video/audio signals and adjust settings (select microphone source, pickup mode, aspect ratio, resolution, frame rate, vertical and horizontal mirroring, etc.).
Smart Features Entry: Turn "AI Tracking" / "Auto Framing," "Whiteboard," and "DeskView" on or off, and access specific settings for adjustments. See below for detailed operation methods.
Recording Area: Start or stop standard video recording, use AI Recording (transcribes audio into text summaries; requires account login), or take screenshots.
Status Bar: Display and adjust gesture settings, virtual camera status, and access more settings.
Scene Presets: Save current parameters as a preset (AI mode, view, effects, image settings) for quick switching.
View: Adjust the camera direction (Link 2 Pro only) and zoom.
Effects: Select real-time filters, use or upload virtual backgrounds (choose "Bokeh" to focus on the subject, or "Background Blur/Replacement" to protect privacy), perform Green Screen Keying (see "Advanced Applications — Green Screen Keying Live Streaming" for detailed steps), and apply real-time Beautify & Makeup effects.
Image: Manually adjust exposure, color temperature, saturation, etc., and save these parameters as a color template for one-click application in future sessions.

.svg)

