Advanced Application — Multi-Camera Live Streaming
In professional podcasts, interviews, or multi-camera production scenarios, you may need to record separate video streams for each webcam (known as "Isolated Recording" or "ISO Recording") to allow individual adjustment of each camera angle during post-production. The following introduces two methods to achieve this in OBS Studio. You need to follow the specific workflow below. This workflow supports recording up to three cameras simultaneously.
Pre-recording Checklist:
- GPU Performance: Ensure your computer has a dedicated graphics card (e.g., NVIDIA RTX series) to handle multi-channel video encoding.
- Audio Test: Before starting the official recording, be sure to test whether each microphone is accurately recording to an independent audio track.
- Disk Space: ISO recording consumes a significant amount of space. Please reserve 3–4 times the storage space required for a regular recording.
In professional podcasts, interviews, or multi-camera production scenarios, you may need to record the footage from each Insta360 Link camera into a separate video file (ISO recording) to allow for independent adjustments during post-production. The following section introduces two methods to achieve this in OBS Studio.
Method 1: Using the "Source Record" Plugin (Recommended)
This method uses a free plugin to create independent video files for each camera.
- Install the Plugin: Download the "Source Record" plugin from the official OBS Resources forum. After installation, restart OBS.
- Add a Filter:
- Add your camera source to a scene.
- In the "Sources" list, right-click Camera A > select "Filters."
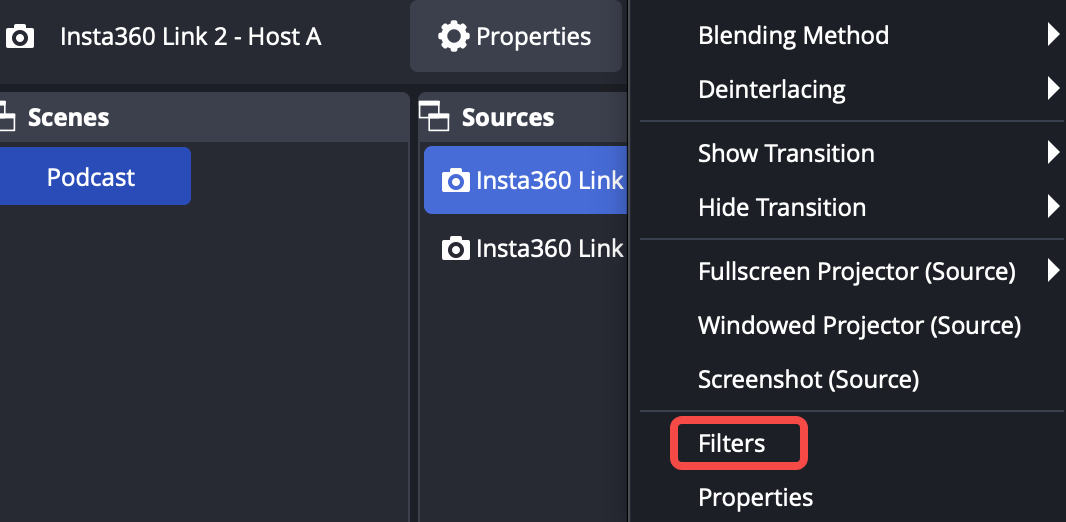
- Click the "+" icon under "Effect Filters" and select the Source Record plugin.
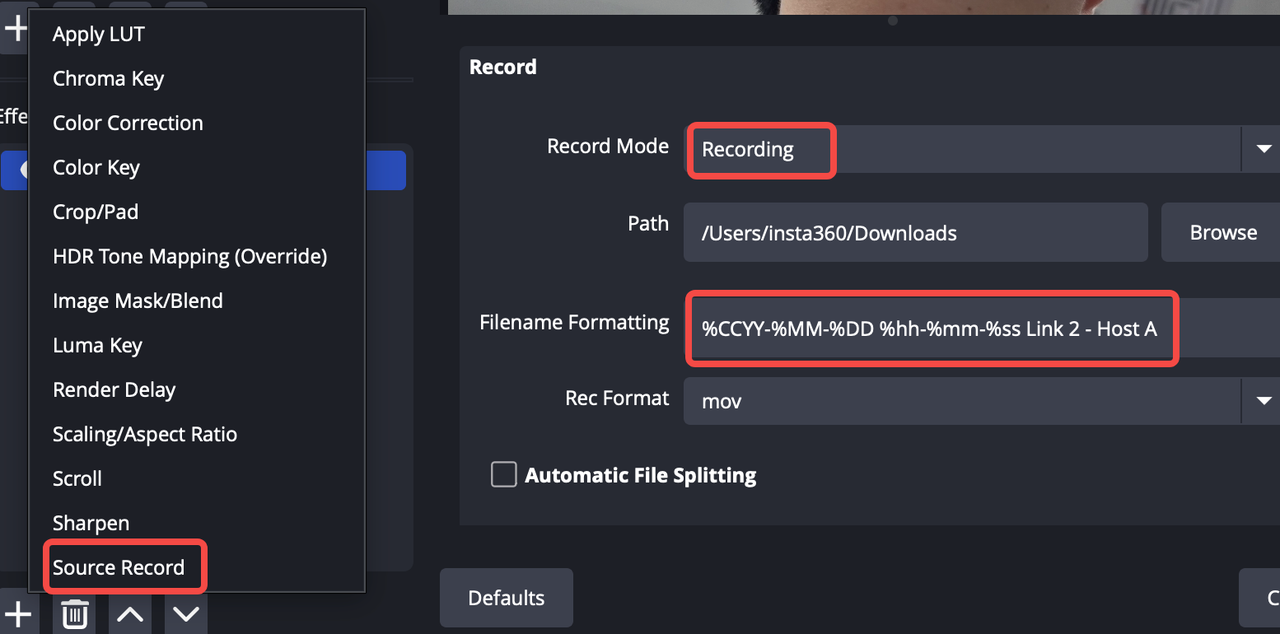
- Encoding Settings:
- Name: Give this recording source a name, such as "Host View."
- Record Mode: Set to "Recording" so it starts simultaneously when the main OBS recording button is clicked.
- Encoder: To reduce the load on your computer, ensure you select a hardware encoder:
- Windows: Select NVENC (NVIDIA graphics cards) or Hardware Encoding (AMD graphics cards).
- macOS: Select the Apple VT H264 Hardware Encoder.
- Avoid using x264 software encoding for all cameras, as this may lead to insufficient performance.
- Repeat Settings: Repeat the steps above for any other Link cameras in the scene.
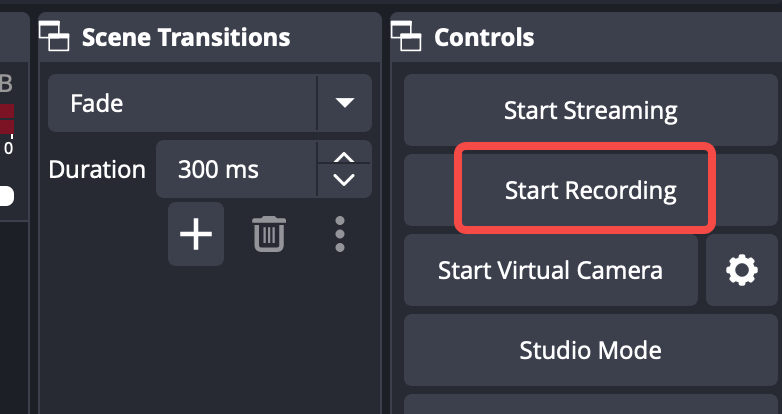
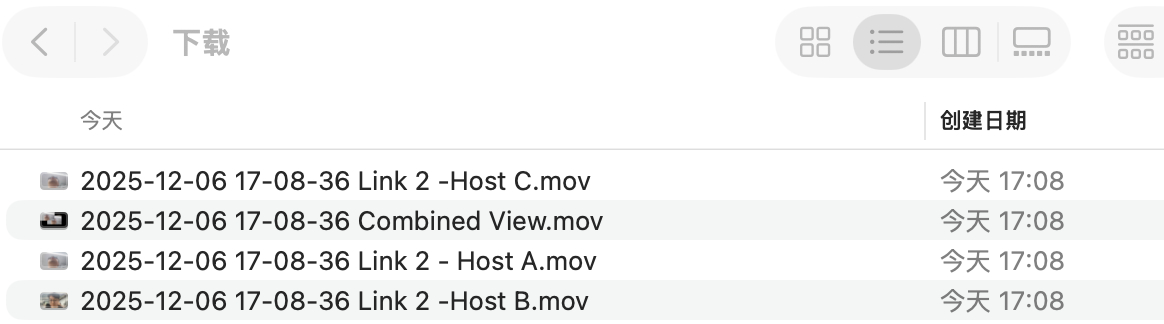
- Start Recording: Once you click "Start Recording" in OBS, an independent lossless video file will be generated for each camera in addition to the main output file.
Tips: This method requires encoding four videos simultaneously, which demands high computer performance. If your computer resources are limited and you want to ensure audio-video synchronization, please consider Method 2.
Method 2: "Ultra-Wide" Canvas
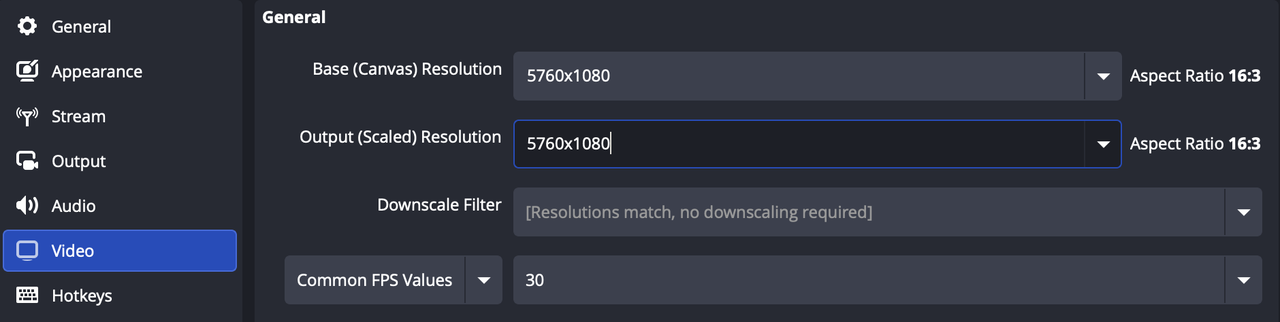
- Change Canvas Size: Go to "Settings" > "Video" tab in the bottom-right corner of the OBS client.
- Set "Base (Canvas) Resolution" to 5760x1080 (i.e., three 1920x1080 frames side-by-side).
- Set "Output (Scaled) Resolution" to 5760x1080.
- Arrange Cameras: In the scene, arrange the three camera sources side-by-side from left to right.
- Post-production Editing: Import the resulting ultra-wide video file into editing software (e.g., Adobe Premiere Pro, DaVinci Resolve). Duplicate the video track and use the cropping tool to isolate each individual camera angle.
- Audio Separation Settings
For podcasts, independent audio tracks are just as important as the video. Please complete the following settings in OBS:
- Go to the top menu bar "Edit" > "Advanced Audio Properties."
- In the "Tracks" area, assign an exclusive track to each microphone (e.g., for Microphone A, check only Track 1; for Microphone B, check only Track 2).

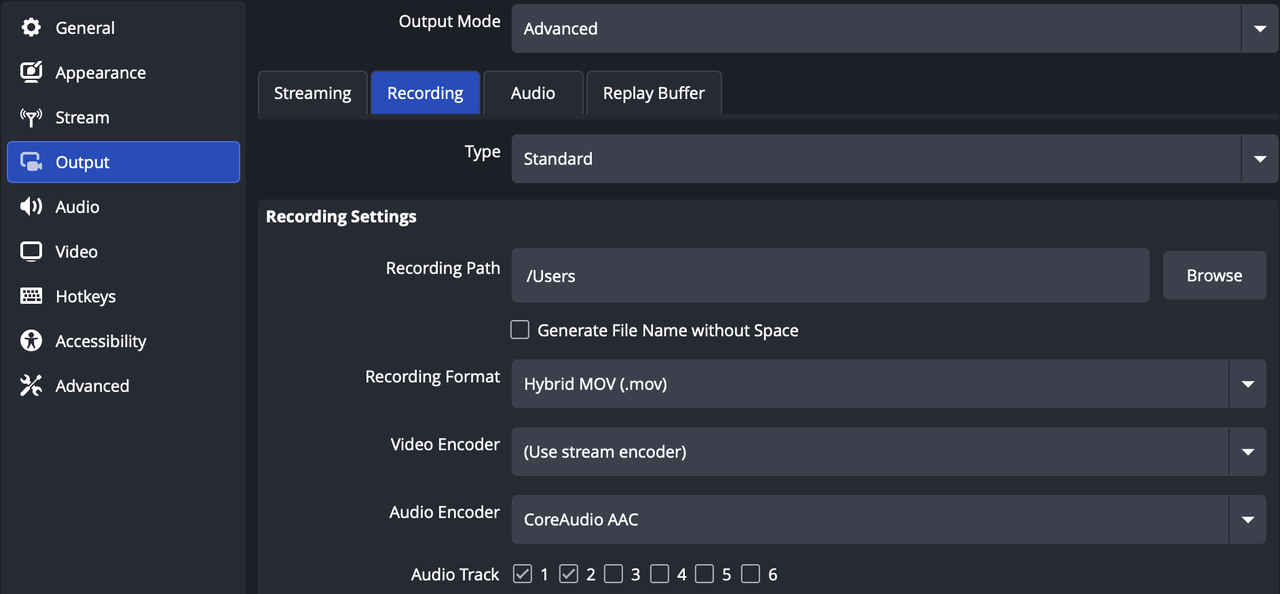
- Go to "Settings" > "Output", set "Output Mode" to "Advanced", and under the "Recording" tab, check the independent audio tracks you want to record (e.g., Track 1, Track 2). After recording, you will obtain audio files with separate tracks for editing.

.svg)

