Using Elgato Stream Deck to Control Link 2 Series Cameras
By integrating with Stream Deck, you can map frequently used functions of Link 2 series cameras to Stream Deck keys, enabling quick settings and control without needing to use the client interface.
Software Installation and Setup
- Ensure both the camera and Stream Deck are connected to your computer.
- Download and open the Elgato Stream Deck software. Search for and install the "Insta360 Webcam" plugin in the plugin store. If the search fails, you can also download the plugin and install it manually.
- Once installation is complete, the "Insta360 Webcam" option will appear in the software sidebar, featuring the following three categories of control functions:
- Webcam Configuration
- Adjust Webcam
- Reset Webcam
Operation Guide
1. Webcam Configuration
This function is used to set camera parameters to a predefined fixed value with a single click or to act as a toggle for specific features.
- Parameter Preset Example: Drag and drop "Webcam Configurationa" onto a key, enter a button title, select the camera, and choose the "Color Temperature" function with a value set to "10000." Once pressed, the color temperature will immediately adjust to 10000K, regardless of the current setting. This applies similarly to other adjustable parameters like brightness and saturation.
- Feature Toggle Example: Set the key function to "AI Tracking On/Off." Pressing this key will enable or disable the AI tracking feature. Pressing it again will toggle the state.
2. Adjust Webcam
This function is used to adjust the camera incrementally by a set amount.
- Operation Example: Drag and drop two "Adjust Webcam" functions onto two separate keys.
- Key 1: Select "Zoom" for the function and set the increment to "+0.1" (Zoom In).
- Key 2: Select "Zoom" for the function and set the increment to "-0.1" (Zoom Out).
- By repeatedly pressing these two keys, you can gradually zoom the field of view in or out.
3. Reset Webcam
This function is used to restore one or all of the camera's settings to their initial state.
- Single Reset Example: Set the key function to "Brightness." If you are unsatisfied with the brightness adjustment, press this key to restore the brightness value to its standard initial value.
- Reset All: Set the key function to "All Parameters." Pressing the key will restore all image and function settings of the camera to factory default states.
Tips: If using macOS, you need to open System Preferences and grant permissions to Stream Deck to trigger the keys.
Customizing Control Panel Layout
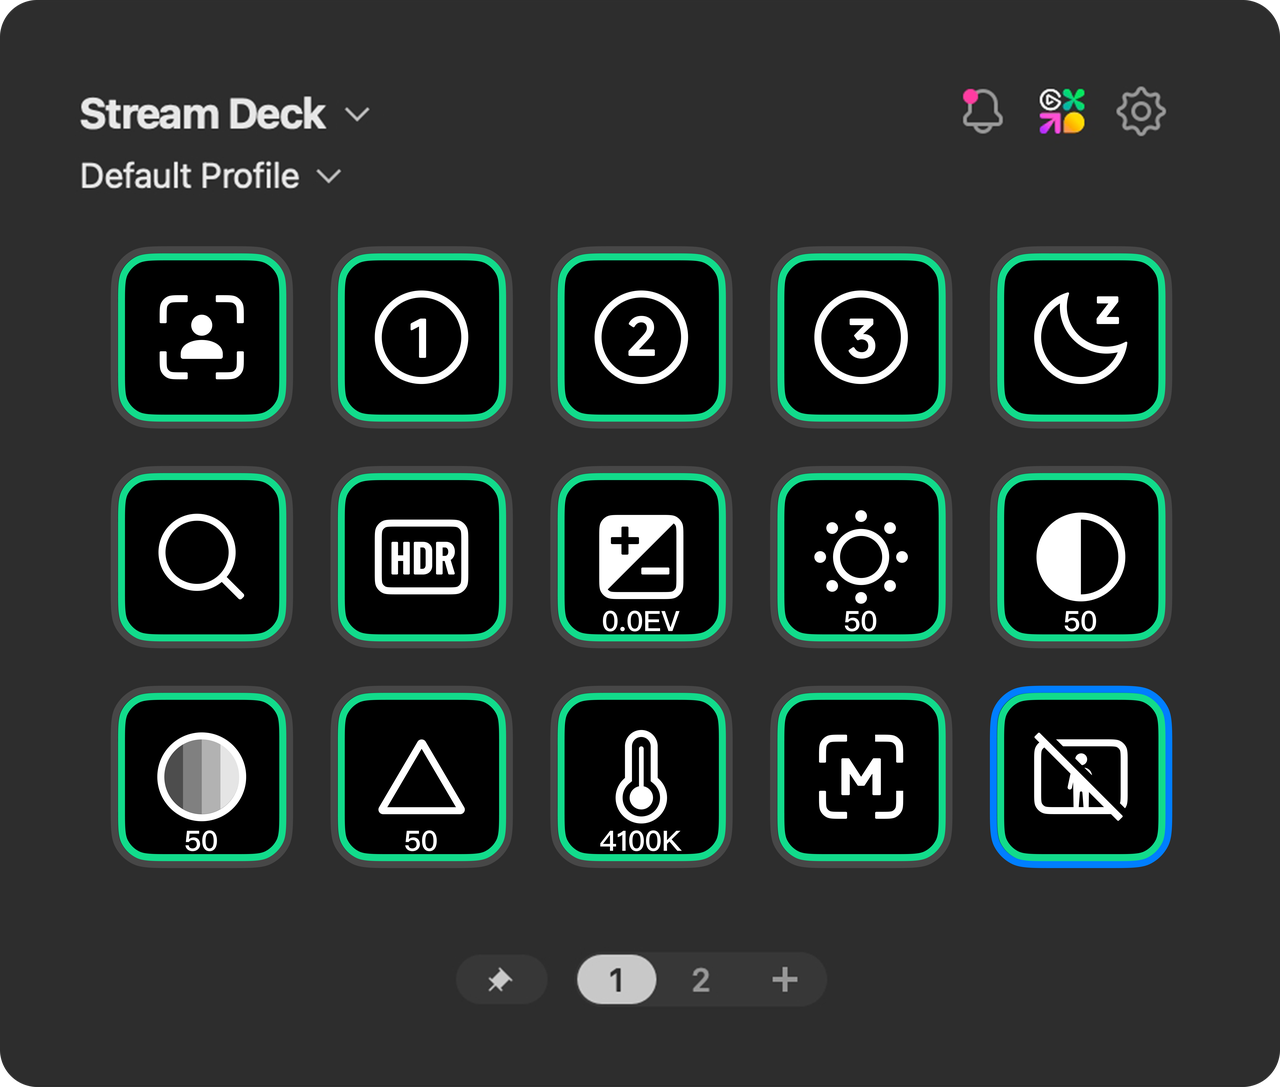
Users can customize the panel layout. You can partially modify preset buttons or click the page numbers below to set up a new page. Here is a suggested layout for the Stream Deck control panel, which you can customize based on your personal habits:
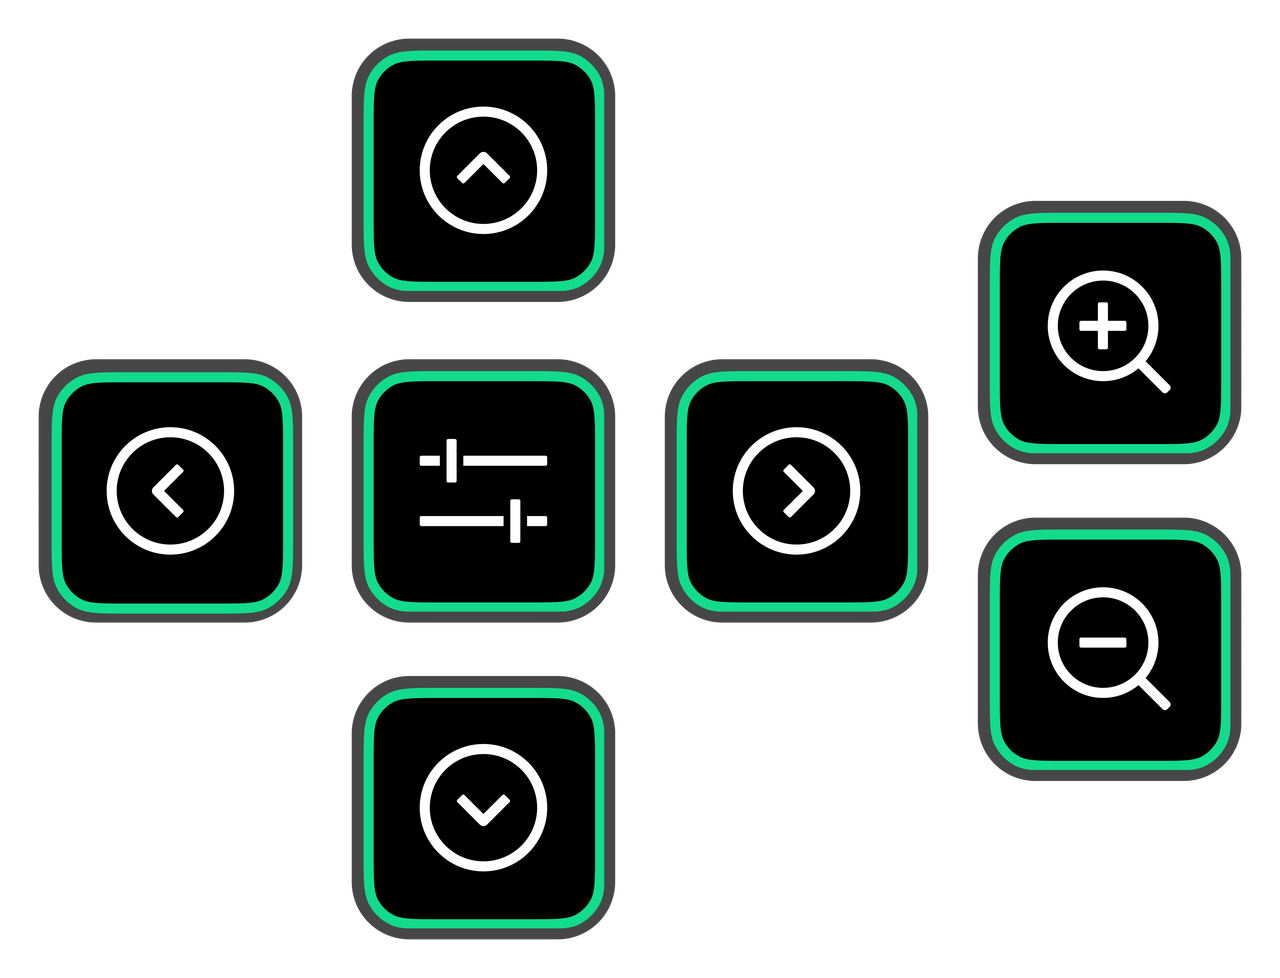
- Central Area (Directional Control): Place five "Adjust Webcam" keys with functions set to: Gimbal Up, Down, Left, Right, and "Gimbal Reset."
- Left and Right Sides (Zoom Control): Place two "Adjust Webcam" keys with the "Zoom" function, setting the increments to "+0.1" and "-0.1."
- Other Keys: You can place "Webcam Configuration" keys to quickly toggle frequently used functions, such as:
- AI Tracking On/Off
- DeskView Mode On/Off
- Adjusting exposure (brightness) to a specific value
- Preset Keys: Place "Webcam Configuration" keys, select the "Preset" function, and specify sub-options (e.g., Preset 1, Preset 2).
- Saving a Preset: First, adjust all parameters in the client (e.g., Beautify, Filters, Image settings, etc.). On the Stream Deck, click the corresponding preset key to save all current settings.
- Calling a Preset: When needed, press the key to switch to the saved settings with one click.
- Updating a Preset: After modifying parameters in the client, return to the Stream Deck and long-press the corresponding preset key for 3 seconds to refresh and save the new settings.
- Examples:
- Preset 1: General Live Stream settings (Enable Beautify, Makeup, Auto Tracking).
- Preset 2: Green Screen Live Stream settings (One-click keying and virtual background replacement).
- Navigation Keys: You can place the default Stream Deck "Previous Page" and "Next Page" navigation keys in the corners of the panel to switch between different control pages.
Notes
When calling functions involving Beautify, Makeup, Virtual Backgrounds, Filters, and certain image parameters via Stream Deck, ensure the client is running in the background for the settings to take effect.
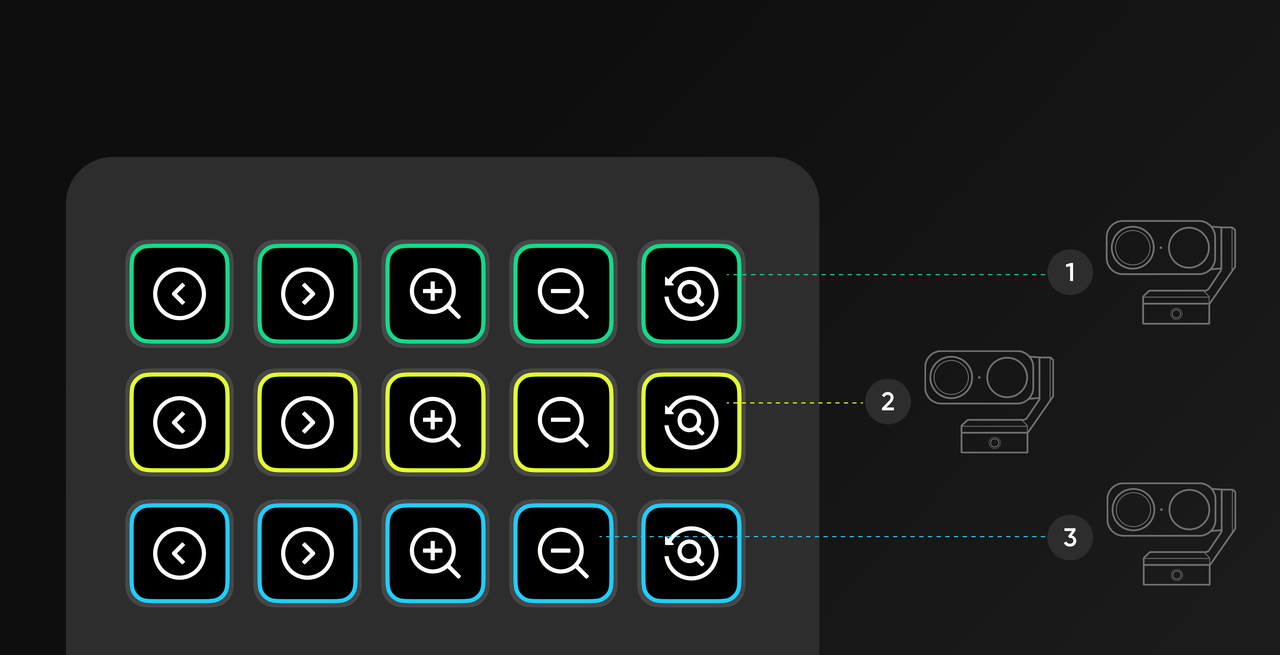
Multi-Camera Real-Time Control
You can use Stream Deck as a real-time control console to adjust camera angles and various settings without ever opening the settings menu.
Tip 1: Preset Workflow
Set up one-tap switches for multiple cameras, saving time and allowing for easier use.
Preset Button Operation Logic:
- First Click (when the button has no preset): Save the current state of all storable camera settings as a new preset.
- Subsequent Clicks (when the button already has a preset): Quickly switch to the saved state of the preset with a single click.
- Long press for 3 seconds (when the button already has a preset): Overwrite the existing preset with the camera’s current new state.
Tips:
- Feature Permissions: The scope of preset content stored and called via Stream Deck depends on the current operating environment.
- Hardware only (without running the Link Controller client): You can only preset and call parameters directly related to the camera hardware, such as gimbal position, digital zoom, and AI modes (including AI Tracking/Auto Framing, Whiteboard Mode, and Deskview Mode).
- Full functionality (with the Link Controller client running in the background): You can preset and call all software parameters, including the hardware parameters and AI modes mentioned above, as well as effect settings (such as virtual background, filters, makeup, beautify), and image settings.
- Operation Interval: When switching between different presets using Stream Deck, it is recommended to allow at least 3 seconds between operations. Clicking too quickly in succession may cause some commands to fail due to device response delay.
Operation Workflow:
- Set up the shot: In the Insta360 software or on the Stream Deck, point Camera A at the face. Adjust the exposure to ensure the face is well-lit.
- Save to Stream Deck:
- Drag the "Webcam Configuration" action from the Insta360 list onto a key.
- In the Stream Deck software, select "Preset."
- Choose Camera A.
- Name the key: "Camera A: Close-up."
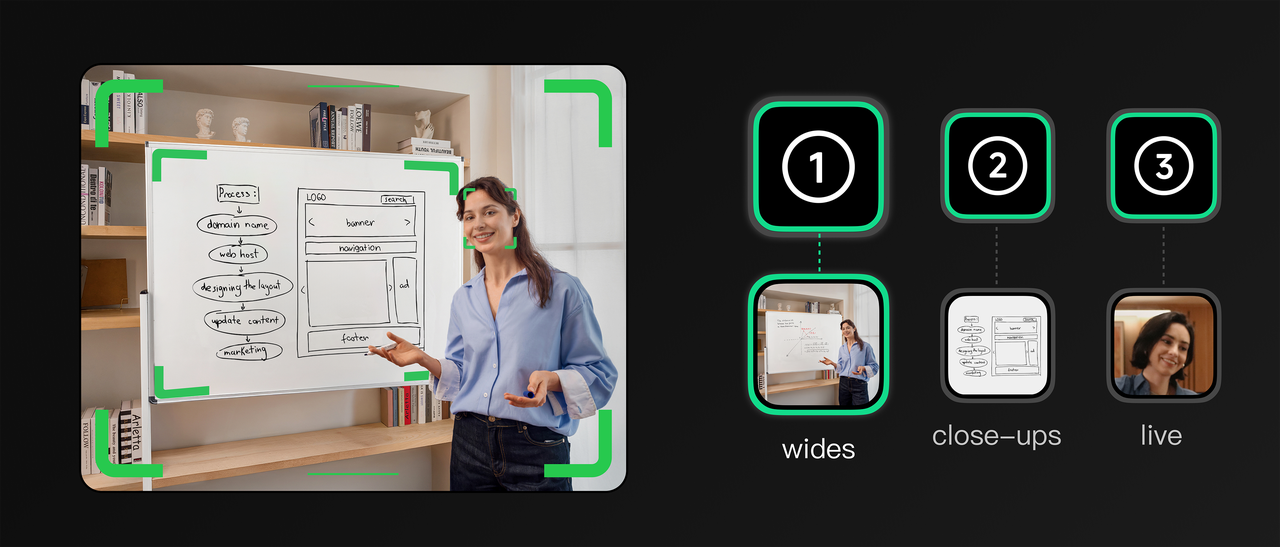
- Create a wide-angle shot: Now, create a new preset, adjust the camera to a wider angle. Long-press the preset key for 3 seconds to save it, and name it "Camera B: Wide."
- Repeat: You can point Camera C at the presentation whiteboard and repeat the steps above to save the preset.
- Result: You can now instantly switch between wide shots and close-ups for any guest with a single button press, without affecting the quality of the independent recording.
Tip 2: Real-Time Manual Adjustments During Recording
You can adjust guest framing and image settings during recording without opening the client software.
Gimbal Adjustment: Drag the "Adjust Webcam" action to the Deck and select gimbal movement. This creates a "joystick" on your Stream Deck (Up/Down/Left/Right/Zoom). If a guest moves out of frame, you can physically move the camera gimbal to follow them.
Image Settings: Drag the "Webcam Configuration" action to a key
- Configure it to control Exposure or White Balance.
- If a camera shot looks too dark during recording, tap this key to immediately brighten the raw hardware footage.


.svg)

