App Use
When Flow is used with the Insta360 app, more functions can be used, such as Deep Track, Panorama, Timelapse, etc.
Connect to the Insta360 app
- Turn on Flow.
- Turn on the phone's Bluetooth and Wi-Fi, and choose to connect to the device with the prefix Flow.
Note: After Bluetooth reset of Flow, "-X" will be added to the device name suffix, such as "Flow XXXXX -9".
- If you connect to the Insta360 app for the first time, you need to authorize relevant information. This process requires an Internet connection. After authorization, the device can be activated, and then enter the app shooting interface.
App Interface
Enter the shooting interface of the app and the following icon functions can be seen. Some of the icon functions are only available in some shooting modes.
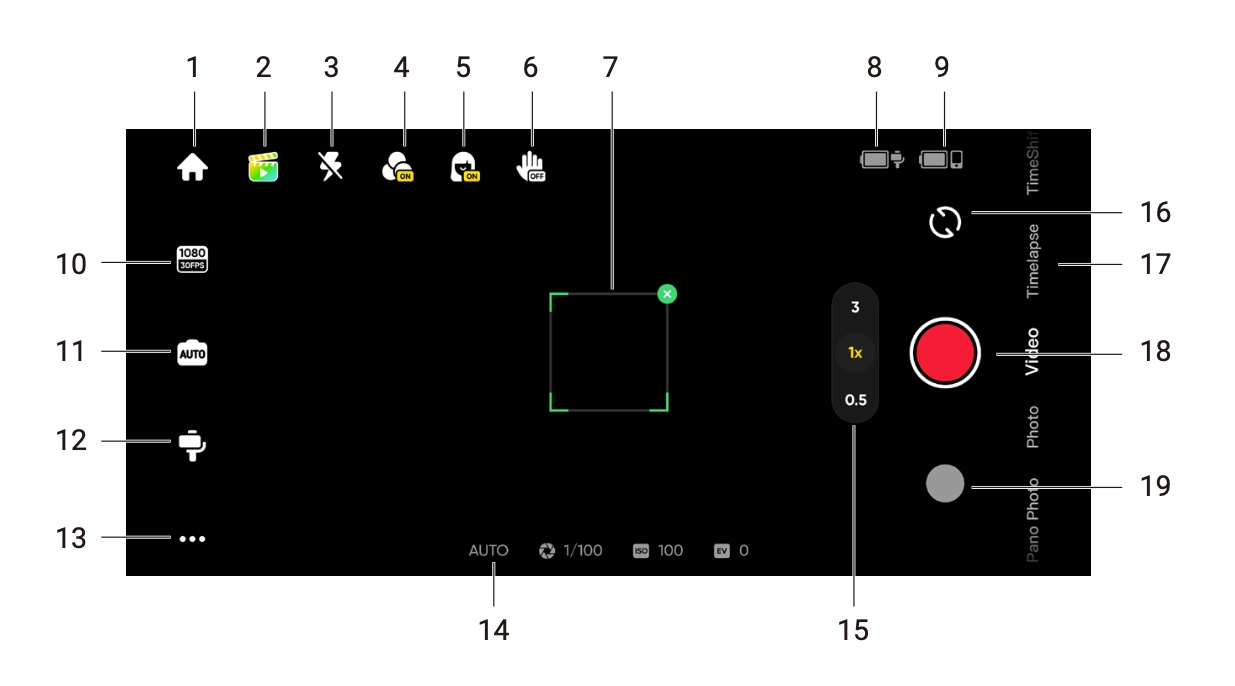
 Home: Return to the home page.
 Shot Genie: Provides shooting tutorials and ideas according to the situation or environment. There are three ways to access Shot Genie's tips:
• Tap "Shot Genie Library" to browse all options.
• Scene Recognition. Once enabled, the current scene will be analyzed and matched to a shooting scenario. Enable or disable in General Settings.
• Voice Control. Enabled by default and the icon is  . Once enabled, it will recognize your voice and provide suitable shooting suggestions based on the keywords you provide. Enable or disable in General Settings.
 Flash: Adjust the flash.
 Filter: Select a photo or video filter.
 Face Filter: Turn the Face Filter function on or off.
 Gesture Control: Display Gesture Control settings and select from photo
 , video
 , photo with tracking
 , or video with tracking
 . When Gesture Control is enabled, face the camera with your full face visible and raise your palm (make sure your palm does not cover your face). Briefly hold this position to trigger the function. Raise your palm again to stop shooting if you chose a video with tracking.
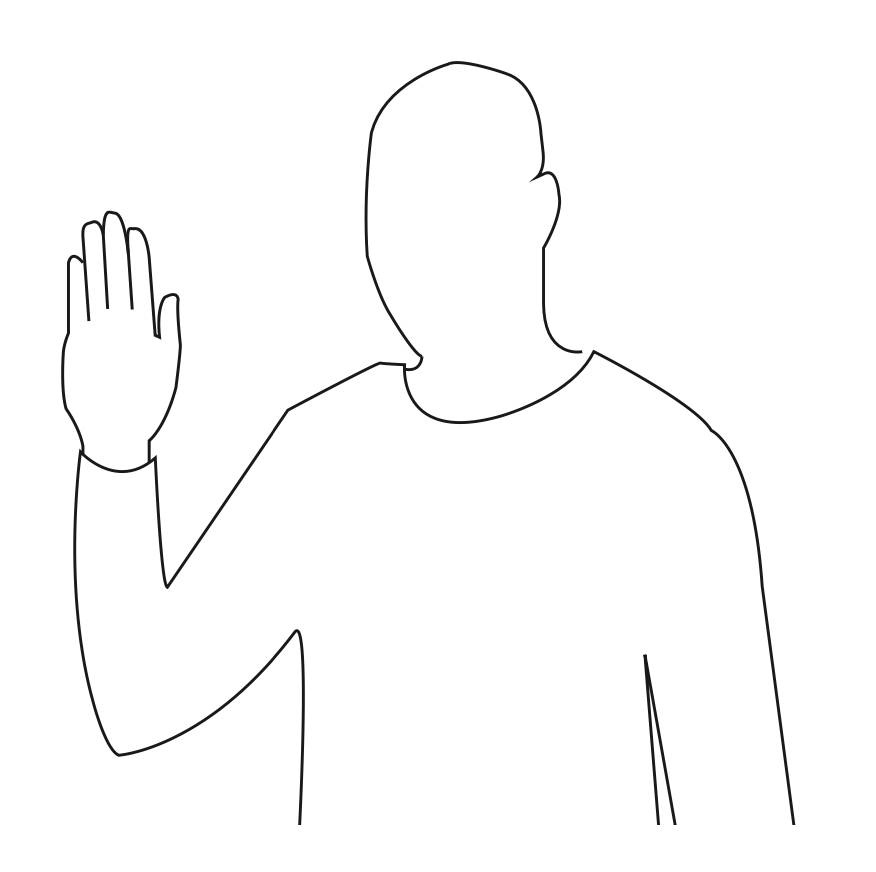 Note: Gesture Control can be used up to 2 meters away from Flow. The feature increases the phone's power usage and may cause it to heat up.
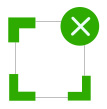 Tracking Box: Flow can automatically track selected targets so they stay in frame within the tracking box. The default position is the center of the screen, but it can be adjusted manually.
 Flow Battery Level: Shows Flow's current battery level.
 Phone Battery Level: Shows the phone's current battery level.
 Resolution and Frame Rate: Set resolution and video frame rate.
 Phone Camera Settings: Adjust settings such as shutter speed, ISO, EV, and WB.
 Flow Settings: Tap to display the gimbal mode and related settings.
- Flow Mode: Select from Auto, F, PF, and FPV.
- Mode Change Method: Choose between two options for how to switch Flow modes and shooting modes.
- Follow Speed: Controls how fast the gimbal reacts to movement. Set to fast, medium or slow.
- Joystick Speed: Set to fast, medium or slow.
- Zoom Speed: Set to fast, medium or slow.
- Front Cam Auto Tracking: When toggled on, Flow will track subjects using the front camera instead of the rear camera.
- Always-On Tracking: When toggled on, Flow keeps tracking the subject (people only) until they reappear in the shot.
- Reverse Joystick Horizontally: Toggle on to reverse the direction of the pan axis movement when using the joystick.
- Reverse Joystick Vertically: Toggle on to reverse the direction of the tilt axis movement when using the joystick.
- Flow Sound and Vibration: Turn Flow's sound and vibration on or off (the Bluetooth reset tone cannot be turned off).
- Auto Calibration: If the phone alignment seems off and you've attached your phone correctly as described previously, try auto calibration to correct the position. Follow the on- screen prompts to complete the process. Do not touch Flow during calibration.
- Adjust Horizontal Axis: Another option to fix incorrect alignment. Unfold the tripod and place Flow on a flat surface. Attach your phone, then start the adjustment process. The axis can be tuned in units of 0.1° and the maximum adjustable angle is 10°.
 General Settings: Adjust settings such as the Grid, Histogram, Scene Recognition and Voice Control; show tutorials and the Flow Button Operation Guide; access product information, and more.
- AUTO


 Shooting parameters: Shows the current settings for exposure mode, WB, shutter speed, ISO and EV.
 Zoom: Displays the current zoom. Long press the icon to show the zoom dial. Zoom can also be adjusted by placing two fingers on the screen and moving them apart or together.
 Switch Front and Rear Cameras: Switch between the front and rear cameras. After switching to the front camera, Flow automatically tracks the subject visible from that camera. This option can be disabled in the Flow Settings.
- Shooting Modes: Scroll to select a shooting mode.
- Pano Photo: tap to take a 3x3, 180°, 240°, or 360° panorama photo. Flow automatically takes multiple photos and assembles them into one pano photo.
- Photo: Supports regular shooting and with a countdown. Long press the shutter button to start shooting in Burst mode.
- Video: Shoot a normal video.
- Slow Motion: Shoot a slow motion video at 120fps or 240fps.
- Widescreen Mode: The phone automatically adjusts to a horizontal position and starts recording in a 2.35:1 widescreen ratio. Filters are turned on by default.
- Timelapse: Shoot a stationary or motion timelapse. Choose from Fixed Angle, Left to Right, Right to Left, and Custom Track modes. Tap the icon
 to set interval duration and length.
- TimeShift: Record a hyperlapse (sped up) video while on the move.
- Live Mode: Use Flow's tracking capabilities in third-party apps with video streams, such as instant messaging apps, camera apps, video conferencing apps, and live streaming apps. Follow the on-screen instructions for correct use. During this mode, only people can be tracked.
- Hoop Mode: Set Flow down to record a half-court basketball game and the AI recognizes your best baskets and saves the highlight as an individual clip for easy editing.
 Shutter Button: Take a photo or to start/stop shooting a video.
 Album: View your previous photos and videos in the album.
* Notes:
- There may be newly added modes or features. Please refer to the interface in the latest version of the Insta360 app.
- Settings and supported functions in the Insta360 app's shooting interface vary depending on the phone model. For details, please refer to the phone compatibility list.
Please click here to contact us for further support.

.svg)

