1.1.8 Import from multiple storage cards
In order to simplify the importing process, we’ve provided reading storage devices function in the camera. When the camera starts to read storage devices, user only needs to connect Titan to a computer to transfer files from the storage cards to the computer by using the one-key import tool in Insta360 Stitcher. There is no need to pull out any storage card.
Import Titan files to computer in Windows system:
Import method 1: Use the USB hub and the SD card reader
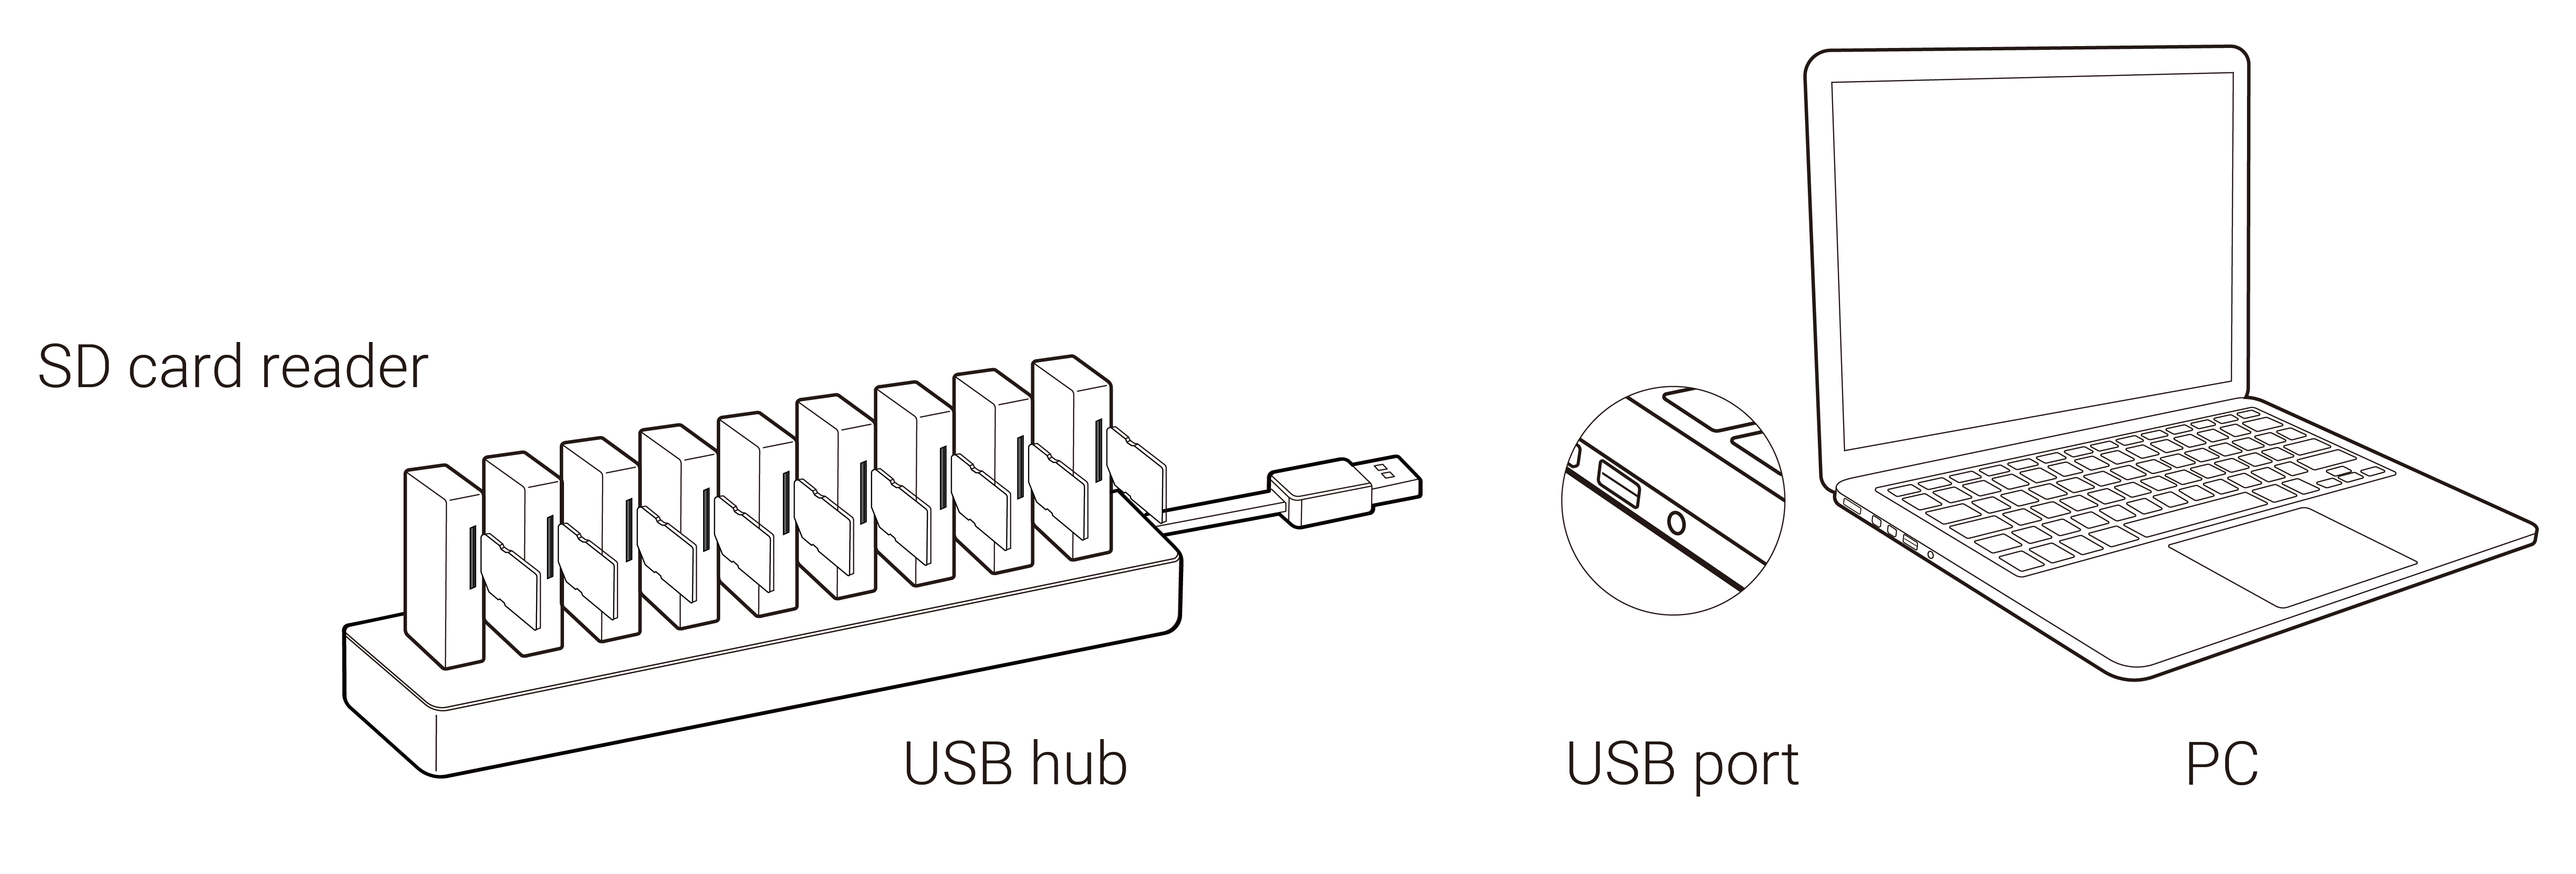
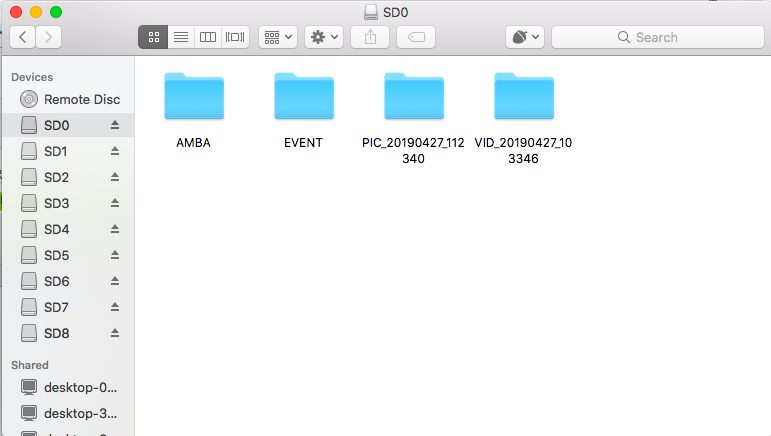
- Please use our official SD card reader and USB hub. Insert the nine SD cards into the hub, then connect the hub to your computer. Wait for your computer to recognize and mount all SD cards.
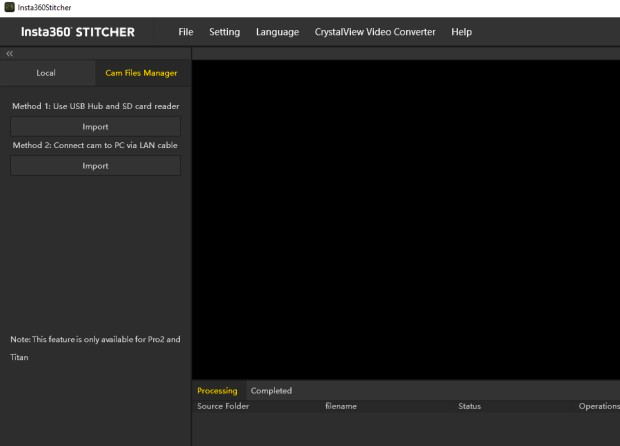
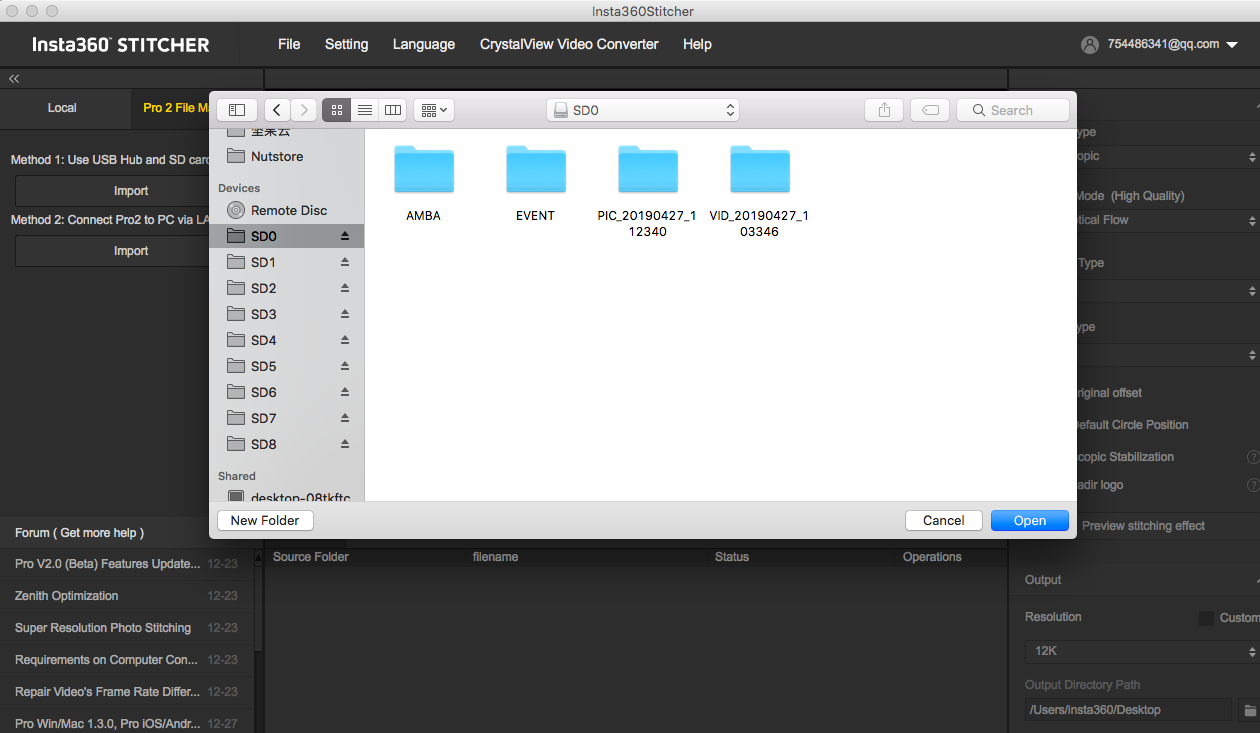
- Open Insta360 Stitcher,go to “Cam Files Manager" page. Click the "Import" button below method 1. Choose the root directory from any one of the inserted SD cards.
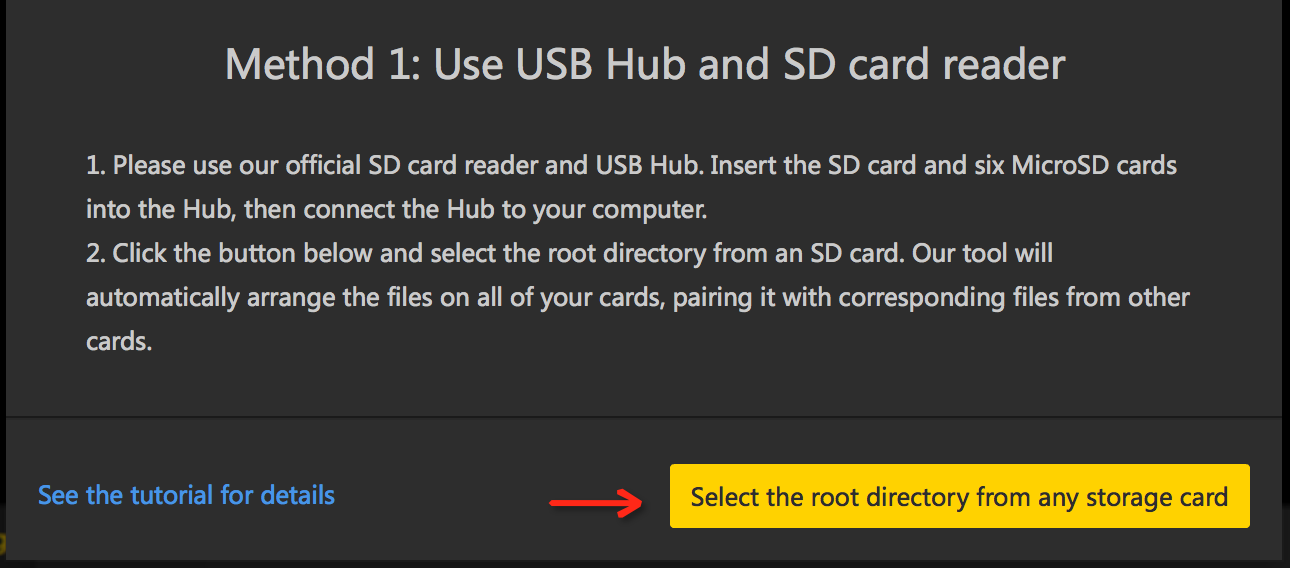
- It takes a while to load all the contents in SD cards. Please wait for the loading process to complete.
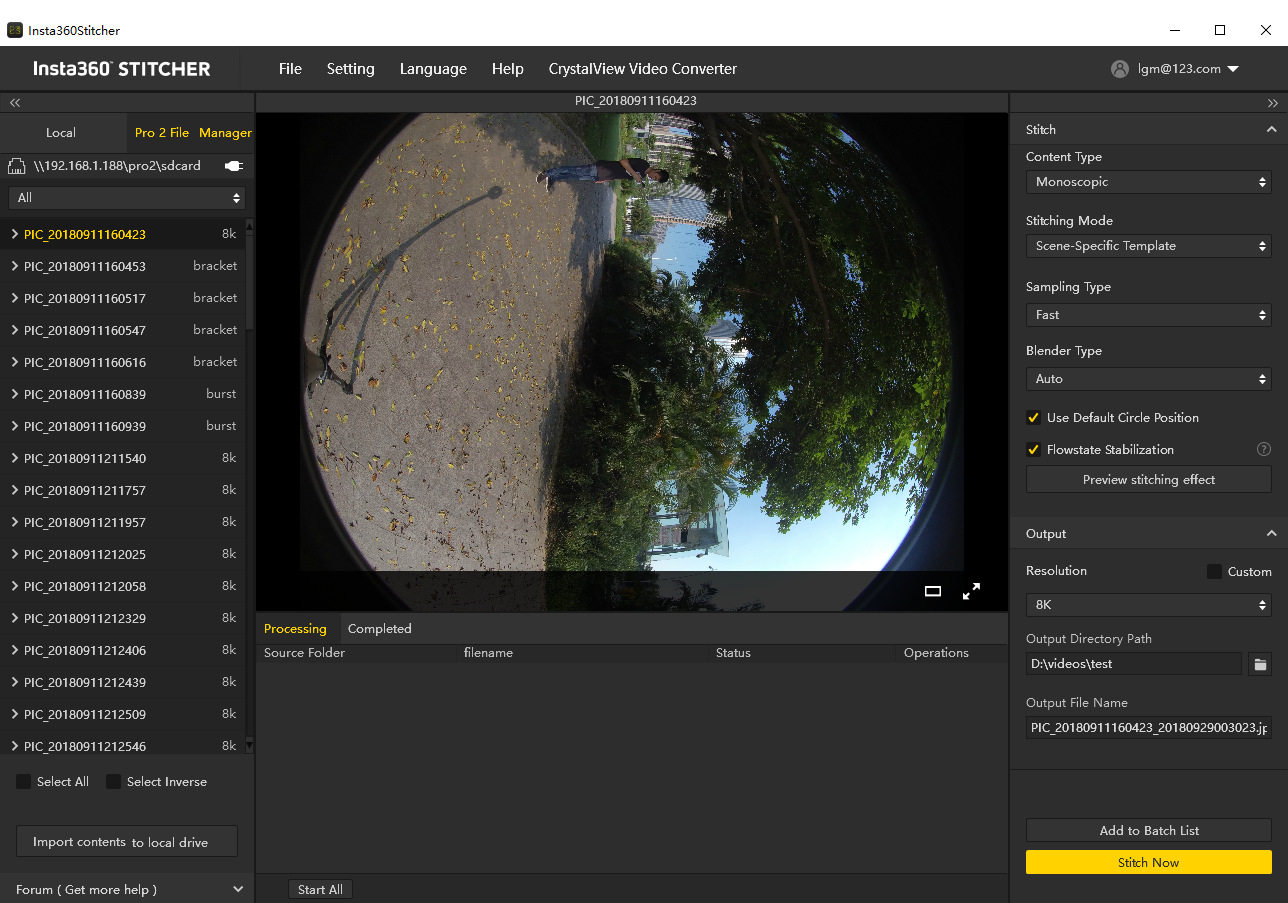
- After all the files are loaded, click the button "Import contents to local drive" at the bottom. Then all the selected contents will be imported to the local drive.
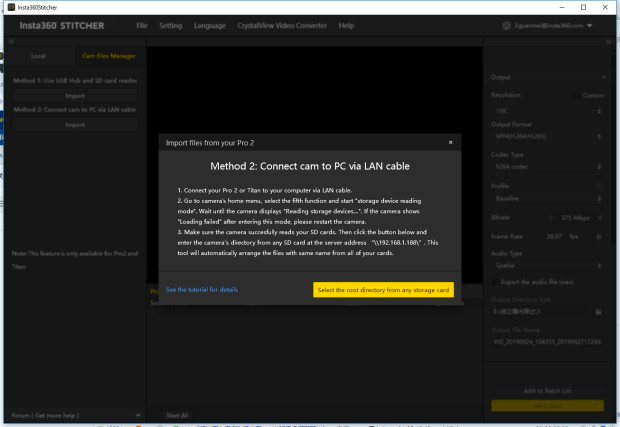
Import method 2: Connect your Titan to your computer via LAN cable
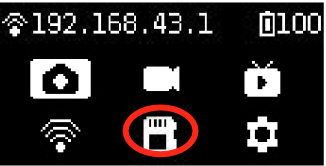
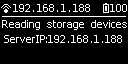
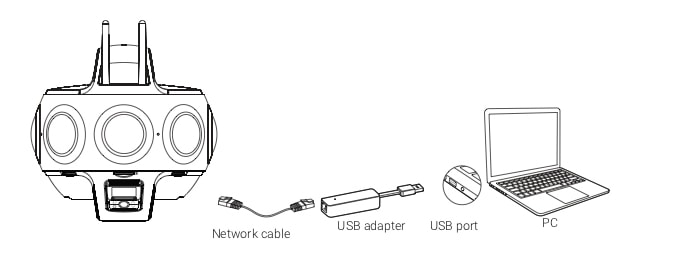
- Go to the Titan's home menu, select the fifth function and start storage device reading mode. Wait until the camera displays "Reading storage devices…".
If the camera shows "Loading failed" after entering this mode, please restart the camera.
- Connect the Titan camera to your computer via LAN cable. If there is no LAN port on your computer, please use the USB ethernet network adapter included in the camera package. As shown in the picture below:
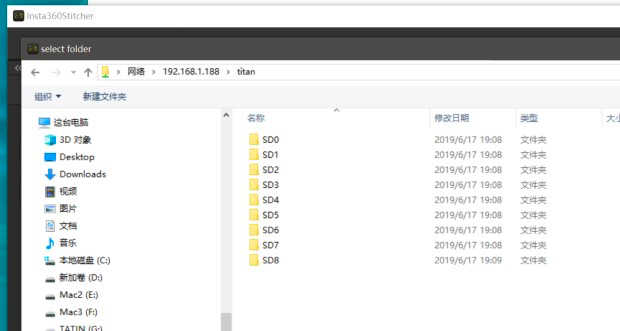
- Enter \\192.168.1.188\titan\ in the address bar of the file manager, and visit the directory to read the contents of all the current storage devices of the camera. You can copy the contents to the same directory and merge the folders with the same name.
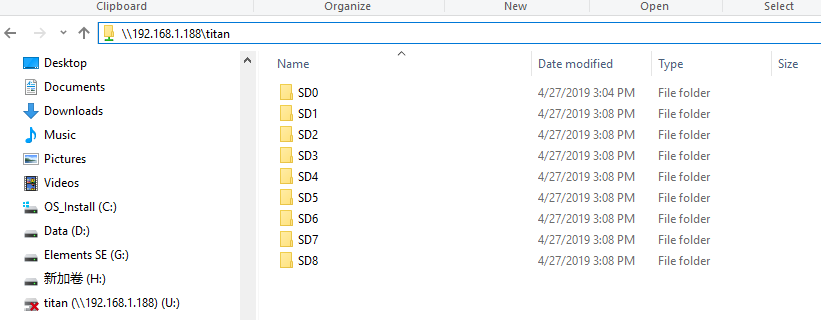
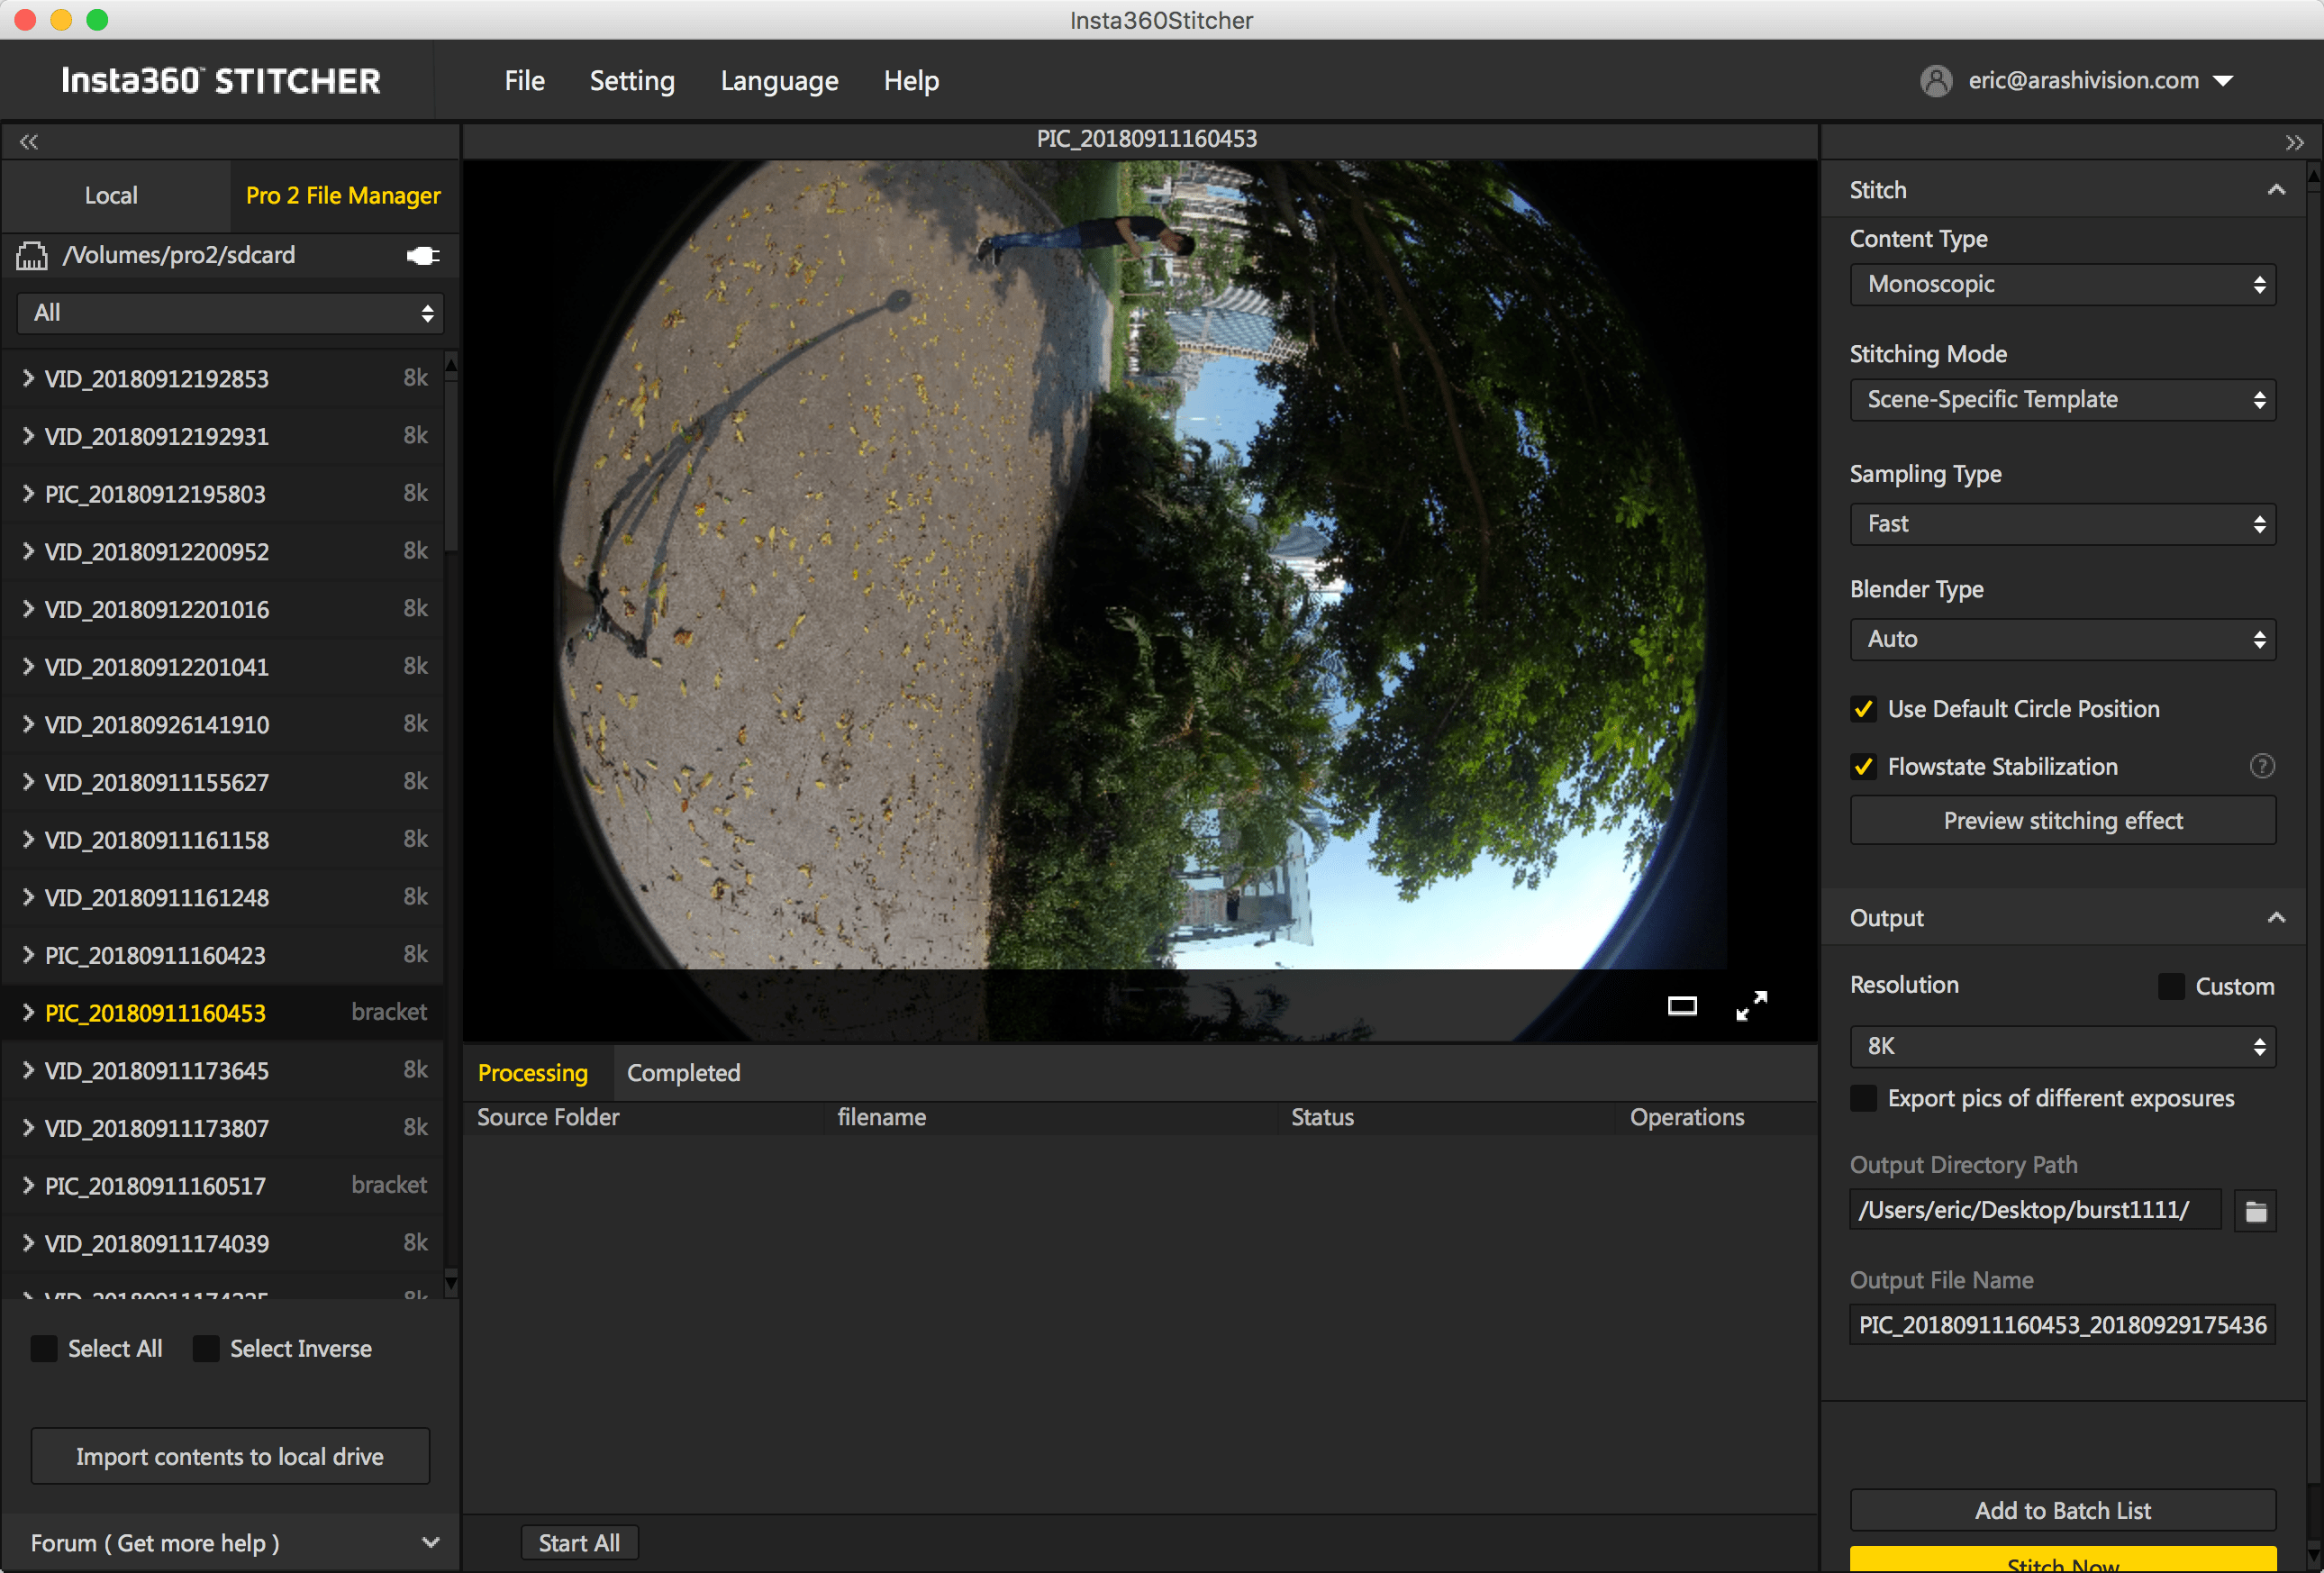
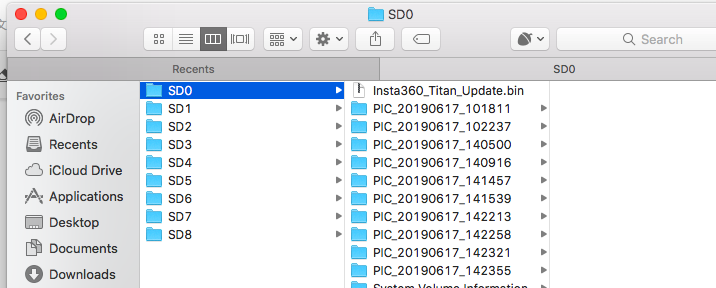
- If you see nine SD cards, you have successfully accessed all of your camera's storage devices. You can choose to merge files in individual folders manually and copy them locally on your computer, or you can import them by using Insta360 Stitcher's one-click import tool.
- Open Stitcher,go to “Cam Files Manager" page. Click the "Import" button below Method 2. Enter “\\192.168.1.188\titan\” in the address bar of select folder. Access this directory and choose a root directory from any one of your SD cards.
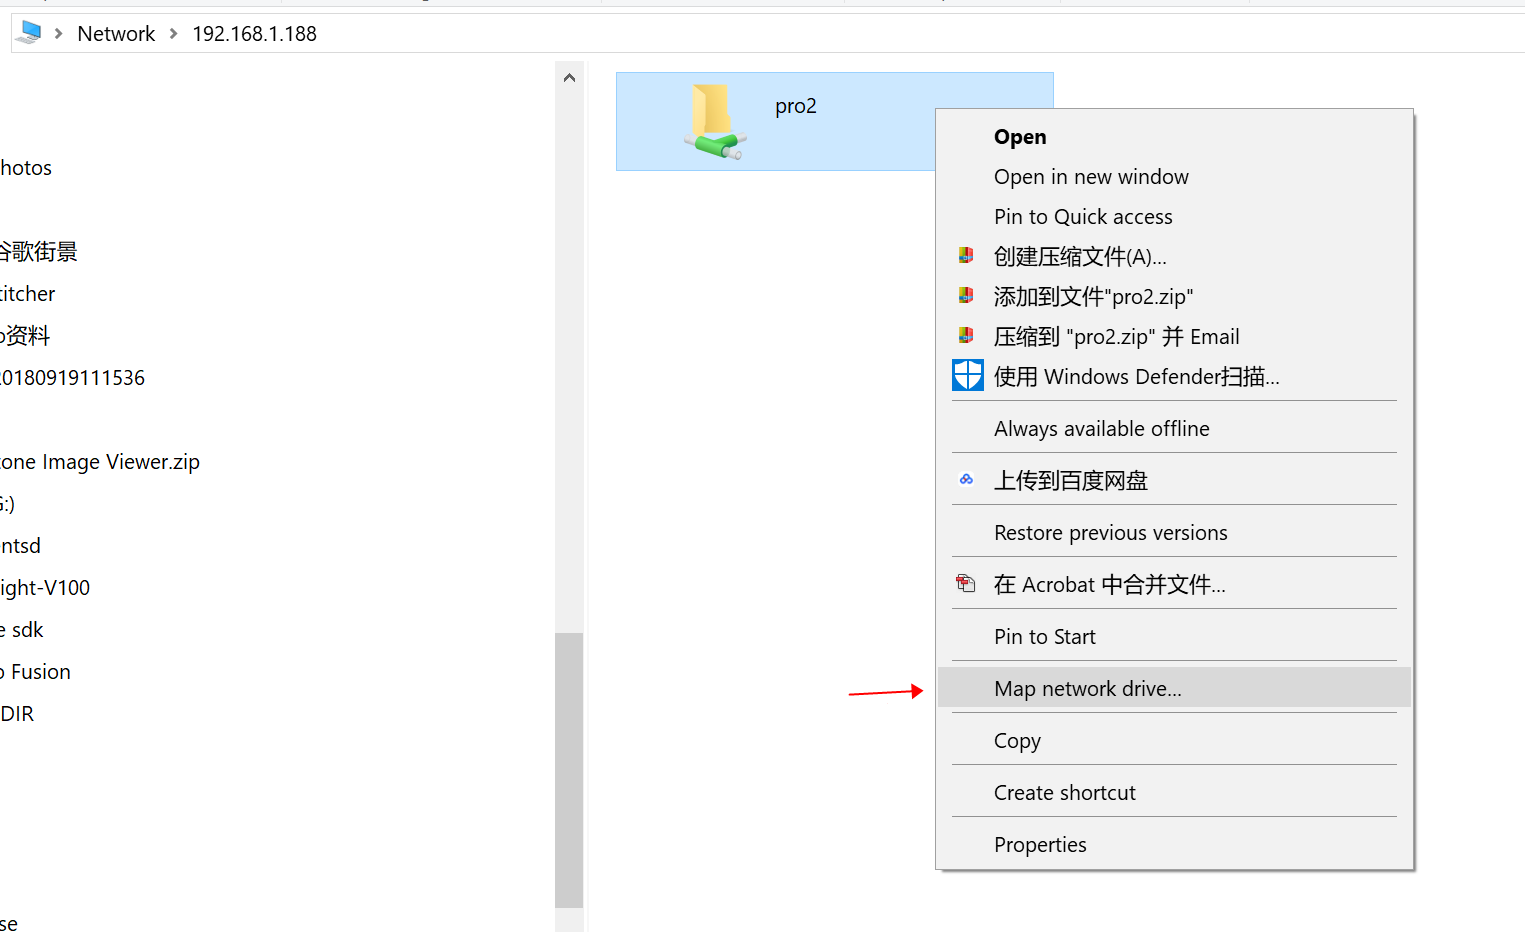
You can also map a network drive for Titan directory under server address: \\192.168.1.188\ . In this way, you don't have to type its network address each time.
- It takes a while to load all the contents in SD cards. Please wait for the loading process to complete.
- After all the files are loaded, click the button "Import contents to local drive" at the bottom. Then all the selected contents will be imported to the local drive.
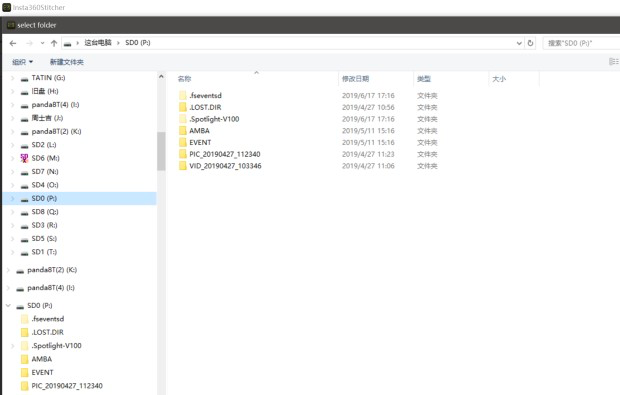
Import method 3:
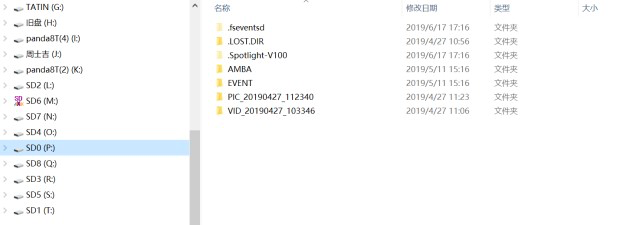
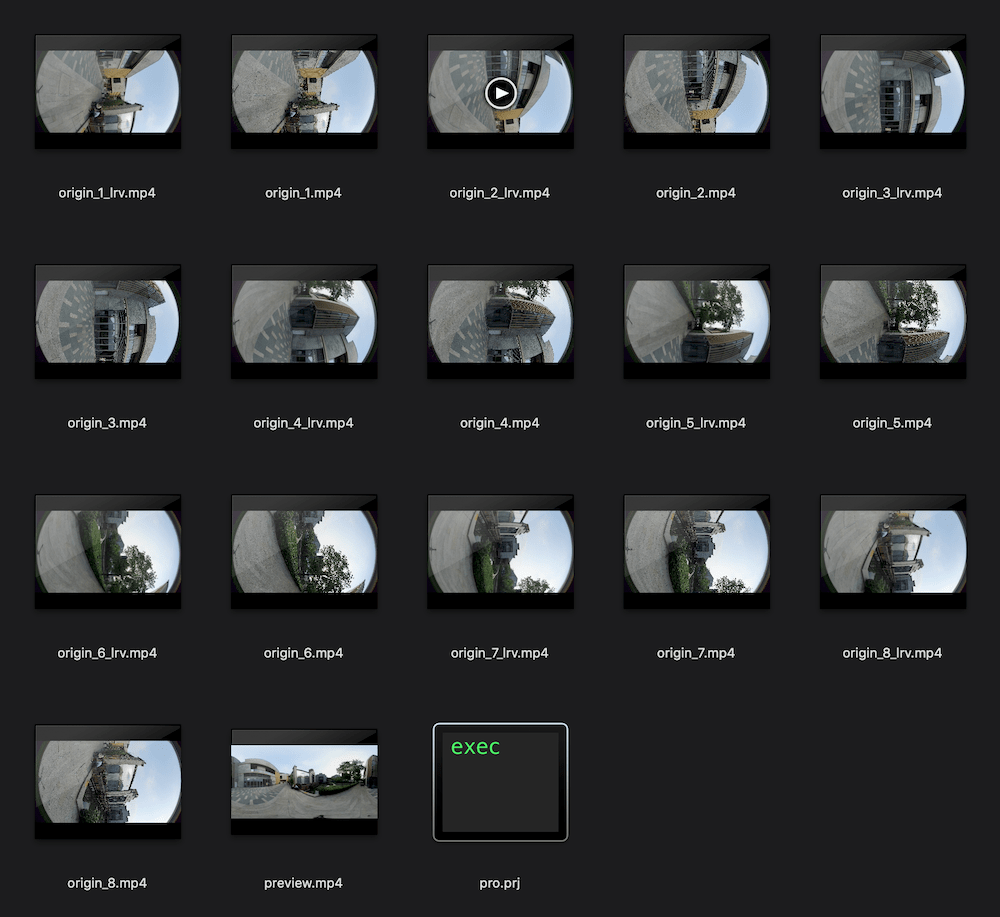
Merge the files with the same name from the 9 SD cards into one folder (do not replace them) as shown in below screenshot. A merged video folder contains the following files: 8 lrv.mp4 files, 8 .mp4 file, 1 preview.mp4 file and 1 pro.prj file.
In the case of long recording, the video may be segmented, and the 8 lrv.mp4 files and 8 .mp4 files will be incremented by an integer multiple after segmentation.
Import Titan files to computer in MacOS:
Import method 1: Use the USB hub and the SD card reader
- Please use our official SD card reader and USB hub. Insert the nine SD cards into the hub, then connect the hub to your computer. Wait for your computer to recognize and mount all SD cards.
- Open Insta360 Stitcher,go to “Cam Files Manager" page. Click the "Import" button below method 1. Choose the root directory from any one of the inserted SD cards.
- It takes a while to load all the contents in SD cards. Please wait for the loading process to complete.
- After all the files are loaded, click the button "Import contents to local drive" at the bottom. Then all the selected contents will be imported to the local drive.
Import method 2: Connect your Titan to your computer via LAN cable
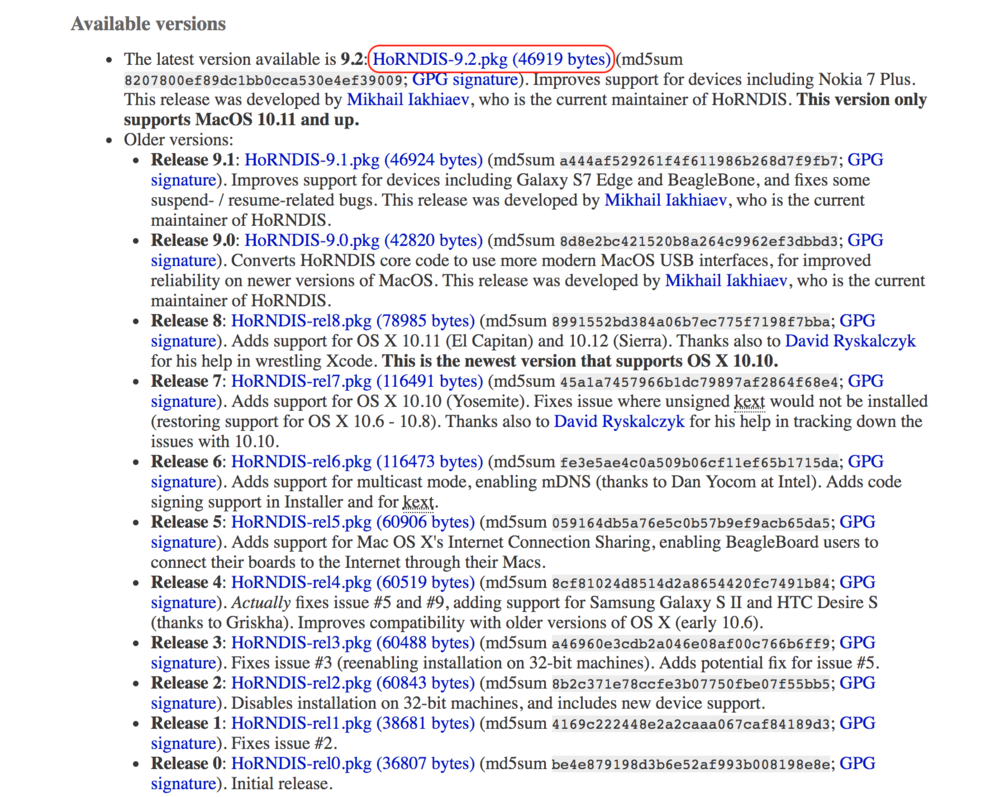
Please visit the website before using the function (https://joshuawise.com/horndis). In the Available versions section, please select to download the corresponding Horndis driver software according to the current Mac system version, and then install the software.
- Go to the Titan's home menu, select the fifth function and start storage device reading mode. Wait until the camera displays "Reading storage devices…".
If the camera shows "Loading failed" after entering this mode, please restart the camera.
- Connect the Titan camera to your computer via LAN cable. If there is no LAN port on your computer, please use the USB ethernet network adapter included in the camera package. As shown in the picture below:
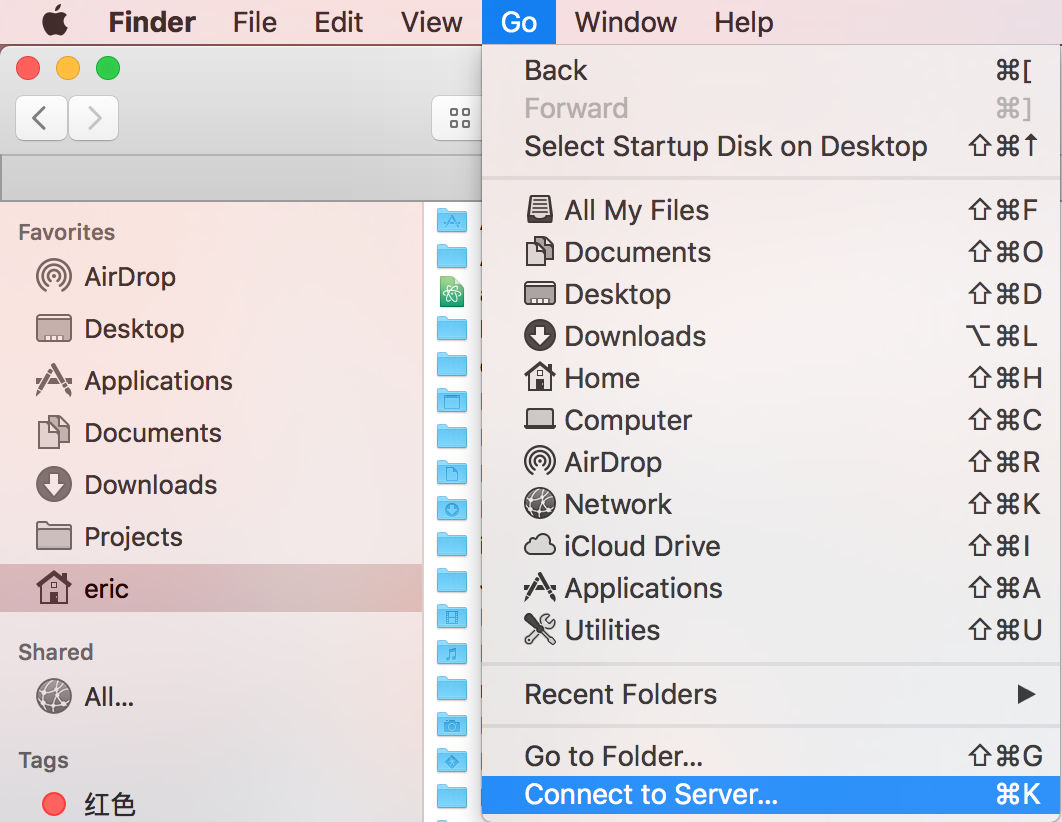
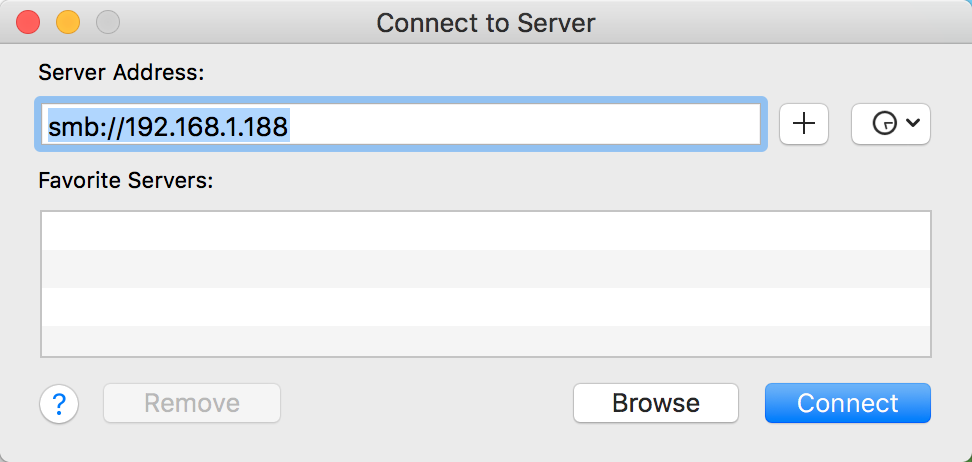
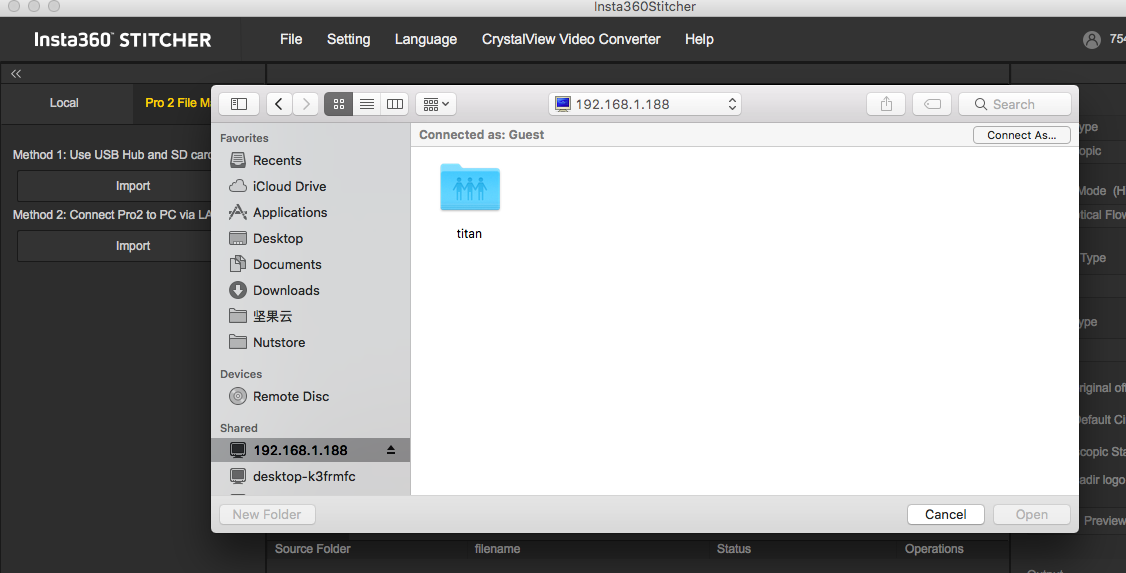
- Open the file manager Finder on Mac system and click Go -> Connect to Server.
- Enter smb://192.168.1.188, in the Server Address bar and click “Connect”.
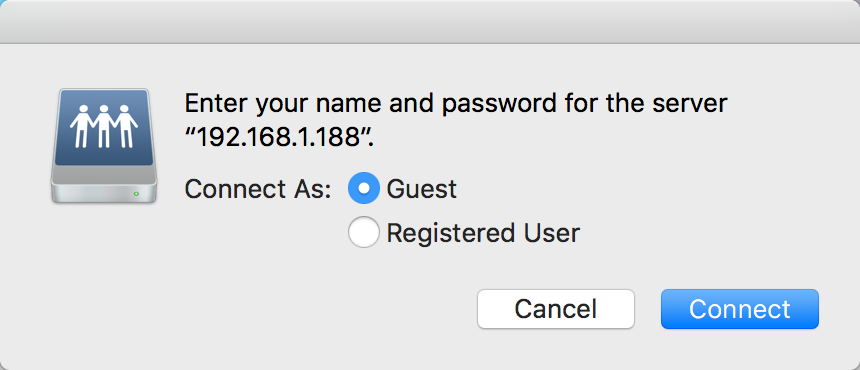
- Select “Guest” in the pop-up window and click “Connect”.
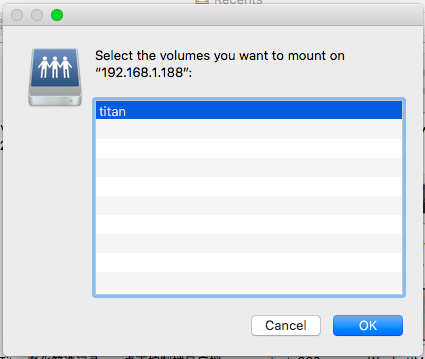
- In the next pop-up window, select "titan" and click “OK" to connect.
- If you see nine SD cards, you have successfully accessed all of your camera's storage devices. You can choose to merge files in individual folders manually and copy them locally on your computer, or you can import them by using Insta360 Stitcher's one-click import tool.
- Open Stitcher,go to “Cam Files Manager" page. Click the "Import" button below Method 2. Choose the root directory from any SD card under server address: 192.168.1.188\titan\ .
- It takes a while to load all the contents in SD cards. Please wait for the loading process to complete.
- After all the files are loaded, click the button "Import contents to local drive" at the bottom. Then all the selected contents will be imported to the local drive.
Please note that after you have put your camera in storage device reading mode, and your computer has direct access to the directories of multiple storage cards, you can drag the folder in your SD card (0) directly to Insta360 Stitcher for use. However, this approach depends on the stability and reliability of the network, so it is strongly recommended to save the content to the local computer before splicing or editing.
Alternatively, if you have purchased an official card reader and hub package, you can take out all the storage cards and insert them into the card reader and hub to connect to your computer, and then manually merge the folders with same name and copy them to your computer.
Import method 3:
Merge the files with the same name from the 9 SD cards into one folder (do not replace them) as shown in below screenshot. A merged video folder contains the following files: 8 lrv.mp4 files, 8 .mp4 file, 1 preview.mp4 file and 1 pro.prj file.
In the case of long recording, the video may be segmented, and the 8 lrv.mp4 files and 8 .mp4 files will be incremented by an integer multiple after segmentation.

.svg)

